


12
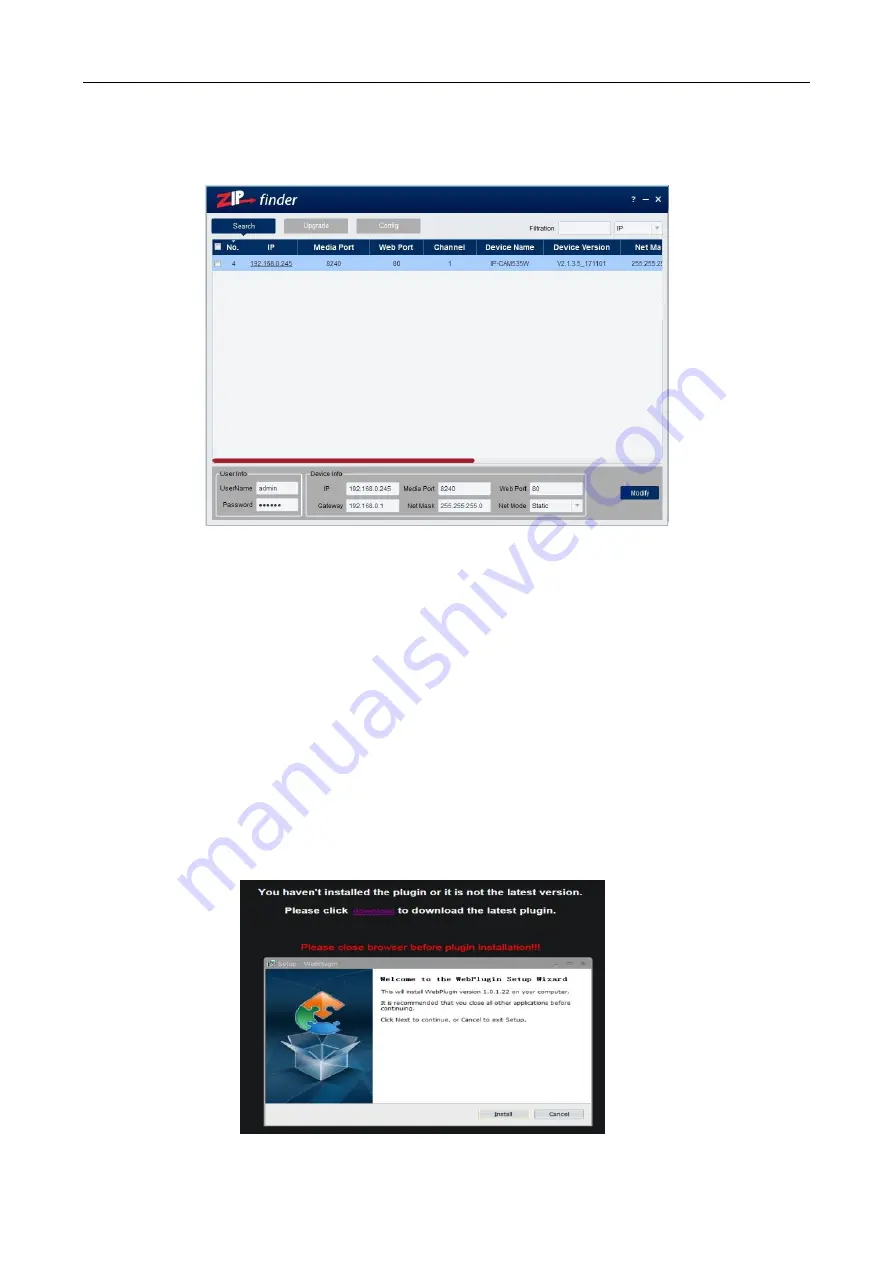
4. You can now change the IP address by completing the section at the bottom of the screen and
click on
Modify
.
See note below.
Note
you need to enter the IP camera password that is 777777, the new IP address, Media Port 8240,
Web Port 80, Gateway (Local IP of Router) & Net Mask (Subnet Mask usually 255.255.255.0)
5. You can now add the next IP camera and follow the same procedure above.
6. Double click IP address to display login and enter password to view picture.
4.3 Installation of Controls and Login to System
Before using IE (Internet Explorer) browser to access the IP camera for the first time, related plug-
in components must be installed by following the procedure below:
Access IP address of the IP camera to automatically load the controls from it.
In a pop-up plug-in installation dialogue box, choose an installation option to perform the
installation process.