


Timer Recording
RECORDING
43
The Timer Recording function allows you to record up to
8 programs within a period of one month.
11
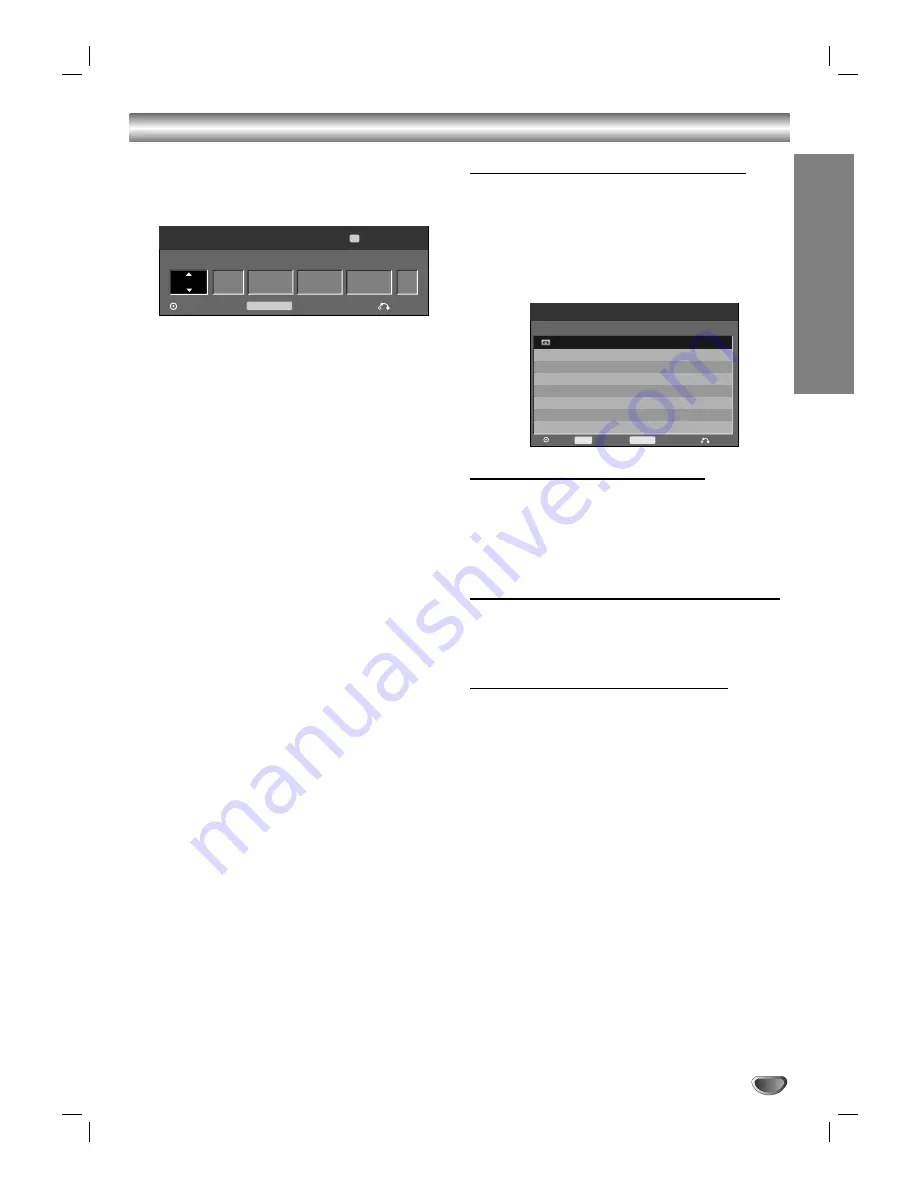
Press TIMER REC.
The Timer Record menu will appear.
•
Media
– Choose a media (DVD or VCR).
•
Ch.
– Choose a channel (2-69 or 1-125 for anten-
na or cable channels respectively, excluding skip
channels), or one of the external inputs from
which to record (AV1 or AV2).
•
Date
– Choose a date up to 1 month in advance,
or select a daily or weekly program.
•
Start Time
– Set the recording start time.
•
End Time
– Set the recording end time.
•
Mode
– Choose a record mode.
DVD: EP, LP, SP, XP, or AT (Auto)
VCR: SP, SLP, or AT (Auto)
AUTO mode determines how much time is avail-
able on the disc or tape and switches record
mode, if necessary, to complete recording the
program.
2
2
Enter the necessary information for your timer
recording(s).
•
b
/
B
(left/right) – Move the cursor left/right
•
v
/
V
(up/down) – Change the setting at the cur-
rent cursor position
• Press RETURN
(
O
)
to exit the Timer Record
menu.
• Press ENTER (
) after filling in all the program
information.
• Press TIMER REC to display Timer Record List.
3
3
Press ENTER (
) to save the program.
The Timer Record List will appear.
4
4
Press RETURN (
O
) to exit the Timer Record
List.
5
5
Be sure to load a recordable disc or tape.
No t e :
• The Timer indicator lights on the front panel display.
• If the Disc and Tape indicator are blinking, either no disc
or tape is loaded, or the loaded disc is not recordable.
• The VCR/DVD Recorder will record the audio according
to the current TV tuner setting (Stereo, Mono or SAP).
Use the AUDIO button to set the audio before switching
the VCR/DVD Recorder to Standby mode.
• You must press STOP to stop the Timer Recording.
• The VCR/DVD Recorder will automatically power off
when the Timer Recording ends.
• There is a short delay when a timer recording finishes to
confirm the recorded program. If two timer recordings are
set to record sequentially (one right after the other), the
very beginning of the later program may not be recorded.
Checking Timer Recording Details
Programming can be checked whenever the VCR/DVD
Recorder is turned on. Press TIMER REC twice.
• Use
v
/
V
to select a timer recording.
• Press ENTER (
) to edit the selected program.
Timer Record menu appears.
• Press
CLEAR
to delete the selected program
from the Timer Record List.
Canceling a Timer Recording
You can clear a timer setting anytime before the record-
ing actually starts.
•
Use
v
/
V
to select a program you want to erase on
the Timer Recorder List. If you want to erase the
program, press CLEAR.
Stopping a Timer Recording in Progress
After a timer recording has started, you can still cancel
the program.
•
Press STOP.
Timer Recording Troubleshooting
Even though the timer is set, the recorder will not
record when:
• There is no disc (or tape) loaded.
• A non-recordable disc (or tape) is loaded.
• Disc Protect is set to ON in the Disc menu (see page 25).
• There are already 99 titles recorded on the disc.
You cannot enter a timer program when:
• A recording is already underway.
• The time you’re trying to set has already passed.
• There are already 8 timer programs set.
If two or more timer programs overlap:
• The earlier program takes priority.
• When the earlier program finishes, the later program starts.
• If two programs are set to start at exactly the same time, the
program entered first takes priority.
Confirmation is not possible when:
• Disc Protect setting is set to ON.
• There are already 99 titles recorded on the disc.
If the disc is damaged, the recording may not complete
successfully. In this case even though the Check field
shows “Rec. OK”, it may not be.
TIMER REC
Media
Ch.
Date
Start Time
End Time
Mode
Timer Record
OK
Timer Rec List
Close
198 min Free
Ch.11
DVD
01/02 Fri
10:07 AM
11:00 AM
EP
SP
Media
Start Time
Duration
Date
Ch.
Mode
Check
Timer Record List
Edit
Close
Delete
CLEAR
10/19 Sun
Ch.11
18:07 AM
30min
SP
Rec. OK
Timer Rec
TIMER REC


