background image

P A G E   1 8

206-03890

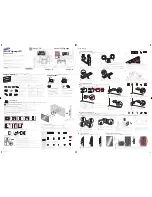
Remote Control Functions in TV Mode

1

2

3

4

5

6

7

8

9

0

tv

mode

light

power   

tv/video

comp/dvi

freeze

vcr cable dvd sat

mute

pip input

pipch- pipch+

pip

info

record

stop

pause

rew

play

ff

menu

exit

timer

cc

swap

vol

ch

surf

audio

video

signal

ratio

front

skip

dash(-)

flashbk

SURF

Use to scroll the Surf channel
list.

MENU

Brings up the main menu

to the screen.

EXIT

Clears all on-screen displays
and returns to TV viewing
from any menu.

CC

Lets you select a closed caption
mode for displaying captioning
information when provided for
DTV/Analog signal.

VIDEO

Adjusts the factory preset pic-
ture according to the room.

PIPCH+

Changes to next higher PIP
channel.

PIP INPUT

Selects the input source for
the sub picture.

MUTE

Switches the sound on or off

THUMBSTICK

Allows you to navigate the on-screen

menus and to adjust the system set-

tings and preferences, by moving to

an option with

F    G 

and selecting the

highlighted option with   . 

TV/VIDEO

Selects: DTV, Analog, Video1,

Video2, Video3, Front video,

Component 1-2, and DVI input

sources.

MODE

Selects the remote operating mode:

TV, VCR, Cable, DVD or Satellite.

Select other operating modes, for

the remote to operate external

devices.

FRONT

Selects the front video input

sources.

COMP/DVI

Selects: Component 1,
Component 2, and DVI input
sources.

AUDIO

Selects MTS sound: Mono,

Stereo, and SAP.

Change the audio language

in DTV mode.

PIPCH-

Changes to next lower

PIP channel

PIP

Switches between PIP, POP

(Picture-out-of-Picture) and

Twin picture mode.

LIGHT

Illuminates the remote control
buttons.

MODE INDICATOR
LIGHTS

Show active remote mode
every time any button is
pressed.

D
E

Summary of Contents for C32V37

Page 1: ...Copyright 2003 Zenith Electronics Corporation Installation and Operating Guide Warranty Model Number C32V37 Direct View TV...

Page 2: ...a Class B digital device pursuant to Part 15 of the FCC Rules These limits are designed to provide reasonable protection against harmful interference when the equip ment is operated in a residential i...

Page 3: ...llow the manufac turer s instructions and should use a mounting accessory recommended by the manufacturer 8 Transporting Product A product and cart combination should be moved with care Quick stops ex...

Page 4: ...o qualified service personnel 20 Damage Requiring Service Unplug this product from the wall outlet and refer servic ing to qualified service personnel under the following con ditions a If the power su...

Page 5: ...e Source 28 Twin Picture 29 VIDEO Menu EZ Picture 30 Manual Video Control 31 Color Temperature 32 Z View 32 Video Preset 32 AUDIO Menu Audio Language 33 EZ SoundRite 33 Stereo SAP Broadcasts Setup 34...

Page 6: ...when the TV is in standby mode Dims when the TV is switched on Remote control sensor TV VIDEO Menu VOL LEFT RIGHT Volume G button increases the sound level and vol ume F button decreases the sound lev...

Page 7: ...ble or antenna sig nals to the television either directly or through your cable box Video 1 2 and 3 Inputs Connects the video signals from various types of equipment Y PB PR DVD Component Video and HD...

Page 8: ...in input menu Left Right Audio Used for stereo sound from various types of equipment Video in Connects the video signals from any piece of equipment S Video A connection available on some very high en...

Page 9: ...your antenna connection in order to prevent interference CALIBRATION DIGITAL AUDIO OUTPUT OPTICAL ANTENNA 1 ANTENNA 2 DIGITAL AUDIO INPUT1 OPTICAL COMPONENT1 75 75 Antenna Cable TV Wall jack RF coaxi...

Page 10: ...ideo and audio jacks on the back of your cable box and connect them following the instructions provided with your equipment This can be combined with any other equipment you may want to hook up 1 In O...

Page 11: ...rom cable or your VCR you will need to connect A V cables as well as the wire that runs from the VCR to your TV If you want to receive your signals on Channel 3 or 4 locate the Out to TV jack on your...

Page 12: ...as below A V cables not included with TV DVD player Back AV panel or Back AV panel Find the component or S Video jacks for video connections depending on your DVD connec tors Then make the correspond...

Page 13: ...put Audio L R Component Out Y Pb Pr CALIBRATION DIGITAL AUDIO OUTPUT OPTICAL ANTENNA 1 ANTENNA 2 DVI HDTV INPUT DIGITAL AUDIO INPUT1 OPTICAL COMPONENT1 DIGITAL AUDIO INPUT2 OPTICAL DVI DVD DTV INPUT P...

Page 14: ...cks located on the back of your TV See the Operating Manual of the second TV or monitor for further details regarding that device s input settings 1 2 Audio input Video input S Video VIDEO VIDEO AUDIO...

Page 15: ...nels are connected correctly Set up your speakers through your analog stereo amplifier according to the instruc tions provided with the amplifier 1 2 3 VIDEO VIDEO AUDIO L MONO R S VIDEO VIDEO AUDIO I...

Page 16: ...nt instruc tion manual for operation 1 2 Digital Audio Optical Input CALIBRATION DIGITAL AUDIO OUTPUT OPTICAL ANTENNA 1 ANTENNA 2 DVI HDTV INPUT DIGITAL AUDIO INPUT1 OPTICAL COMPONENT1 DIGITAL AUDIO I...

Page 17: ...mote control This TV is programmed to remember which mode it was last set to even if you turn the TV off Note See page 20 if you have not auto programmed the TV to receive channels in your local broad...

Page 18: ...ce for the sub picture MUTE Switches the sound on or off THUMBSTICK Allows you to navigate the on screen menus and to adjust the system set tings and preferences by moving to an option withF G and sel...

Page 19: ...highlighted options RECORD PAUSE REW FFWD PLAY STOP Control the functions on your VCR VOLUME UP DOWN Increases decreases the sound level INFO When you watch the TV dis plays information on top of the...

Page 20: ...ymbols With the remote control in hand press the POWER button to turn your TV on 1 2 3 Automatically finds all channels available through antenna or cable inputs and stores them in memory on the chann...

Page 21: ...R button to begin the channel search Note Allow EZ Scan to complete the channel search cycle for TV CABLE DTV etc 4 5 6 7 8 Run EZ Scan again after any Antenna Cable connection changes Mini glossary T...

Page 22: ...ist Press the MENU button on the remote control then use the UP DOWN arrow button to select the Setup menu Press the RIGHT arrow button to access the Setup menu Use the UP DOWN arrow button to select...

Page 23: ...igital DTV signals Select the DTV in Main Input on the menu to check the DTV signal Using the SIGNAL button 1 2 Press the MENU button on the remote control then use the UP DOWN arrow button to select...

Page 24: ...d a preview screen Use channel UP DOWN button on your remote control to select the a channel to Label Use the UP DOWN and LEFT RIGHT arrows to select the appropriate label for the channel and press to...

Page 25: ...ct a viewing source for the PIP picture inset on the following page Changes the picture source for the main screen so you can watch your off air TV cable TV VCR DVD or any other devices that are conne...

Page 26: ...VCR or any other devices that are connected to your TV Press the PIP button to show the sub picture Each press of PIP button changes the PIP options as shown below PIP lets you view 2 different input...

Page 27: ...on Select the Analog or DTV option on the Sub input menu or with the PIP INPUT button Use the PIPCH PIPCH button to select a channel for the sub picture Main Picture Sub Picture Selecting PIP Channels...

Page 28: ...view it on the Main screen PIP selection Use UP DOWN arrow but ton to select one of 3 PIP screen pic tures in POP mode Input source selection for PIP Use PIP INPUT button or Sub input of Setup menu t...

Page 29: ...h time you press SWAP you switch the PIP and Main screen channels Press the PIP button on the remote control in POP mode to activate twin picture mode Select the Analog or DTV option on the Sub input...

Page 30: ...ss the MENU button on the remote control then use the UP DOWN arrow button to select the Video menu Press the RIGHT arrow button to access the Video menu Use the UP DOWN arrows to select the EZ Pictur...

Page 31: ...eas of the picture The lower the level the softer the image Tint Adjusts the balance between the red and green levels Use the LEFT RIGHT arrow button to adjust the option to your preference Use the UP...

Page 32: ...e RIGHT arrow button Use the UP DOWN arrow button to select Off or On On automatically adjusts the picture display for opti mum quality Press EXIT button to return to TV viewing or press MENU button t...

Page 33: ...being sent by the broadcasting station 4 5 Audio Language Press the MENU button on the remote control then use the UP DOWN arrow button to select the Audio menu Press the RIGHT arrow button to access...

Page 34: ...Audio Menu options to their original pre set values or use your own settings with Off Stereo or SAP can be received only when the TV station transmits those signals even though you have selected STER...

Page 35: ...EFT RIGHT arrow button to adjust the option to your preference Use the UP DOWN arrows to select another option Press EXIT button to return to TV viewing or press MENU button to return to the previous...

Page 36: ...7 8 9 0 tv mode light power tv video comp dvi freeze vcr cable dvd sat mute pip input pipch pipch pip info record stop pause rew play ff menu exit timer cc swap vol ch surf audio video signal ratio fr...

Page 37: ...ons are Eastern Central Mountain Pacific Alaska Hawaii Press EXIT button to return to TV viewing or press MENU button to return to the previous menu 1 2 3 4 5 6 Sets the time automatically through the...

Page 38: ...ur or minutes option Once selected use the UP DOWN arrow button to set the year hours or minutes Press EXIT button to return to TV viewing or press MENU button to return to the previous menu 1 2 3 4 5...

Page 39: ...s Press EXIT button to return to TV viewing or press MENU button to return to the previous menu 1 2 3 4 5 Lets you set an automatic daily turn off time for your TV Off Timer function overrides On Time...

Page 40: ...button to choose On Timer then press the RIGHT arrow button Use the UP DOWN arrows to choose On then press the RIGHT arrow button Use the LEFT RIGHT arrow button to select either Time Channel or Volu...

Page 41: ...The timer begins to count down from the number of minutes selected Press EXIT button to save and return to TV viewing 1 2 Lets you select the amount of time before your TV automatically turns itself...

Page 42: ...e menu Use the UP DOWN arrow button to choose Auto Off then press the RIGHT arrow Use the UP DOWN arrows to choose On or Off Press EXIT button to return to TV viewing or press MENU button to return to...

Page 43: ...ture for mat Each press of the RATIO button changes the picture for mat Your options are Set By Program 4 3 16 9 and Zoom Press EXIT to save and return to TV viewing 1 2 Using the RATIO button Using t...

Page 44: ...nformation usually at the bottom position and is used for a data service generally not program related Caption Text if provided by the broadcaster would be available for both digital and analog channe...

Page 45: ...g or press MENU button to return to the previous menu 1 2 Press the CC button repeatedly to scroll and select available caption languages Press EXIT to save and return to TV view ing 3 4 5 Choose the...

Page 46: ...Select a typeface for the words Text Color Choose a color for the text Text Opacity Specify the opacity for the text color Bg Background Color Select a back ground color Bg Background Opacity Select t...

Page 47: ...ton on the remote control then use the UP DOWN arrow button to select the Option menu Press the RIGHT arrow button to go to the Option menu Use the UP DOWN arrows to choose the Language then press the...

Page 48: ...NU button on the remote control then use the UP DOWN arrow button to select the Option menu Press the RIGHT arrow button to access the Option menu Use the UP DOWN arrow button to select Degauss then p...

Page 49: ...utton to select EZ Demo then press the RIGHT arrow button Press EXIT button on the remote to stop EZ Demo 1 2 3 4 Shows you how to navigate the TV s on screen menus 1 2 3 4 5 6 7 8 9 0 tv mode light p...

Page 50: ...eps children from watch ing certain TV programs among only the programs intended for children according to the ratings limit The children rating does not apply to other TV programs Unless you block ce...

Page 51: ...find unsuitable for chil dren under 14 years of age TV MA Mature audience only Program is specifically designed to be viewed by adults and therefore may be unsuitable for children under 17 G General...

Page 52: ...t a time Press the POWER button after each code change If the right code is found the device will turn off B Enter a code number using the number buttons on the remote Programming code numbers for the...

Page 53: ...7 116 MINERVA 088 MITSUBISHI 004 006 024 028 040 042 109 116 124 146 MTC 004 006 062 101 NAD 015 025 NEC 006 007 016 Brand Codes 019 024 040 056 130 132 134 NIKEI 043 ONKING 043 ONWA 043 OPTONICA 019...

Page 54: ...LTA 013 020 MITSUBISHI 013 020 045 046 049 051 059 061 151 MTC 034 040 MULTITECH 024 034 NEC 012 023 039 043 048 NORDMENDE 043 OPTONICA 053 054 PANASONIC 066 070 074 083 133 140 145 PENTAX 013 020 031...

Page 55: ...070 PACE SKY SATELLITE 143 PANASONIC 060 142 PANSAT 121 Brand Codes PERSONAL CABLE 117 PHILIPS 071 PICO 105 PRESIDENT 019 102 PRIMESTAR 030 110 111 PROSAT 072 RCA 066 106 REALISTIC 043 074 SAMSUNG 123...

Page 56: ...064 079 MEMOREX 001 MOVIE TIME 028 032 NSC 015 028 038 071 073 OAK 016 031 037 053 PANASONIC 044 047 PARAGON 001 PHILIPS 006 012 013 020 065 085 090 PIONEER 034 051 052 063 076 POST NEWS WEEK 016 PRU...

Page 57: ...se the cloth and wipe the cabinet again 3 Let the cabinet air dry before turning the TV on If you expect to leave your TV dormant for a long time such as a vacation unplug the power cord from the wall...

Page 58: ...deo games or for other uses that involve single fixed images such as a photo CD player you should avoid setting the Brightness level too high If static images like network identification icons or patt...

Page 59: ...ending appliance or shut one of them off Check volume levels Make sure the TV is not Muted Try another channel The problem may be with the broadcast not your TV Are the Audio cables installed properly...

Page 60: ...to see if the source equipment has been turned on Make sure that the connections are secure on the back of your TV and on the source equipment Check to see if all the connections are secure Look in th...

Page 61: ...ision signals sent over the air A large metal piece of equipment does not always have to be visible for your home to be using an antenna ASPECT RATIO The ratio of the horizontal dimension to the verti...

Page 62: ...ne speaker all the speakers play the same audio OUTPUT Refers to the jack that sends a signal out of a VCR DVD or other A V device PIP This is the most common way to refer to the Picture In Picture PI...

Page 63: ...for VHF UHF Audio Output W 7W x 2 Supplied accessories Remote control batteries 2 size AA Alkaline battery External input ports Video Audio input 4 set Video output 1 set S Video input 3 Component inp...

Page 64: ...tain or separate system components and Damages or operating problems that result from normal wear and tear misuse abuse operation outside envi ronmental specifications or contrary to the requirements...

Reviews: