background image

Closed Captions

21

Closed captioning is a process which converts the audio portion of a television program into written
words, which then appear on the television screen in a form similar to subtitles. Closed captions allow
viewers to read the dialogue and narration of television programs. 

Using Closed Captions

Captions are the subtitles of the dialogue and narration of television
programs. For prerecorded programs, program dialogue can be
arranged into captions in advance. It's possible to caption a live
program by using a process called “real-time captioning”, which
creates captions instantly. Real-time captioning is normally done by
professional reporters using a machine shorthand system and
computer for translation into English.
Captioning is an effective system for the hearing-impaired, and it can
also aid in teaching language skills.

• The picture at left shows a typical caption.

Caption Tips

• Not all TV broadcasts include closed caption signals.
• Sometimes TV stations broadcast two different caption signals on the same channel. By selecting CC 1

or CC 2, you can choose which signal you view. CC 1 is usually the signal with the captions, while CC
2 might show demonstration or programming information.

• Your TV might not receive caption signals normally in the following situations.

Poor reception conditions are encountered:

An old, bad or illegally recorded tape is played.

Strong, random signals from a car or airplane interfere with the TV signal.

The signal from the antenna is weak.

The program wasn't captioned when it was produced, transmitted or taped.

A

IGNITION:
Picture may flutter, drift, suffer from black spots or horizontal
streaking. Usually caused by interference from automobile ignition
systems, neon lamps, electrical drills and other electrical
appliances.

A

GHOSTS:
Ghosts are caused when the TV signal splits and follows two paths.
One is the direct path and the other is reflected off tall buildings,
hills or other objects. Changing the direction or position of the
antenna may improve reception.

A

SNOW:
If your receiver is located at the weak, fringe area of a TV signal,
your picture may be marred by small dots. It may be necessary to
install a special antenna to improve the picture.

FOLLOW ME

1

2

3

4

5

Summary of Contents for C27V36

Page 1: ...TM FAROUDJA Installation and Operating Guide Warranty Model Numbers C27V36 C32V36 Direct View TVs Copyright 2003 Zenith Electronics Corporation...

Page 2: ...vide reasonable protection against harmful interference when the equipment is operated in a residential installation This equipment generates uses and can radiate radio frequency energy and if not ins...

Page 3: ...face This product should not be placed in a built in installation such as a bookcase or rack unless proper ventilation is provided or the manufacturer s instructions have been adhered to 11 Power Sour...

Page 4: ...dangerous voltage or other hazards Refer all servicing to qualified service personnel 20 Damage Requiring Service Unplug this product from the wall outlet and refer servicing to qualified service per...

Page 5: ...Channel Memory 16 Fine Tuning Adjustment 16 Picture Setup 17 EZ Video 17 VM Velocity Modulation 17 ACC Auto Color Control 17 Adjusting the Picture 18 Picture Formats 18 Sound Setup 19 Stereo SAP Broad...

Page 6: ...trol keys 4 TV VIDEO Selects TV VIDEO COMPONENT or DVI mode 5 COMP DVI Selects COMPONENT or DVI mode 6 ARC Selects 4 3 or 16 9 picture formats 7 NUMBER BUTTONS Direct channel selection 8 FLASHBK Retur...

Page 7: ...o or SAP 17 MUTE Press to mute sound Press again to restore sound 18 PIP Picture in Picture PIP Selects the PIP mode twin picture window or channel search mode PIPCH Selects the sub picture channel SW...

Page 8: ...VCR BUTTONS Control some video cassette recorders 24 SKIP Left Right Playing CDs Selects previous next song Playing DVDs Selects previous next movie chapter 25 STAND BY INDICATOR r r Illuminates red w...

Page 9: ...elected 4 Press the exit button to save and return to TV viewing Selecting the Main Picture Input Source Changes the picture source for the main screen so you can watch your off air TV cable TV VCR DV...

Page 10: ...the Channel menu 2 Press the G and then use D E button to select EZ Scan 3 Press the G and then use D E button to select Turbo or Normal 4 Press the G button The EZ Scan function starts If you want to...

Page 11: ...t button to save and return to TV viewing Tuning Channels Use the ch button to easily select the next higher or lower channel Or use the NUMBER buttons to directly select the desired channel Adjusting...

Page 12: ...button and then use D E button to select the Timer menu 2 Press the G and then use D E button to select Clock 3 Press the G button and then use the D E button to select Manual 4 Press the G button an...

Page 13: ...sleep button to select the desired sleep time Each time you press this button preset sleep time settings are displayed one by one as shown below The Sleep Timer begins to count down from the number of...

Page 14: ...button to select Scan mode 3 Press the G and then use D E button to select Interlaced for watching normal TV or Progressive for viewing a more stationary image a video game for example 4 Press the ex...

Page 15: ...ened If you are unable to correct problem by degaussing try again after about 4 minutes Booster If the reception is poor at the fringe area of TV signal select Booster to On If the picture condition i...

Page 16: ...ne Tuning Adjustment Fine Tuning adjusts the picture to a stable condition when it is poor for example a horizontal stripe twisted picture or no color in program 1 Press the menu button and then use D...

Page 17: ...1 Press the menu button and then use D E button to select the Picture menu 2 Press the G and then use D E button to select VM 3 Press theG and then use D E button to select High Low or Off 4 Press the...

Page 18: ...The setting of highlighted menu option is displayed Use the D E button to select other options 4 Press the exit button to save and return to TV viewing Picture Formats You can select 4 3 or 16 9 pict...

Page 19: ...during stereo SAP broadcasting EZ Audio You can enjoy the best sound without any special adjustment because the TV automatically adjusts the sound appropriate to the program character Choosing a soun...

Page 20: ...s the menu button and then use D E button to select the Sound menu 2 Press the G and then use D E button to select EZ Audio 3 Press the G and then use D E button to select User 4 Press the G and then...

Page 21: ...ignals on the same channel By selecting CC 1 or CC 2 you can choose which signal you view CC 1 is usually the signal with the captions while CC 2 might show demonstration or programming information Yo...

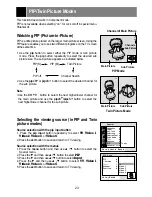
Page 22: ...and then use D E button to select Captions 3 Press the G and then use D E button to select On EZ Mute or Off 4 Press the exit button to save and return to TV viewing Note EZ mute shows the selected c...

Page 23: ...ng the viewing source in PIP and Twin picture modes Source selection with the pip input button 1 Press the pip input button repeatedly to select TV Video 1 Video 2 Video 3 or Video 4 2 Press the exit...

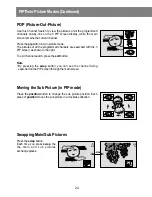
Page 24: ...searched with the 3 PIP screen as shown to the right To exit channel search press the exit button Note By pressing the swap button you can see the channel being searched on the PIP screen through the...

Page 25: ...to select the Special menu 2 Press the G and then use D E button to select PIP 3 Press the G and then use D E button to select Volume 4 Press the G and then use F G button to adjust headphone sound l...

Page 26: ...ies Previously Shown in Theaters Movie Ratings Unblocked G and Above general audience PG and Above parental guidance suggested PG 13 and Above 13 years and up R and Above restricted NC 17 and Above 18...

Page 27: ...password when requested 4 Press the D E button to select the Lock on off 5 Press the G and then use the D E button to select the on or off 6 Press the F and then use the D E button to select the Set p...

Page 28: ...e the 300 to 75 ohm adapter or the cable from the set if attached 2 Connect the CATV cable 75 ohm coaxial cable to the 75 ohm antenna jack 300 Ohm Flat Wire 1 Connect the 300 ohm flat wire to screws o...

Page 29: ...inputs VCR Audio amplifier to these outputs for recording or monitoring the selected program 7 DVI INPUT JACKS Connect set top box to these inputs Use the tv video or comp dvi button to select DVI 8 V...

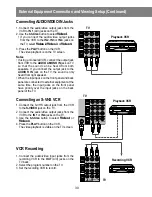
Page 30: ...front panel and back panel are connected to external equipment at the same time the input jacks on the front panel have priority over the input jacks on the back panel of the TV Connecting an S VHS VC...

Page 31: ...ent video outputs to Y PB PR on the TV and DVD audio outputs to right and left jacks of audio L R inputs on the TV 2 Turn on the DVD player and insert a DVD 3 Use the tv video or comp dvi button to se...

Page 32: ...lect DVI External Stereo 1 Connect analog stereo amplifier input jacks to variable audio out of the TV 2 Set up your speakers through your analog stereo amplifier according to the instructions provide...

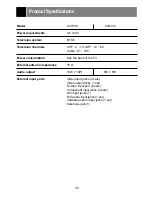
Page 33: ...9 Cable 01 125 Power consumption See the back of the TV External antenna impedance 75 Audio output 10W 10W 5W 5W External input ports Video input jacks 4 sets Video output jacks 1 set S video input po...

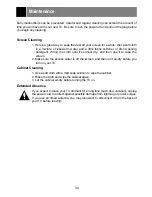
Page 34: ...lmost dry and then use it to wipe the screen 2 Make sure the excess water is off the screen and then let it air dry before you turn on your TV 1 Use a soft cloth with a mild soap solution to wipe the...

Page 35: ...le images Remote control does not work Cannot tune desired channel CHECK THESE THINGS Is power cord plugged in Is television turned on Check batteries in remote control Try another channel station tro...

Page 36: ...tion maintenance or failure to maintain or separate system components and Damages or operating problems that result from normal wear and tear misuse abuse operation outside environmental specification...

Reviews: