P A G E 1 4
This is how to
install the
swivel bracket
that comes
with this
Entertainment
Machine..
Header
206-3366-o
R E F E R E N C E U N D E R - C A B I N E T M O U N T S W I V E L B R AC K E T
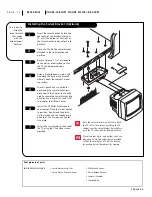
Installing the Swivel Bracket (Optional)
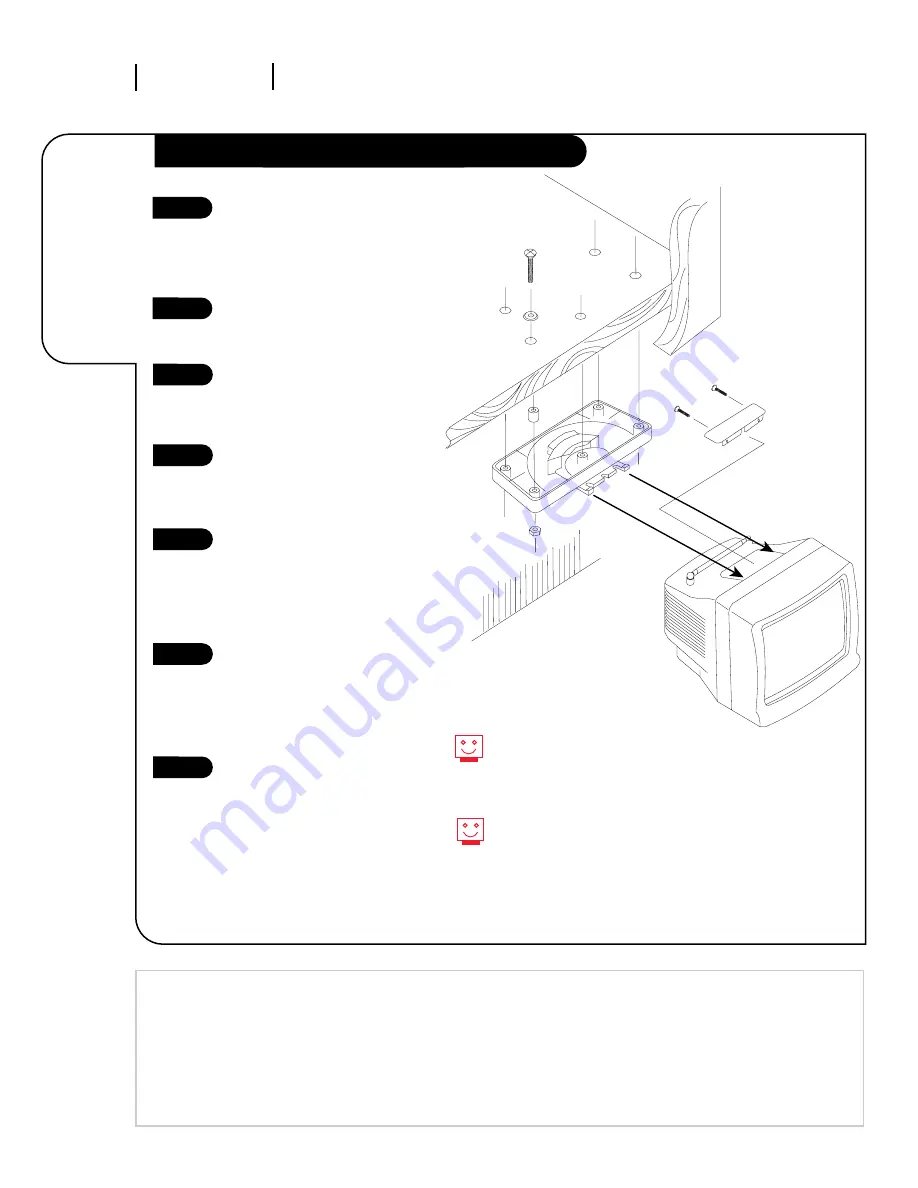
Mini glossary of parts
SWIVEL BRACKET ASSEMBLY
1 Swivel Bracket w/Lip Tabs.
5 Phillips Head Screws.
1 Swivel Plate 2 Pan Head Screws
5 Plastic Headed Washers.
5 Spacers (if needed).
5 Threaded Nuts
Insert the swivel bracket lip into the
top recess of the back panel of your
TV until the lip tabs at the front of
the swivel bracket snap and lock into
position.
Place the TV with the swivel bracket
attached in the right location and
position.
Be sure to leave 1 3/4” of clearance
to the wall or other surface so that
the TV can be removed when
required.
Using a graphite pencil, mark a thin
line along the back of the bracket
where it meets the cabinet’s mount-
ing surface.
Use this pencil line as a guide for
positioning the swivel bracket tem-
plate to drill the 5 holes that will be
used to secure the swivel bracket into
position. Use a drill bit at least 3/16”
in diameter to drill the 5 holes.
Install the 5 Phillips headscrews in
your cabinet. Place the swivel bracket
in position. Now thread the plastic
finish washers and the threaded nuts
on each of the 5 screws and tighten
into place.
Install the swivel plate to the back of
the TV using the 2 Pan Head screws
provided.
1
2
3
4
5
6
7
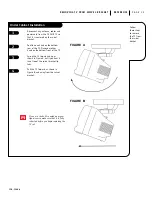
Once the swivel bracket is mounted, attach
the TV set to the bracket by sliding the TV
cabinet over the swivel bracket lip as before
until the TV snaps into its secured position.
If your cabinet has a long bottom skirt, you
may need to use the extra spacers provided
so that the bracket and TV will be located
far enough below the cabinet for viewing.
Summary of Contents for A09A02X
Page 23: ...206 3366 o...


