72
GW13-024_v05
After getting it wet, the space should change its color. Compare the color
of the square space on the wet test apparatus with the color legend on the
packaging. A green color means that the water is soft, a brown color means
the water is hard (medium level) and an orange color means that the water
is extremely hard (high level). On the basis of your results adjust water
hardness in the espresso machine according to the above instructions.
8. Selecting a programmed amount of coffee
The espresso machine has 4 preprogrammed amounts of coffee: 30 ml,
40 ml, 50 ml and 60 ml. The amount of coffee may be selected by pressing
the coffee amount select button
(C)
. After each push you will hear
a sound signal. The amount of coffee changes in the following order: 30 ml
40 ml 50 ml 60 ml P1 P2 30 ml, etc.
CAUTION!
P1
and
P2
(Program 1 and 2) are special memory
functions, which enable you to save your custom settings. The
method of setting the memory programs (P1 and P2) is shown in
paragraph 12.
9. Selecting temperature for the brewed coffee
The espresso machine has 3 temperature settings for brewing coffee: low
temperature ( indicator), high temperature ( indicator) and extremely
high temperature ( indicator). The temperature setting by the temperature
select button
(D)
. After each push of the button you will hear a sound
signal. The temperature changes in the following order: high ( indicator)
extremely high ( indicator) low ( indicator) high ( indicator), etc.
10. Selecting espresso instant bags mode or ground
coffee mode
The espresso machine has two modes for making coffee:
1. the espresso instant bags mode,
2. the ground coffee mode.
To active a mode press and hold the single/double cup select button
(B)
for 2 seconds.
Depending on its previous setting the machine will change from the
espresso instant bags mode (
indicator) into the ground coffee mode
(
indicator) or the other way around. Each change will accompanied
by a sound signal.
11. Making espresso
11.1. Unplug the espresso machine from the power supply.
11.2. Fill the water tank
(1)
according to
paragraph 4
.
11.3. Plug the espresso machine by putting the cord into the socket. The
machine will turn on. The display panel and the power on/off button
(A)
will flash. The display panel will indicate power is on
.
11.4. Push the power on/off button
(A)
, You will hear a sound signal.
11.5. The
indicator on the display panel will begin to whirl, signalizing
that the espresso machine is heating up.
11.6. When the
indicator stops whirling, you will hear a sound signal
informing you that the machine is ready for use (has reached the
right temperature).
11.7. Choose espresso instant bags mode or ground coffee mode by
pressing single/double cup select button
(B)
for 2 seconds.
After each push you will hear a sound signal.
11.8. Pour ground coffee by means of a measuring cup
(13)
or insert
espresso instant bags into the filter handle container
(6)
.
11.9. Remove the excess of coffee from the edge of the filter and
compress the coffee by the permanent coffee compressor
(5)
or the
whip of the measuring cup
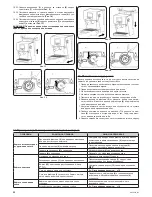
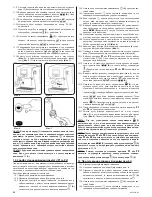
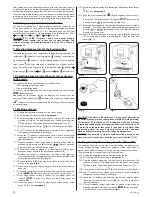
(13) (Fig. 4)
.
11.10. Attach filter handle
(6)
to the brew head
(4)
, by turning it with a firm
motion to the right
(Fig. 3)
.
11.11. Place a cup or cups on the drip tray grid
(7)
, directly under the brew
head
(4)
.
11.12. Choose a double cup of coffee pressing the single/double cup select
button
(B)
. After each push you will hear a sound signal.
11.13. If you have chosen to take a double cup, the display panel will
indicate
. In case of a single cup the display panel will
indicate
.
11.14. Select the amount of coffee by pressing the coffee amount select
button
(C)
– see
paragraph 8
.
11.15. Select temperature setting by pressing the temperature select button
(D)
– see
paragraph 9
.
11.16. Push the brew coffee button
(F)
and espresso will come out of
the machine. The display panel will indicate
(after choosing
a double cup) or
(after choosing a single cup).
11.17. Brewing will automatically stop after the selected amount of coffee is
prepared. You will hear two sound signals and the display panel will
indicate
or
(depending on the last selection between
a single or a double cup).
11.18. Remove the filter handle by turning it to the left
(Fig. 5)
and throw
out the used bag or coffee grounds
(Fig. 6)
. Clean the filter with
water
(Fig. 7)
.
CAUTION! If the water in the water tank (1) runs out of water during
the coffee brewing process, the espresso machine will stop working.
The indicator
will flash on the display panel and you will hear
a repeating sound signal informing you about the necessity to fill
in water. Open the water tank cover (1) and pour in the water. After
replenishing water, the sound signal will stop and the espresso
machine will automatically finish the coffee brewing process.
CAUTION! It is possible to stop the coffee brewing process at any
given moment. It is enough to push the Power on/off button (A).
12. Programming the memory function (P1 and P2)
The espresso machine has two memory modes letting you program your
custom settings including temperature, espresso instant bags mode or
ground coffee mode, selecting 1 or 2 cups and a given amount of coffee.
The programming process includes the following steps:
12.1. Unplug the espresso machine from the power supply.
12.2. Fill the water tank
(1)
according to
paragraph 4
.
12.3. Plug the espresso machine by putting the cord into the socket. The
machine will turn on. The display panel and the power on/off button
(A)
will flash. The display panel will indicate power is on
.
12.4. Push the power on/off button
(A)
. You will hear a sound signal.
12.5. The
indicator on the display panel will begin to whirl, signalizing
that the espresso machine is heating up.
12.6. When the
indicator stops whirling, you will hear a sound signal
informing you that the machine is ready for use (has reached the
right temperature).
12.7. Choose espresso instant bags mode or ground coffee mode by
pressing single/double cup select button
(B)
for 2 seconds.
After each push you will hear a sound signal.
Fig. 4
Fig. 5
Fig. 6
Fig. 7

