background image

116

117

PL

PL

40023222

03/2022

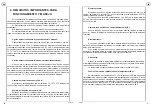
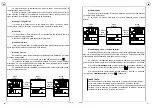
Tryb czuwania (Stand-by)

W każdym trybie po naciśnięciu przycisku „Stand-by”, pilot przechodzi w tryb 

czuwania i urządzenie przestaje działać.

Po ponownym naciśnięciu przycisku, pilot powraca do poprzedniego trybu.

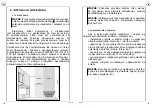
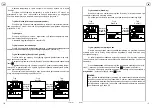
Tryb wykrywania otwartego okna

Grzejnik  może  wykrywać  znaczny  spadek  temperatury,  na  przykład,  z  powodu


otwarcia  okna  zimą.  Wtedy  automatycznie  dopasowuje  swoje  działanie,  żeby 

oszczędzać energię.

W takim przypadku urządzenie wyłącza grzanie na 30 minut albo ogranicza 

je do momentu, gdy temperatura w pomieszczeniu wzrośnie wskazując, że okno jest 

zamknięte.

Przez 

równoczesne

 naciśnięcie przycisku wykrywania otwartego okna i przy

-

cisku „-”, włącza się czujnik otwartego okna. Ikona         pojawia się na ekranie.

Ponowne  naciśnięcie  przycisku  wykrywania  otwartego  okna  równocześnie  z 

przyciskiem

 „-” wyłącza tę funkcję. Ikona        znika.

WAŻNE:

Aby grzejnik działał jak najlepiej, powinien być umieszczony blisko otworu okna 

bez żadnych mebli ani innych przedmiotów w pobliżu. Jakość działania funkcji 

wykrywania otwarcia/zamknięcia okna zależy od szeregu czynników, takich jak, 

umiejscowienie  urządzenia,  jak  szybko  rośnie/spada  temperatura  wewnątrz


pomieszczenia, typu okna, itp.

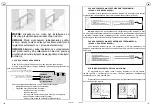
Nacisnąć

przycisk

Stand-by

Nacisnąć

przycisk

Stand-by

Tryb

Comfort

Tryb

Stand-by

Tryb

Comfort

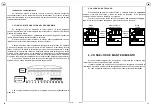
Nastawa  temperatury  w  trybie  nocnym  nie  może  być  wyższa  niż  w  trybie


„Komfort”.

Przykład:  Jeśli  ustawiono  temperaturę  w  trybie  „Komfort”,  25  stopni,  po 

przełączeniu  w  tryb  „Noc”  i  odczekaniu  na  zadaną  temperaturę,  po  osiągnięciu


25 stopni, temperatura nie wzrośnie, nawet po naciśnięciu przycisku “+“.

Tryb Antifreeze (ochrona przed zamarzaniem)

Przejść w tryb Ochrona przed zamarzaniem „Antifreeze”, temperatura jest usta

-

lana na poziomie 7 stopni i nie może być podwyższona ani zmniejszona za pomocą 

przycisków “+“ lub “-“.

Tryb zegara

Przejść w tryb Zegara „Chrono”, wyświetlacz LCD pokaże temperaturę, datę, 

czas i stan realizacji dziennego programu.

Ustawianie programu opisano w rozdziale 5.4.

Tryb przewodu sterowniczego

Przejść w tryb przewodu sterowniczego „Pilot-Wire” – urządzenie rozpoznaje polecenia 

odbierane z przewodu sterowniczego (Comfort/Night/Antifrezee/ECO/Stand-by).

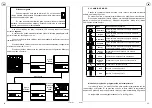
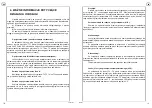
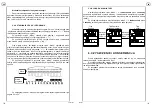
Tryb wzmocnienia (Boost) trwa 2 godziny

Tryb ten może być używany do szybkiego ogrzania pomieszczenia lub szyb

-

kiego osuszenia ręczników.

Nacisnąć przycisk wzmocnienia „Boost 2h”, aż wyświetlacz pokaże odpowiednią 

ikonę      . 

Urządzenie będzie grzać z pełną mocą przez 2 godziny z maksymalną tempe-

raturą 33°C w pomieszczeniu. Po upływie 2 godzin urządzenie automatycznie powra

-

ca do poprzedniego trybu pracy.

W dowolnej chwili można wyjść z trybu wzmocnienia ogrzewania i zmienić tryb 

pracy, naciskając ponownie przycisk „Boost 2h”.

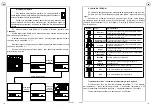
Nacisnąć

przycisk

„Boost 2h”.

Nacisnąć

przycisk

„Boost 2h”.

Tryb

Comfort

Tryb

Boost 2h

Tryb

Comfort

Summary of Contents for Folio Glass

Page 1: ...Zehnder Folio Glass FR Mode d emploi EN Operating instructions DE Bedienungsanleitung IT Istruzioni per l uso ES Instrucciones de uso PL Instrukcja obsługi ...

Page 2: ...tion 9 4 CONDITIONS PRÉALABLES IMPORTANTES POUR LE FONCTIONNEMENT ET L UTILISATION 10 5 UTILISATION DE L APPAREIL AVEC LA TÉLÉCOMMANDE 5 1 Présentation 12 5 2 Introduction des piles et mise en service 13 5 3 Choix du mode 15 5 4 Temps et réglage du programme 18 5 5 Verrouillage des touches 19 6 NETTOYAGE ET ENTRETIEN 19 7 SERVICES ET GARANTIE 20 1 03 2022 FRANÇAIS 1 ENGLISH 21 DEUTSCH 41 ITALIANO ...

Page 3: ...oré avec le plus grand soin selon notre charte qualité nous vous en souhaitons une entière satis faction Pour profiter pleinement de toutes ses possibilités nous vous invitons à lire attentivement cette notice et à la conserver à proximité de votre appareil Merci de votre confiance AVERTISSEMENTS MISE EN GARDE Pour éviter une surchauffe ne pas couvrir l appareil de chauffage Attention surface très...

Page 4: ...onner le bas du boîtier au minimum à 15 cm du sol L appareil de chauffage ne doit pas être placé juste en dessous d une prise de courant D utiliser des vis de fixation adaptées à la nature de votre mur IMPORTANT Le radiateur ne doit pas être soumis à une humidité ambiante intensive ou permanente douche piscine etc 2 INSTALLATION DU RADIATEUR 2 1 AVERTISSEMENTS IMPORTANT Avant toute opération d ent...

Page 5: ...e fiche de prise de courant N bleu ou gris Neutre Phase Fil pilote centrale L brun Fil pilote noir Phase Neutre Fil pilote noir L brun N bleu ou gris Suisse classe I Europe classe II IMPORTANT Votre radiateur ne doit jamais être ins tallé avec son boîtier récepteur en position haute ATTENTION Procédez toujours à la coupure de l ali mentation électrique disjoncteur fil pilote avant toute opération ...

Page 6: ...8 s allument Le radiateur fonctionnera à la température maximum pendant 2 heures puis il recommencera à fonctionner selon la fonction choisie pré cédemment Pour bloquer le clavier une fois les réglages effectués appuyez sur la touche T6 pendant 5 secondes 4 bips confirmeront la programmation En appuyant sur les autres touches le témoin 6 clignotera pendant 2 3 secondes pour indiquer le blocage en ...

Page 7: ...que l affi chage de la température apparaisse le radiateur passe de la possibilité de commande A à B La possibilité de commande B est indiquée par l allumage constant du symbole de verrouillage des touches de commande Exemple pratique Le radiateur a été démarré via l écran tactile c à d en mode de commande A et la touche T3 qui correspond à la température de 55 C a été activée Ce n est que plus ta...

Page 8: ... comportemental Modes de fonctionnement Mode Boost 2 heures Horloge Mode programme Indicateur de verrouillage Indicateur de détection de fenêtre ouverte Mode Chrono Indicateur de jour Bande adhésive Zone pour collage 5 UTILISATION DE L APPAREIL AVEC LA TÉLÉCOMMANDE 5 1 PRÉSENTATION Les radiateurs Zehnder sont accompagnés d une télécommande infrarouge qui permet de communiquer au capteur le contrôl...

Page 9: ...age de la température Entrer en mode Night ou en mode Comfort pour régler la température à l aide des touches Plus ou Moins en appuyant une fois sur la touche Plus la température augmente de 0 5 degré en appuyant une fois sur la touche Moins elle diminue de 0 5 degré La température peut être réglée de 7 à 30 degrés Réglage jour Réglage minutes Réglage heures Télécom mande initialisée Après avoir i...

Page 10: ...a chute remontée de température dans la pièce etc Appui sur stand by Mode Confort Mode Stand by Mode Confort Appui sur stand by Le réglage de la température en mode Night ne peut être supérieur à celui du mode Comfort Par exemple si l on règle la température du mode Comfort à 25 degrés en mode Night il ne sera plus possible d augmenter la température à l aide de la touche plus lorsque celle ci aur...

Page 11: ...ondant au niveau de consommation d énergie vert basse jaune moyenne rouge élevée 5 4 TEMPS ET RÉGLAGE DU PROGRAMME Depuis le mode Chrono en appuyant sur la touche Chrono la date cligno tera l utilisateur peut régler le jour à l aide des touches Plus ou Moins et le programme journalier sera affiché En appuyant sur la touche Mode l heure clignotera et l utilisateur pourra régler l heure actuelle à l...

Page 12: ...cture d achat datée Garantie Voir conditions générales de vente dans le pays concerné La garantie ne s applique pas notamment en cas de mise en œuvre d installa tion ou d entretien non conforme à la norme en vigueur du pays aux règles de l art et à la notice d utilisation Pour toute autre question concernant la garantie contactez votre installateur ou votre revendeur Les radiateurs et les sèche se...

Page 13: ...structions carefully and keep them to hand Thank you for your purchase WARNINGS CAUTION To avoid overheating do not cover the heating appliance Caution hot surface CAUTION Some parts of this product can become very hot and cause burns Particular attention has to be given where children and vulnerable people are present Children of less than 3 years should be kept away unless continuously supervise...

Page 14: ...PORTANT The radiator must not be exposed to intensive or on going ambient humidity shower swim ming pool etc 2 INSTALLING THE RADIATOR 2 1 WARNINGS IMPORTANT Before performing any maintenance work put the dial in the position allow the appliance to cool completely and disconnect it from the mains The flexible cable supplied with your appliance is desi gned to be connected to the mains via a juncti...

Page 15: ...ed to the mains via a plug N blue or grey Neutral Live Pilot wire base unit L brown Pilot wire black Live Neutral Pilot wire black L brown N blue or grey Switzerland class I Europe class II IMPORTANT This appliance should never be installed with the electrical connection box positioned topside NOTE The flexible cable supplied with the appliance is designed to be connected to the mains via a plug o...

Page 16: ...rs the L5 L7 and L8 LEDs will light up The radiator will operate at maximum temperature for 2 hours after which it will go back to operate in the function set before the Boost function If after the settings you wish to lock the keypad press the T6 button for 5 seconds you will hear 4 beeps confirming the setting When touching the other buttons lightly the L6 LED will flash for 2 3 seconds indicati...

Page 17: ...he On button on the remote control until the temperature is displayed the radiator changes from operating option A to B Operating option B is indicated by the constant illumination of the operating key lock symbol Practical example The radiator was started via the touch screen i e in control option A and the T3 key which corresponds to the temperature of 55 C The radiator was switched on only late...

Page 18: ...indicator Behavioral indicator Operating modes Boost mode 2 hours Clock Program mode Lock indicator Open window detection indicator Chrono Mode Day indicator Adhesive strip Glue area Mode key Plus key Window open detection button Boost 2h key Minus key Chrono key On Stand by key 5 USING YOUR APPLIANCE WITH THE REMOTE CONTROL 5 1 OVERVIEW The Zehnder radiators are equipped with infrared remote cont...

Page 19: ... device ASC Inactive on this device Comfort and Night Modes setting of the mode s temperature Go to Night or Comfort mode use Plus or Minus buttons for temperature setting by pressing the Plus button once the temperature will rise by 0 5 degrees by pressing the Minus button once the temperature will drop by 0 5 degrees Temperature can be adjusted from 7 up to 30 degrees Once the batteries are inst...

Page 20: ...s falls the type of window etc Press stand by key Comfort mode Stand by mode Comfort mode Press stand by key The Night mode temperature setting cannot be higher than the Comfort mode s one Example If the Comfort mode s temperature has been set to 25 degrees when switching to Night mode and wanting to set the temperature once it reaches 25 degrees the temperature will not rise even when pressing th...

Page 21: ... any mode by pressing the Chrono button the date will start flashing the user will then be able to set the current date by using the Plus or Minus buttons The daily program will also be displayed By pressing the Mode button the hour section will start flashing and the user will be able to set the current hour by using the Plus or Minus buttons By pressing the Mode button again the minutes section ...

Page 22: ... 3 the sales reference for your appliance shown on your dated purchase invoice Guarantee See general conditions of sale for your country The guarantee shall not apply if the appliance is installed used or maintained in a way that does not comply with standards in force in the relevant country good professional practice or the manufacturer s instructions For any other warranty questions contact you...

Page 23: ...n sich für diesen Heizkörper entschieden und wir danken Ihnen für diese Wahl Dieses Produkt wurde von uns mit größter Sorgfalt nach unserer Quali tätscharta konzipiert und hergestellt damit es Sie voll und ganz zufrieden stellt Um seine Funktionalitäten kennen zu lernen und bestmöglich nutzen zu können lesen Sie bitte diese Anleitung aufmerksam durch und bewahren sie in der Nähe des Heizkör pers a...

Page 24: ...gsschrauben je nach Beschaf fenheit Ihrer Wand zu verwenden WICHTIG Der Heizkörper darf nicht in einer stark oder dauernd feuchten Umgebung Schwimmbad usw ins talliert werden 2 INSTALLATION DES HEIZKÖRPERS 2 1 WARNHINWEISE BITTE BEACHTEN Vor allen Instandhaltungsarbeiten den Heizkörper mit der Taste ausschalten warten bis der Heizkörper abgekühlt ist und ihn vom Strom netz trennen Das biegsame Ori...

Page 25: ...rogrammiereinheit L Braun Steuerdraht Schwarz Phase Nullleiter Steuerdraht Schwarz L Braun N Blau oder Grau Schweiz Schutzklasse I Europa Schutzklasse II BITTE BEACHTEN Der Heizkörper darf in keinem Fall mit der Elektronikeinheit oben installiert werden ANMERKUNG Das mitgelieferte biegsame Kabel ist für den Netzanschluss über eine Steckdose oder einen Festanschluss bestimmt gemäß örtlich gelten de...

Page 26: ...chen betätigen Sie die Taste T5 Die LEDs L5 L7 und L8 leuchten auf Der Heizkörper ist 2 Stunden lang mit maximaler Temperatur in Betrieb Danach nimmt er wieder den Betrieb wie vor der Boost Funktion auf Falls Sie nach den Einstellungen die Bedientasten sperren wollen drücken Sie 5 Sekunden lang die Taste T6 Es ertönen 4 Pieptöne zur Bestätigung der Einstellung Falls Sie die anderen Tasten berühren...

Page 27: ...rch drücken der Ein Taste am Steuergerät bis die Temperaturanzeige erscheint wechselt der Heizkörper von Bedienmöglichkeit A zu B Die Bedienmö glichkeit B wird jeweils durch konstantes Leuchten des Bedientastensperre Symbols angezeigt Praktisches Beispiel Der Heizkörper wurde über das Touchpanel gestartet d h in der Bedien möglichkeit A und der Taste T3 die der Temperatur von 55 C entspricht Erst ...

Page 28: ...ehe Abbildung rechts zeigt korrekt eingesetztes Steuergerät Temperaturanzeige Batterieanzeige Energieverbrauchsanzeige Betriebsmodi Boost Modus 2 Stunden Uhr Programmiermodus Anzeige Tastensperre Fenster offen Erkennung Wochenprogramm Modus Wochentag Programmierung Kleb streifen Klebe bereich 5 BEDIENUNG DES HEIZKÖRPERS ÜBER DAS STEUERGERÄT 5 1 BESCHREIBUNG Die Heizkörper von Zehnder werden mit ei...

Page 29: ...us bzw in den Komfort Modus Benutzen Sie für die Einstellung der Soll Raumtemperatur die Tasten Plus oder Minus Ein einmaliges Drücken der Taste Plus erhöht die Temperatur um 0 5 Grad ein einma liges Drücken der Taste Minus verringert die Temperatur um 0 5 Grad Es kann eine Temperatur von 7 Grad bis 30 Grad eingestellt werden Bei Stromausfall Netztrennung bleibt die letzte Einstellung am Touchpane...

Page 30: ...n Komfort modus Standby modus Komfort modus Taste Stand by drücken Die eingestellte Temperatur für den Spar Modus kann nicht höher sein als die für den Komfort Modus eingestellte Temperatur Beispiel Wenn die Temperatur für den Komfort Modus auf 25 Grad eingestellt wurde und man danach in den Spar Modus wechselt um dessen Temperatur ein zustellen kann nach Erreichen des Wertes von 25 Grad die Tempe...

Page 31: ... nun den aktuellen Wochentag mit den Tasten Plus oder Minus einstellen Außerdem wird das Tagesprogramm angezeigt Tagesprogramme müssen immer einzeln eingestellt werden und können nicht kopiert werden Nach Drücken der Taste Modus beginnt die Stundenanzeige zu blinken und der Benutzer kann die aktuelle Stunde mit den Tasten Plus oder Minus einstellen Nach erneutem Drücken der Taste Modus beginnt die...

Page 32: ...Ihrer Rechnung Gewährleistung Es gelten die allgemeinen Verkaufs und Lieferbedingungen für das jeweilige Land Von der Gewährleistung ausgeschlossen ist eine Benutzung Inbetriebnahme Installation oder Wartung die gegen die gültige Norm im jeweiligen Einsatzland gegen die anerkannten Fachregeln und gegen die Bedienungsanleitung des Herstellers verstößt Bei allen sonstigen Fragen zur Garantie wenden ...

Page 33: ...ile Signore Vi ringraziamo per aver scelto questo radiatore Ci auguriamo che questo prodotto progettato con la massima cura confor memente alla nostra carta qualità incontri la vostra piena soddisfazione Per poter sfruttare in modo completo tutte le funzionalità offerte vi consigliamo di leggere atten tamente questo manuale d istruzioni e di conservarlo vicino all apparecchio Vi ringraziamo per la...

Page 34: ... fissaggio adatte al tipo di muro IMPORTANTE Il radiatore non deve essere sottoposto a un umidità ambiente elevata o permanente docce piscine ecc 2 INSTALLAZIONE DEL RADIATORE 2 1 AVVERTENZE IMPORTANTE Prima di qualsiasi operazione di manu tenzione mettere la manopola in posizione attendere che si sia raffreddato e scollegarlo dalla rete elettrica Il cavo flessibile montato in fabbrica sul disposi...

Page 35: ...e L marrone Filo pilota nero Fase Neutro Filo pilota nero L marrone N blu o grigio Svizzera classe I Europa classe II IMPORTANTE Il radiatore non deve mai essere instal lato con la centralina di ricezione in posizione alta NOTA BENE Il cavo flessibile montato sull apparec chio va collegato alla rete tramite una presa di corrente o una cassetta di connessione in base alle norme vigenti nel Paese di...

Page 36: ... ed L8 Il radiatore funzionerà alla massima temperatura per 2 ore al termine delle due ore ritornerà a funzionare nella funzione impostata precedentemente Qualora dopo le impostazioni desidera bloccare la tastiera pre mere il tasto T6 per 5 secondi sentirà 4 suoni biip di conferma dell avvenuta impostazione Se sfiori gli altri tasti il led 6 lampeggerà per 2 3 secondi per indicare il blocco in cor...

Page 37: ...re la temperatura il radiatore passa dall opzione di controllo A a B L opzione operativa B è indicata dall il luminazione costante del simbolo di blocco della chiave operativa Esempio pratico Il radiatore è stato avviato tramite il touch screen cioè nell opzione di controllo A e il tasto T3 che corrisponde alla temperatura di 55 C Il radiatore è stato acceso solo dopo e la temperatura di 23 C è st...

Page 38: ...temperatura Indicatore della batteria Indicatore comportamentale Modalità di funzionamento Modalità Boost 2 ore Orologio Modalità di programmazione Indicatore di blocco Indicatore di rilevamento della finestra aperta Modalità orologio Indicatore del giorno Biadesivo Area colla 5 USO DEL RADIATORE CON IL TELECOMANDO 5 1 PRESENTAZIONE I radiatori Zehnder vengono forniti con telecomando ad infrarossi...

Page 39: ...attivo su questo dispositivo Modalità Comfort e Notte impostazione della temperatura modalità Entrare in modalità Notte o in modalità Comfort per l impostazione della temperatura con i tasti Più o Meno premendo il tasto Più una volta la temperatura aumenta di 0 5 gradi premendo il tasto Meno una volta che la temperatura diminuisce di 0 5 gradi La temperatura può essere regolata da 7 gradi a 30 gra...

Page 40: ...ipo di finestra ecc Premere tasto Stand by Modalità Comfort Modalità Stand by Modalità Comfort Premere tasto Stand by L impostazione della temperatura in modalità Notte non può essere supe riore a quella della modalità Comfort Esempio Impostando la temperatura della modalità Comfort a 25 gradi entrando in modalità Notte e volendo impostare la temperatura quando raggiun geremo i 25 gradi anche cont...

Page 41: ...ta verde basso giallo medio rosso alto 5 4 TEMPO E IMPOSTAZIONE DEL PROGRAMMA In qualsiasi modalità premendo il tasto Orologio la data lampeggerà l utente può impostare il giorno corrente con i tasti Più o Meno e si visualizzerà anche il programma giornaliero Premendo il tasto Mode lampeggerà la sezione ora e l utente potrà impos tare l ora corrente con i tasti Più o Meno Premendo nuovamente il ta...

Page 42: ... vostra fattura d acquisto con data Garanzia vedere le condizioni generali di vendita relative al proprio paese La garanzia non si applica in particolare se si verificano condizioni di instal lazione utilizzo messa in funzione o manutenzione non conformi alla normativa in vigore nel paese alle regole dell arte e al manuale d uso del costruttore Per qualsiasi altra domanda riguardante la garanzia c...

Page 43: ...tudes superiores a los 2000 metros 1 ASPECTOS GENERALES Estimado cliente Le damos las gracias por haber elegido este radiador fabricado con el máximo cuidado de acuerdo con nuestra carta de calidad y esperamos que le proporcione total satisfacción Para disfrutar plenamente de todas sus posibilidades le invitamos a leer aten tamente estas instrucciones y a conservarlas cerca de su aparato Gracias p...

Page 44: ...jación adecuados al tipo de pared IMPORTANTE El radiador no deberá estar sometido a una excesiva o permanente humedad ambiente ducha piscina etc 2 INSTALACIÓN DEL RADIADOR 2 1 ADVERTENCIAS IMPORTANTE Antes de realizar cualquier operación de mantenimiento colocar el pomo en posición es perar a que se enfríe y desconectar de la red eléctrica El cable flexible montado originalmente en el radia dor de...

Page 45: ...e piloto negro Fase Neutro Cable piloto negro L marrón N bazul o gris Suiza clase I Europa clase II IMPORTANTE Este aparato no debe instalarse nunca con su caja de conexión eléctrica en una posición alta NOTA El cable flexible suministrado con el aparato está diseñado para ser conectado a la red mediante un enchufe o una caja de conexión conforme a la nor mativa local ATENCIÓN Proceda siempre a co...

Page 46: ...onará a la máxima temperatura durante 2 horas transcurridas las cuales volverá a funcionar en el modo anterior a la función Boost Si tras la programación se desea bloquear el teclado pulsar la tecla T6 durante 5 segundos Se escucharán 4 bips que confirman la programación correcta Si se tocan otras teclas el led 6 parpadeará durante 2 3 segundos para indicar que el bloqueo se ha activado La tecla T...

Page 47: ...ando la tecla de encendido del mando hasta que aparezca la temperatura el radiador pasa del modo de funcionamiento A al B La opción de funcionamiento B se indica mediante la iluminación constante del símbolo LOCK de bloqueo de teclas de funcionamiento Ejemplo práctico El radiador se puso en marcha a través del panel de control es decir en la opción de control A y la tecla T3 que corresponde a la t...

Page 48: ...Modos de funcionamiento Modo Boost 2 horas Reloj Modo programa Indicador de bloqueo Indicador de detección de ventana abierta Modo reloj Indicador del día Cinta adhesiva Zona de adhesión 5 USO DEL RADIADOR CON EL MANDO A DISTANCIA 5 1 PRESENTACIÓN Los radiadores Zehnder incluyen un mando a distancia de infrarrojos que per mite que el sensor controle la temperatura ambiente y se programen los difer...

Page 49: ... dispositivo Modo Confort y Noche programación de la temperatura Ir al modo Noche o a modo Confort para ajustar la temperatura con las teclas Más o Menos Si se presiona una vez la tecla Más la temperatura aumenta 0 5 grados Si se presiona la tecla Menos la temperatura baja 0 5 grados La temperatura se puede regular desde los 7 a los 30 grados Una vez colocadas las pilas la pantalla LCD muestra tod...

Page 50: ...ana etc Presione tecla Stand by Modo confort Modo Standby Modo confort Presione tecla Stand by La programación de la temperatura en modo Noche no puede superar la temperatura de modo Confort Ejemplo programar la temperatura en modo Confort a 25 grados entrar en modo Noche e introducir la temperatura Cuando se alcancen los 25 grados si se sigue pulsando la tecla Más la temperatura no aumentará Modo...

Page 51: ...umo de energía de esta temperatura seleccionada 5 4 TIEMPO E INTRODUCCIÓN DEL PROGRAMMA En cualquier modo al presionar la tecla Reloj la fecha parpadea y puede introducirse el día actual mediante las teclas Más o Menos También se muestra el programa diario Al presionar la tecla Modo parpadeará la sección hora y puede introducirse la hora actual mediante las teclas Más o Menos Presionar de nuevo la...

Page 52: ...aparato Tomar las precauciones normales en el ámbito doméstico para evitar cual quier daño a personas y concretamente aquellas precauciones con respecto a niños y edad mínima de manipulación Normativa medioambiental Tratamiento de los aparatos eléctricos y electrónicos al final de su vida útil Este símbolo indica que el presente producto no puede ser tratado como los residuos domésticos Debe entre...

Page 53: ...ksymalnie wykorzystać grzejnik zalecamy uważne prze czytanie niniejszej instrukcji i zachowanie jej na wypadek potrzeby odwołania się do niej w przyszłości Dziękujemy za zakup OSTRZEŻENIA UWAGA Aby uniknąć przegrzania prosimy nie zakrywać urządzenia grzejnego Uwaga Gorące powierzchnie Caution hot surface UWAGA Niektóre części urządzenia mogą być bardzo gorące i spowodować oparzenia Należy zwrócić ...

Page 54: ...może być wystawiony na inten sywne lub przedłużające się działanie wilgoci prysz nic basen pływacki itp 2 INSTALACJA GRZEJNIKA 2 1 OSTRZEŻENIA WAŻNE Przed wykonaniem jakiejkolwiek konserwacji należyustawićpokrętłowpołożeniuWył umożliwiając całkowite ochłodzenie się urządzenia i odłączyć je od sieci Elastyczny kabel dostarczony z urządzeniem jest przeznaczony do podłączenia do sieci do skrzyn ki pr...

Page 55: ...rowniczy układ L brązowy Przewód sterowniczy czarny Napięcie Neutralny Przewód sterowniczy czarny L brązowy N niebieski lub szary Szwajcaria klasa I Europa klasa II WAŻNE Urządzenie nie może być instalowane ze skrzynką przyłączeniową umieszczoną nad nim UWAGA Przed wykonaniem jakiegokolwiek podłą czenia należy zawsze odłączyć zasilanie elektryczne wyłącznik automatyczny przewód sterowniczy UWAGA E...

Page 56: ...działał przez 2 godziny z maksymalną mocą a następnie powróci do trybu działania przed cyklem wzmocnienia mocy Boost Jeśli po ustawieniu chcemy zablokować klawiaturę należy nacisnąć i przytrzymać przycisk T6 przez 5 sekund będą słyszane 4 krótkie dźwięki potwierdzające aktywację blokady Po naciśnięciu innego dowolnego przycisku DIODA L6 mignie przez 2 3 sekundy wskazując że klawiatura jest aktualn...

Page 57: ...ięcie klawisza ON na pilocie grzejnik zmienia opcję sterowania z A na B Opcja obsługi B jest sygnalizowana ciągłym świeceniem się symbolu blokady panelu sterowania Przykłąd Grzejnik uruchomiono za pomocą ekranu dotykowego czyli w opcji sterowania A i przycisku T3 co odpowiada temperaturze 55 C Grzejnik został włączony do piero później i temperatura 23 C została potwierdzona w trybie Komfort Następ...

Page 58: ...ergii Tryby pracy Przycisk wzmoc mocy 2h Zegar Tryb programu Wskaźnik zablokowania Wskaźnik wykrywania otwarcia okna Tryb zegara Wskaźnik dzienny Taśmy przylepne Miejsce na klej 5 UŻYWANIE URZĄDZENIA ZE ZDALNYM STEROWANIEM 5 1 OPIS OGÓLNY Grzejniki Zehnder są wyposażone w pilota na podczerwień który umożliwia łączność systemu sterowania temperaturą w pomieszczeniu z czujnikiem i ustawianie różnych...

Page 59: ... ASC Tryb niedostępny w tym urządzeniu Tryby Komfort i Noc ustawianie temperatury w tych trybach Przejść do trybu Noc lub Komfort używając przycisków i do ustawie nia temperatury jedno naciśnięcie przycisku podwyższa temperaturę o 0 5 stopnia jednorazowe naciśnięcie przycisku obniża temperaturę o 0 5 stopnia Temperaturę można ustawiać w zakresie od 7 do 30 stopni Ustawianie dnia Ustawianie minut U...

Page 60: ...ryb Comfort Nastawa temperatury w trybie nocnym nie może być wyższa niż w trybie Komfort Przykład Jeśli ustawiono temperaturę w trybie Komfort 25 stopni po przełączeniu w tryb Noc i odczekaniu na zadaną temperaturę po osiągnięciu 25 stopni temperatura nie wzrośnie nawet po naciśnięciu przycisku Tryb Antifreeze ochrona przed zamarzaniem Przejść w tryb Ochrona przed zamarzaniem Antifreeze temperatur...

Page 61: ...danej temperaturze zie lony niski żółty średni czerwony wysoki 5 4 USTAWIANIE CZASU I PROGRAMU W każdym trybie po naciśnięciu przycisku zegara Chrono zacznie migać data użytkownik może wtedy ustawić aktualną datę używając przycisków i Będzie również wyświetlany dzienny program Po naciśnięciu trybu Mode zacznie migać godzina i użytkownik może wprowadzić bieżącą godzinę przy użyciu przycisków i Po p...

Page 62: ...aleceniami producenta W każdej innej sprawie dotyczącej gwarancji prosimy kontaktować się ze swoim instalatorem lub sprzedawcą Grzejniki i podgrzewane wieszaki do suszenia ręczników muszą być używane zgodnie z instrukcjami obsługi i konserwacji dostarczonymi z urządzeniem Stosować się do środków ostrożności w domu aby zapobiec urazom szcze gólnie w odniesieniu do dzieci które mogą mieć kontakt z u...

Page 63: ...ions techniques et d erreurs EN Subject to change without notice errors excepted DE Technische Änderungen und Irrtümer vorbehalten IT Con riserva di modifiche tecniche ed errori ES Sujeto a modificaciones técnicas y posibles errores PL Zastrzega się możliwość zmian technicznych i błędów ...

Reviews: