


4
Power
Red
Solid red for booting up process
Blue
Solid blue for booting up completion
Purple
Blink purple during: (a) firmware upgrade, (b) reset
button pressed for at least 5 sec to factory default.
Unlit
When reset button is pressed or when power off.
Power Mode
PoE Mode
Power Requirement
PoE (IEEE802.3af) with Class 3
Power Consumption
4.95 W
Adaptor Mode
Power Requirement
12V/1A Adaptor
Power Consumption
5.0 W
Install the hardware and connect all cables
A.
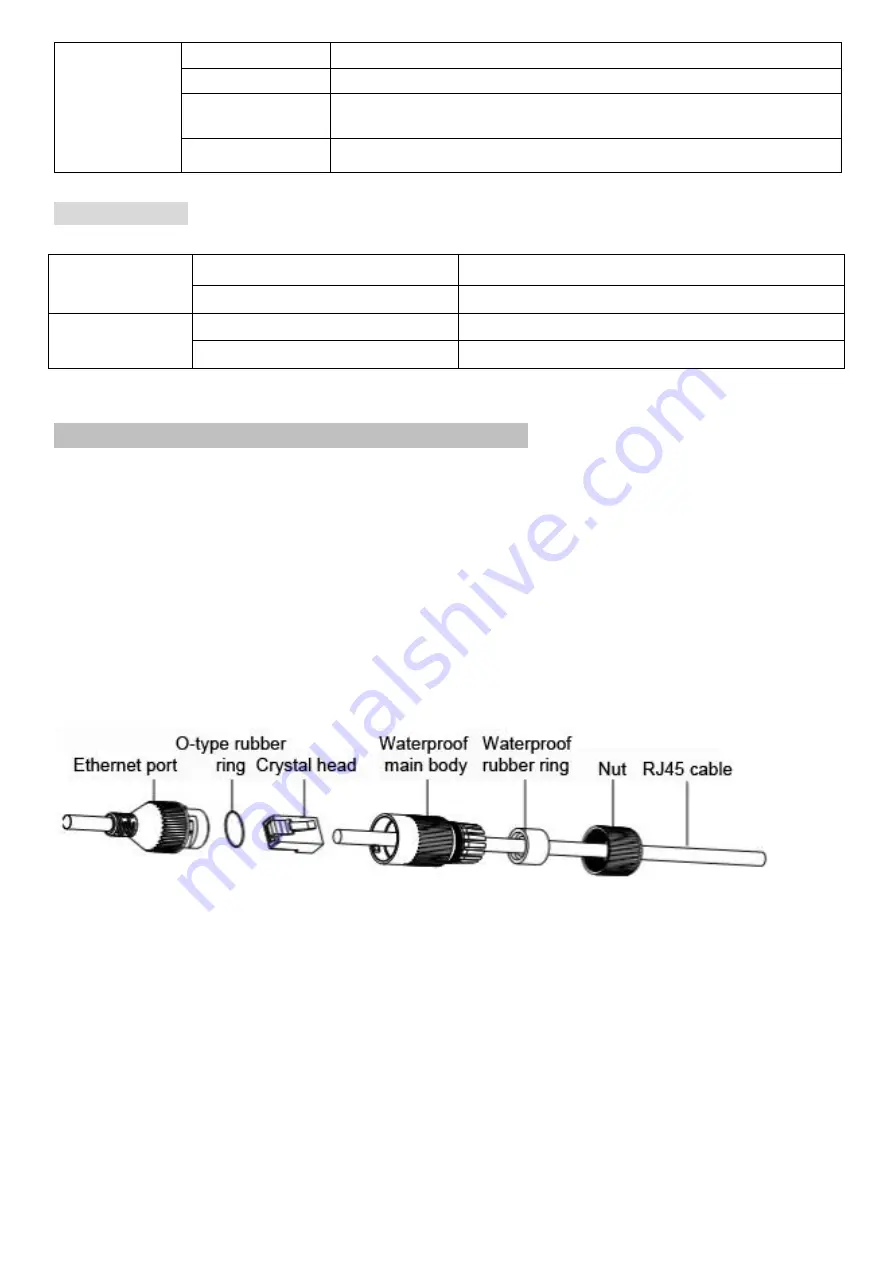
RJ45 waterproof connector
1)
Make sure all components are assembled as shown on the below graph.
2)
Check that the ethernet port and the waterproof main body are tightly fasten.
3)
Please use the supplied waterproof RJ45 connector and seal all connectors
tightly to avoid moisture.
B.
Wall and ceiling mounting
1)
Attach the alignment sticker to the wall/ceiling. Drill two holes into the wall -
two for screws and one for cable.
2)
Align the screw holes on the metal base to the two plastic anchors on the
wall/ceiling, insert the supplied screws to the hole and secure them.
Summary of Contents for D4220
Page 1: ...0 86085A5000030 ZAVIO Outdoor IR Mini Dome Quick Installation Guide...
Page 6: ...5...
Page 15: ...14 Application of IP Camera...
Page 16: ...15 Memo...


