background image

12

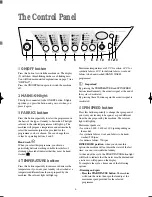
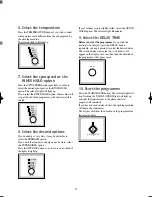
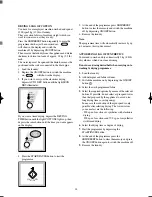
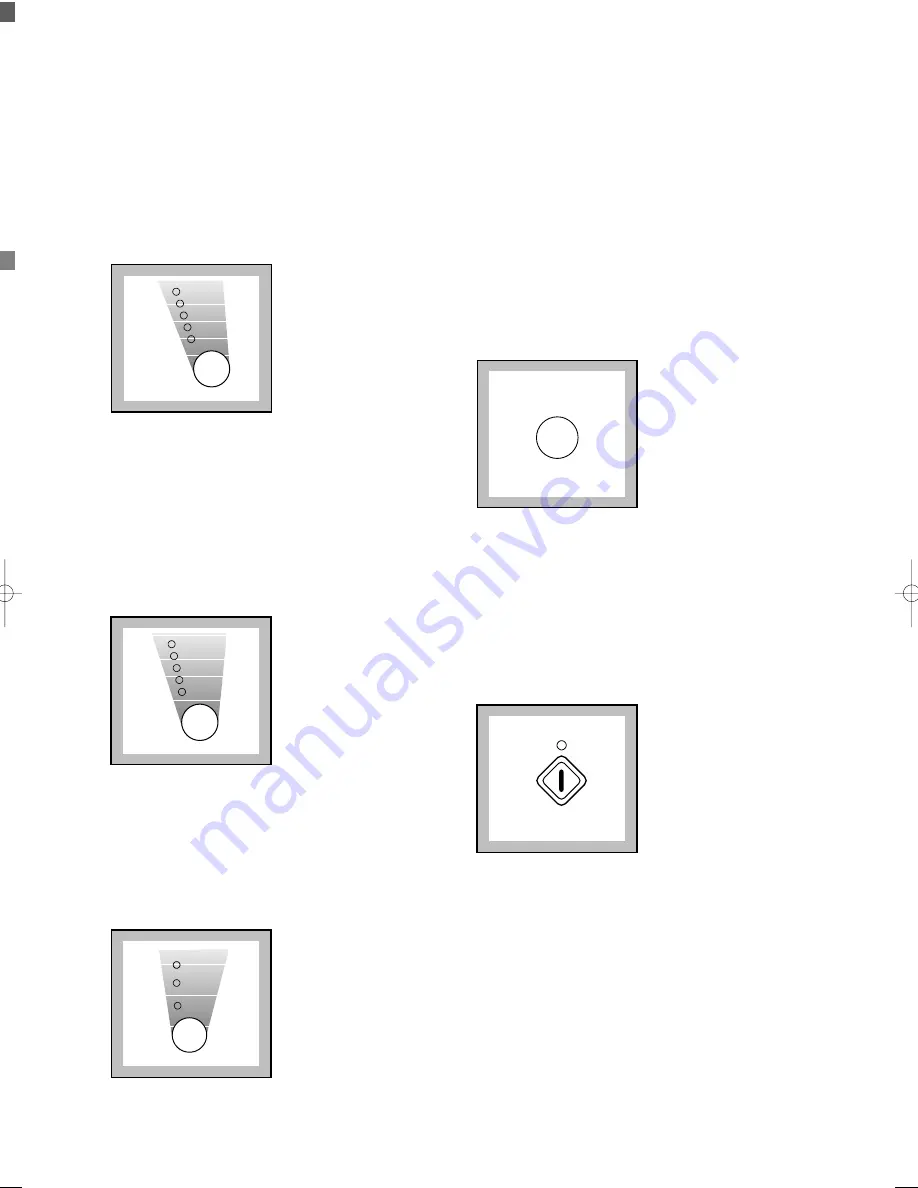
6. Select the temperature

Press the TEMPERATURE button if you wish to select
a temperature value different from the one proposed by
the washing machine. 
The relevant light will light up.

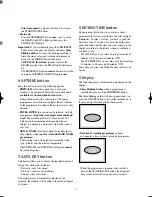
7. Select the spin speed or the

RINSE HOLD option

Press the SPIN SPEED button repeatedly, in order to
select the desired spin speed or the RINSE HOLD
option. The relevant light will light up.
If you select the RINSE HOLD option, the machine will
stop at the end of the programme with the water still in
the tub.

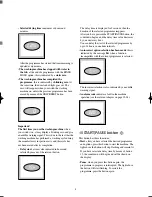
8. Select the desired options

If your laundry is very dirty, it may be advisable to
select the PREWASH option.
If you wish the laundry to undergo an extra rinse, select
the SUPER RINSE option.
Press the OPTIONS button so as to cause one or both of
the lights to light up.

OPTIONS

RINSE
QUICK

WASH

PREWASH
EXTRA

S PIN

S P EE

D

1600

1200

900

700

RINSE

HOLD

60°C

50°C

90°C

40°C

TE

M PERATU

RE

30°C

If your laundry is only slightly soiled, select the QUICK
WASH option. The relevant light illuminates.

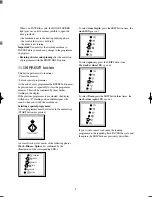
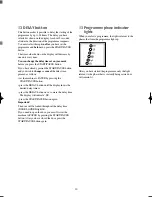
9. Select the DELAY TIME

Before you start the programme

, if you wish the

starting to be delayed, press the DELAY button
repeatedly, or keep it pressed, to select the desired delay.
The selected delay time value (up to 24 hours) will
appear on the display for 3 seconds, then the duration of
the programme will appear again.

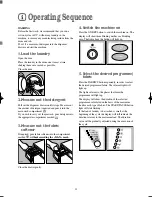
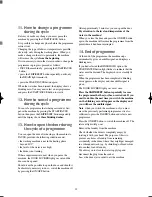
10. Start the programme

Press the START/PAUSE button. The relevant light will
stop flashing, the DOOR LOCKED light will light up,
and only the light relevant to the phase that is in
progress will remain lit.
If you have chosen a delayed start, the washing machine
will begin the countdown.
The display will show the duration of the programme or
the selected delay.

START/PAUSE

DELAY

132999022 WJS1265-1465-1665W.qxd  9/13/01  11:15 AM  Pagina  12    (Nero/Process Black pellicola)

Summary of Contents for WJS 1265 W

Page 1: ... C 1200 900 700 500 RINSE HOLD START PAUSE RESET DELAY WJS 1265 W SKIP EXTRA DRY STORE DRY IRON DRY COTTONS SYNTHETICS D RYING TIM E HAND WASH PREWASH EXTRA RINSE QUICK WASH FABRICS OPTIO NS SPIN SPE ED T EMPERATURE AUTO DRY 30 C COTTONS STORE DRY SYNTHETICS ON OFF INSTRUCTION BOOKLET 132999022 GB ...

Page 2: ...n in contact with volatile petroleum products should not be machine washed If volatile cleaning fluids are used care should be taken to ensure that the fluid is removed from the garment before placing in the machine Wash small items such as socks laces washable belts etc in a washing bag or pillow case as it is possible for such items to slip down between the tub and the inner drum Only use the ad...

Page 3: ...4 Autodrying 2 kg of synthetics 14 Washing and Drying Hints 15 Which detergent to use 16 And in which form 16 Wash Care Symbols 17 Washing Programmes 18 Drying Programmes 19 Maintenance and Cleaning 20 21 Descaling 20 After each wash 20 Maintenance wash 20 External cleaning 20 Cleaning the dispenser drawer 20 Cleaning the drawer recess 20 Cleaning the filter 20 The dangers of freezing 21 Something...

Page 4: ...htly soiled laundry A programme without prewash is sufficient for normally soiled laundry Try to load the maximum drying capacity of the machine as small loads are uneconomical Always load well spun laundry The higher the spin speed the lower the electricity consumption and the shorter the drying times In the interest of the environment Materials marked with the symbol are recyclable Check with yo...

Page 5: ...e light goes out the door can be opened see page 13 Detergent dispenser drawer Prewash Main wash Fabric softener C0063 SYNTHETICS DELICATES COTTONS WOOL 60 C 50 C 90 C 40 C 1200 900 700 500 RINSE HOLD START PAUSE RESET DELAY WJS 1265 W SKIP EXTRA DRY STORE DRY IRON DRY COTTONS SYNTHETICS D RYING TIME HAND WASH PREWASH EXTRA RINSE QUICK WASH FABRICS OPTIO NS SPIN SPE ED T EMPERATURE AUTO DRY 30 C C...

Page 6: ... Press this button to switch the machine on The display 9 will show three blinking dashes or a blinking zero You will find more detailed explanations on page 7 see DISPLAY Press the ON OFF button again to switch the machine off 2 MAINS ON light This light is connected to the ON OFF button It lights up when you press the button and goes out when you press it again 3 FABRICS button Press this button...

Page 7: ...duced according to the type of fabric and the selected temperature The PREWASH and QUICK WASH options cannot be selected together 7 AUTO DRY button This button allows you to choose the required degree of drying for cottons and synthetics Extra dry only for cottons Store dry cottons and synthetics Iron dry only for cotton The drying time is automatically adjusted by the machine the laundry will be ...

Page 8: ...utton 0 1 25 The delay time is displayed for 3 seconds then the duration of the selected programme reappears After you have pressed the START PAUSE button the countdown begins and the delay time value decreases by one unit every hour You can delay the start of the selected programme by up to 24 hours in one hour intervals An incorrect option selection has been made this is indicated by the message...

Page 9: ...med by three dashes flashing in the display If the previous programme is not cleared the display will show a 0 flashing and an audible signal will sound when you switch the machine on Selecting a special programme A wash programme must be selected in the normal way START button not pressed A normal wash cycle consists of the following phases Wash Rinses Spin and is confirmed by the illumination of...

Page 10: ...ay time proceed as follows set the machine to PAUSE by pressing the START PAUSE button press the DELAY button until the display shows the desired delay time or press the DELAY button once to erase the delay time The display will indicate 0h press the START PAUSE button again Important The door will be locked throughout the delay time DOOR LOCKED light lit If you need to open the door you must firs...

Page 11: ...arked without exceeding the MAX mark Close the drawer gently C0065 C0064 P0004 4 Switch the machine on Press the ON OFF button to switch the machine on The display will show three blinking dashes or a blinking zero The light above the button will light up 5 Select the desired programme fabric Press the FABRICS button repeatedly in order to select the desired programme fabric The relevant light wil...

Page 12: ...f the lights to light up OPTIONS RINSE QUICK WASH PREWASH EXTRA S PIN SPEE D 1600 1200 900 700 RINSE HOLD 60 C 50 C 90 C 40 C T EMPER ATU R E 30 C If your laundry is only slightly soiled select the QUICK WASH option The relevant light illuminates 9 Select the DELAY TIME Before you start the programme if you wish the starting to be delayed press the DELAY button repeatedly or keep it pressed to sel...

Page 13: ...olutely necessary to do so switch the machine off by pressing the ON OFF button After approximately 3 minutes you can open the door Pay attention to the level and temperature of the water in the machine When you close the door and press the ON OFF button again the machine will resume the programme from the point where it had been interrupted 14 End of programme At the end of the programme the mach...

Page 14: ...E DRY SYNTHETICS 5 At the end of the programme press SKIP RESET button to clear the memory and switch the machine off by depressing ON OFF button 6 Remove the laundry Note The programme time will automatically increase by up to 2 minutes this is quite normal AUTODRYING 2 KG OF SYNTHETICS You intend to wash and dry automatically 2 kg 4 4 lb of synthetics which do not need ironing Do not use a dosin...

Page 15: ...shops In some cases it may help to soak the stain before washing with a special pre soak product or biological detergent If you have used the machine to wash rinse or spin only non colour fast garments there may be dye left in the sump To ensure any subsequent wash is not contaminated with the dye select and carry out a rinse and spin programme without any garments to ensure that any dye is remove...

Page 16: ...shing machine washer dryer The liquid fabric softener should be poured into the compartment marked with the symbol Follow the manufacturer s dosage instructions and never exceed the MAX level Bounce conditioning sheets for use in a tumble dryer We recommend the conditioning sheets are pinned using a safety pin to an article of laundry and placed in the tumble dryer Which detergent To ensure you ob...

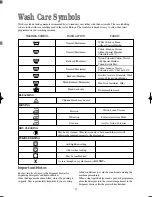
Page 17: ...ioner entering the machine prematurely When using liquid detergent and a prewash programme place the detergent into the correct compartment in the dispenser drawer after the prewash has finished 95 60 50 40 40 40 Chlorine bleach may be used May be tumble dried with high heat setting with low heat setting A cross through any symbol means DO NOT May be dry cleaned Other letters and or a bar beneath ...

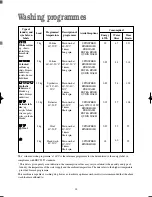
Page 18: ...WJS 1265 W RINSE HOLD PREWASH EXTRA RINSE QUICK WASH SPIN SPEED RINSE HOLD SPIN SPEED RINSE HOLD White cotton e g sheets tablecloths household linen Coloured cotton e g shirts blouses underwear towels house hold linen Synthetic fabrics and blends e g shirts blouses underwear Delicate fab rics e g acrylic fabrics viscose poly ester synthetic blends Wool 30 40 30 40 30 40 50 60 30 40 60 95 60 5 kg 5...

Page 19: ...fabric Cotton and linen towels T shirts bathrobes Max load 2 5 kg Spin speed 1200 Drying time mins 75 85 1400 70 80 1600 65 75 1 5 kg 1200 45 55 1400 40 50 1600 35 45 Synthetics and mixed fabrics jumpers blouses underwear household linen 2 kg 900 85 95 1 kg 900 55 65 Iron dry Suitable for ironing Cotton and linen sheets tablecloths shirts etc 2 5 kg 1200 55 65 1400 50 60 1600 45 55 1 5 kg 1200 35 ...

Page 20: ... the hottest cotton wash programme Use a normal measure of detergent must be a powder such as Ariel Futur External cleaning Clean the exterior cabinet of the appliance with soap and water only and then dry thoroughly Cleaning the dispenser drawer The washing powder and additive dispenser drawer should be cleaned regularly Remove the drawer by pressing the catch downwards and by pulling it out Flus...

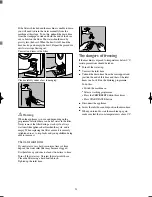
Page 21: ...e standpipe or sink and hold the end of the hose over a bowl on the floor The water should drain by gravity into the bowl When the bowl is full hook the hose back up and empty the bowl Repeat the procedure until water stops flowing out Unscrew and remove the filter Clean carefully under a fast running tap Warning When the appliance is in use and depending on the programme selected there can be hot...

Page 22: ...ilter in the inlet hose is blocked E10 The inlet hose may be squashed or kinked E10 The door has not been closed E40 The machine fills then empties immediately The end of the drain hose is too low The end of the drain hose is submerged in water There is no vent in the end of the drain hose The machine does not empty and or does not spin The drain hose may be squashed or kinked E20 The RINSE HOLD o...

Page 23: ...n filter is clogged E20 The machine is overloaded The selected drying time was not suitable for the laundry The machine vibrates when spinning The internal packing has not been removed The machine is in contact with the wall or furniture The machine is not level and stable check diagonally The washing load is badly distributed in the drum Maybe there is very little laundry in the drum Service Spar...

Page 24: ... of glass or plastic Costs incurred for calls to put right an appliance which is improperly installed or calls to appliances outside the United Kingdom Appliances found to be in use within a commercial environment plus those which are subject to rental agreements Products of Zanussi manufacture which are NOT marketed by Zanussi European guarantee If you should move to another country within Europe...

Page 25: ...nd OWN SALES Perth PH1 3AF SHETLAND 3 4 Carlton Place Lerwick Shetland OWN SALES ZE1 0PW SHETLAND Bolts Shetland 26 North Road Lerwick OWN SALES Shetland ZE1 0PE WHALSAY Leask Electrical Harisdale Symbister Whalsay OWN SALES Shetland ZE2 9AA NORTHERN IRELAND BELFAST Owenmore House Kilwee Business Park Dunmurry Belfast BT17 0HD WALES CARDIFF Unit 4 Guardian Industrial Estate Clydesmuir Road Cardiff...

Page 26: ... Enfield London EN3 7BB GRAVESEND Unit B4 Imperial Business Estate West Mill Gravesend Kent DA11 0DL IPSWICH Unit 6C Elton Park Business Centre Hadleigh Road Ipswich IP2 0DD LETCHWORTH 16 17 Woodside Ind Park Works Road Letchworth Herts SG6 1LA LONDON 2 4 Royal Lane Yiewsley West Drayton Middlesex UB7 8DL MAIDENHEAD Reform Road Maidenhead Berkshire SL6 8BY MOLESEY 10 Island Farm Avenue West Molese...

Page 27: ...DIMENSIONS Height 85 cm Width 60 cm Depth 58 cm POWER SUPPLY VOLTAGE 230 240 V 50 Hz TOTAL POWER ABSORBED 2050 W 10A Minimum 50 kPa WATER PRESSURE Maximum 800 kPa Washing LOAD CAPACITY Cotton linen 5 kg max 6 kg Synthetics 2 5 kg Delicate fabrics 2 5 kg Wool and Hand Wash 2 kg Drying Cotton linen 2 5 kg Synthetics 2 kg SPIN SPEED Maximum 1200 rpm WJS 1265 W 1400 rpm WJS 1465 W 1600 rpm WJS 1665 W ...

Page 28: ...e floor Your new washing machine has been designed to be permanently plumbed in to your home s water supply and drainage system However if this is not possible it may be connected to a suitable existing tap with the drain hose discharging into a sink The appliance has an inlet hose with female 3 4 BSP thread connector If this connection is not compatible with the plumbing of the existing installat...

Page 29: ... 38 mm 1 diameter standpipe 1 2 P1039 3 pin Max 90 cm 35 4 Min 60 cm 23 6 P0021 When discharging into a standpipe ensure that the top of the curve in the hose end is no more than 90cm 35 4 and no less than 60cm 23 6 above floor level The upright standpipe should have a minimum length of 30cm 12 from the bottom of the elbow to the top of the pipe see diagram Make sure that it is designed in such a ...

Page 30: ... should protrude a few centimetres beyond the edges of the machine Warning The machine should NOT be placed on deep pile carpeting Note Please ensure that when the appliance is installed it is easily accessible for the engineer in the event of a breakdown P1051 In the interest of the environment Washing machines and dishwashers should be connected to the FOUL drainage system the water will then be...

Page 31: ...ol or coloured green and yellow The wire coloured blue must be connected to the terminal marked N or coloured black GREEN YELLOW BROWN CORD CLAMP BLUE 13 A P1041 E N L Mod Prod No Ser No Mod Prod No Ser No P0042 The wire coloured brown must be connected to the terminal marked L or coloured red Upon completion there must be no cut or stray strands of wire present and the cord clamp must be secure o...

Page 32: ...he world s largest producer of powered appliances for kitchen cleaning and outdoor use More than 55 million Electrolux Group products such as refrigerators cookers washing machines vacuum cleaners chain saws and lawn mowers are sold each year to a value of approx USD 14 billion in more than 150 countries around the world ...

Reviews: