


13
CONFIDENTIAL
DOC-USR-0089-03
____________________________________________________________________________________
Z3 Technology, LLC
♦
100 N. 8th St. STE 250
♦
Lincoln, NE 68508-1369 USA
♦
+1.402.323.0702
RUNNING THE ENCODER
7.0
This section gives step-by-step instructions on using the Z3-AM572x-RPS to encode 720p video from an HDMI
video source to a PC media player. In addition to the Z3-AM572x-RPS, you will need the following:
A non- HDCP source with HDMI output
A computer mouse with a USB connection (wired or wireless will work)
A PC with VLC media player
The SDP file provided with your Z3 software release (see your customer support server account)
7.1
Set up the Video Source
(1)
Select an HD source with HDMI non-HDCP output (in Z3’s testing, the Brite-View BV-5005HD is used).
-Power on the HD Source.
-Connect HDMI to a monitor.
-Set the HD Source to 720p output.
-Select content you would like to stream.
If you see playback on the monitor, you’ve confirmed the source works.
7.2
Connect the Encoder
Connect the supplied 2.5 mm serial cable and gender changer to the serial console of the application
(1)
board and to your PC.
Take the HDMI cable connected to the monitor and now connect it to HDMI In on the board.
(2)
Connect an Ethernet cable to the board and a router or other DHCP server on the same network as
(3)
your PC. By default the Z3-AM572x-RPS is set to obtain an IP address through DHCP upon start up.
Connect the USB cable or wireless USB stick for your computer mouse to the USB 2.0 jack on the
(4)
application board. This will be used for configuration and control.
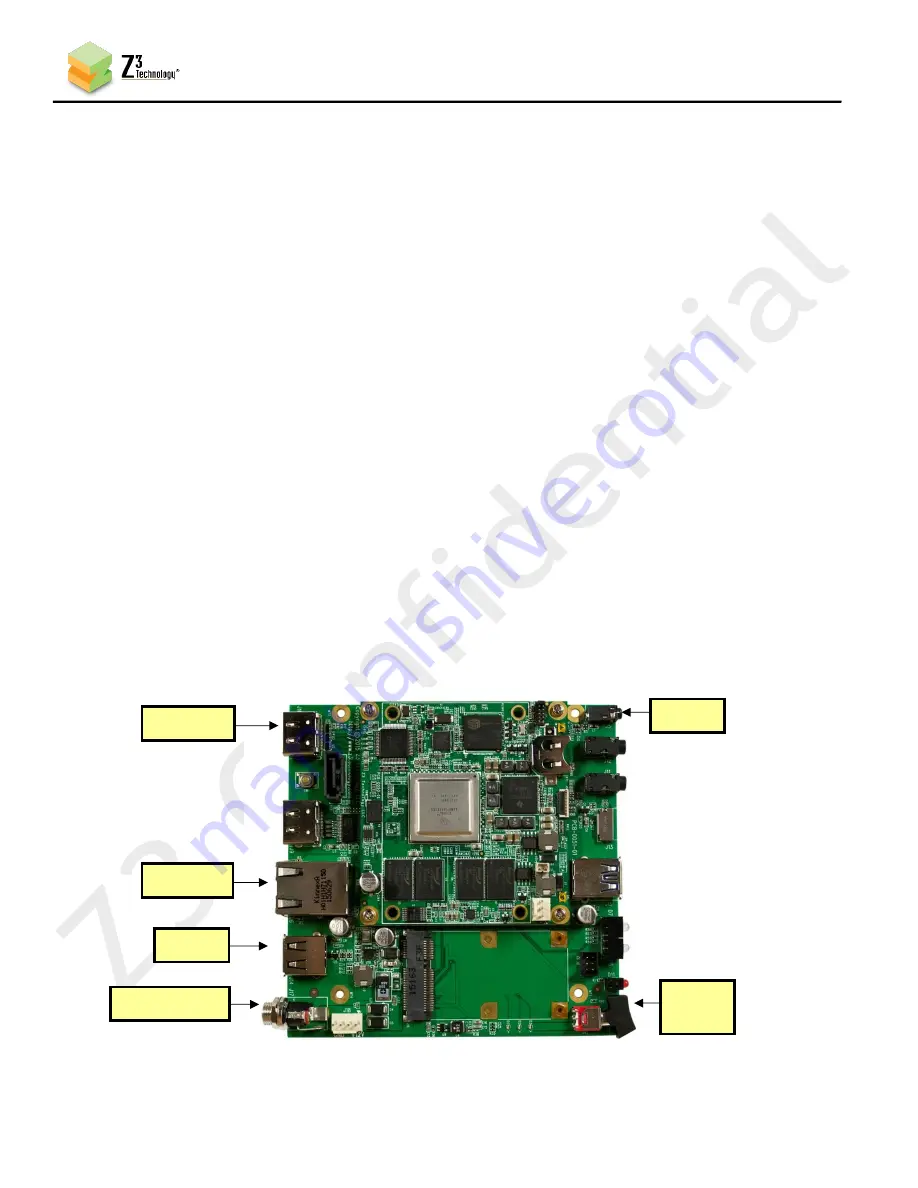
Figure 4 HDMI Encode Connections
Ethernet
+12V Power
Serial
Power
Switch
HDMI In
USB
2.0


