


37
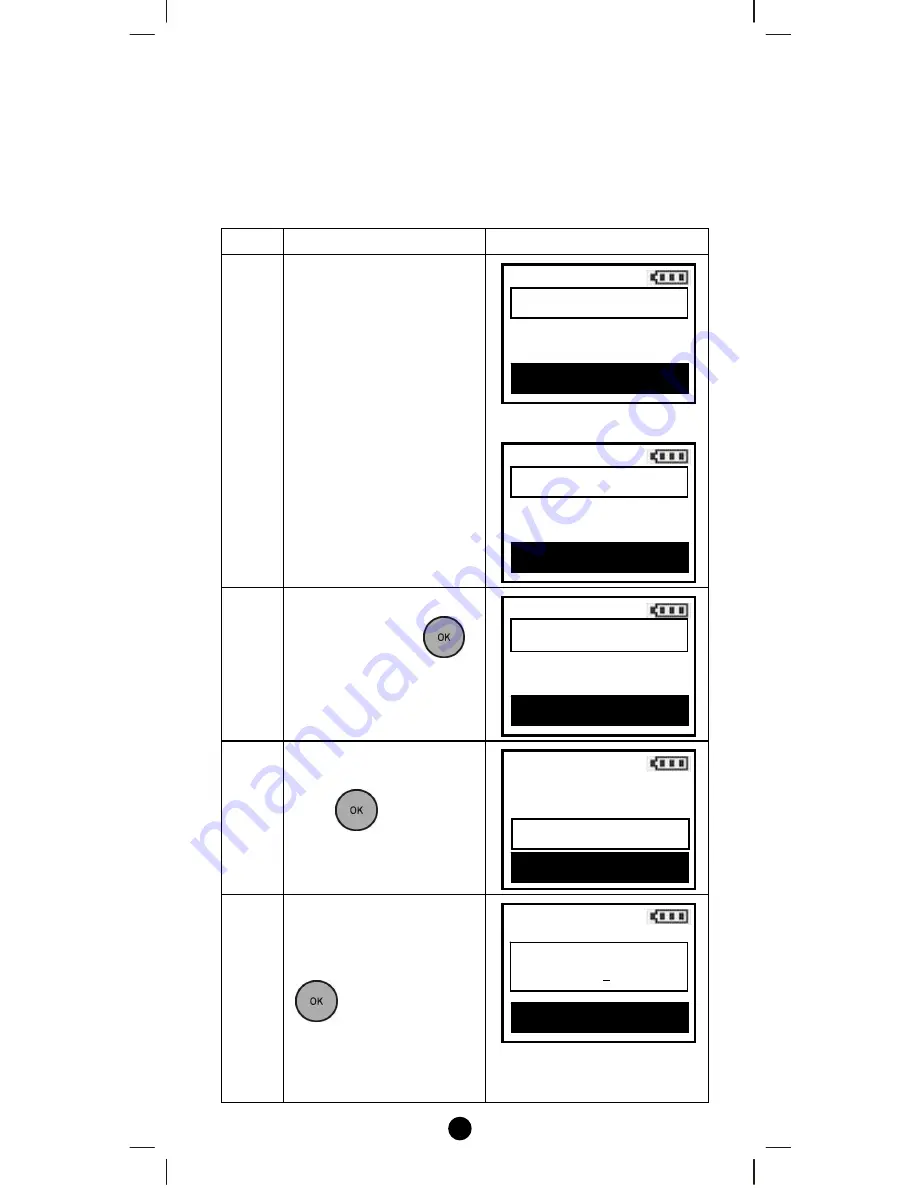
Change Device Configuration
This function is used to modify the parameter of the Z-Wave device via
the configuration command class.
Look up the Parameter No. and Parameter Value of the target device
from the device user manual before you start the below process.
Step
Setup Key
LCD Indication
1
Press and hold
ef
keys
simultaneously for 3
seconds under the Home
page.
⇓
2
Select
“
Advanced
Setup
"
and press
key.
3
Select
“
Configuration
"
and
press
key.
4
Use
cd
keys to change
your parameter number
and
ef
keys to select
number position, press
to save the setting.
Home
Device >
Scene
>
Comfort
>
OK to Enter
Setup
Add Device
>
Delete Device
>
Add to Scene >
OK to Enter
Setup
Advanced Setup
>
System Settings
>
About
>
OK to Enter
Advanced Setup
Learning Mode
Config. Assoc.
>
Configuration >
OK to Enter
Configuration
Parameter No(0-255)
000
OK to Save


