background image


Chapter 3 System Installation                                                                                                                Page 8 

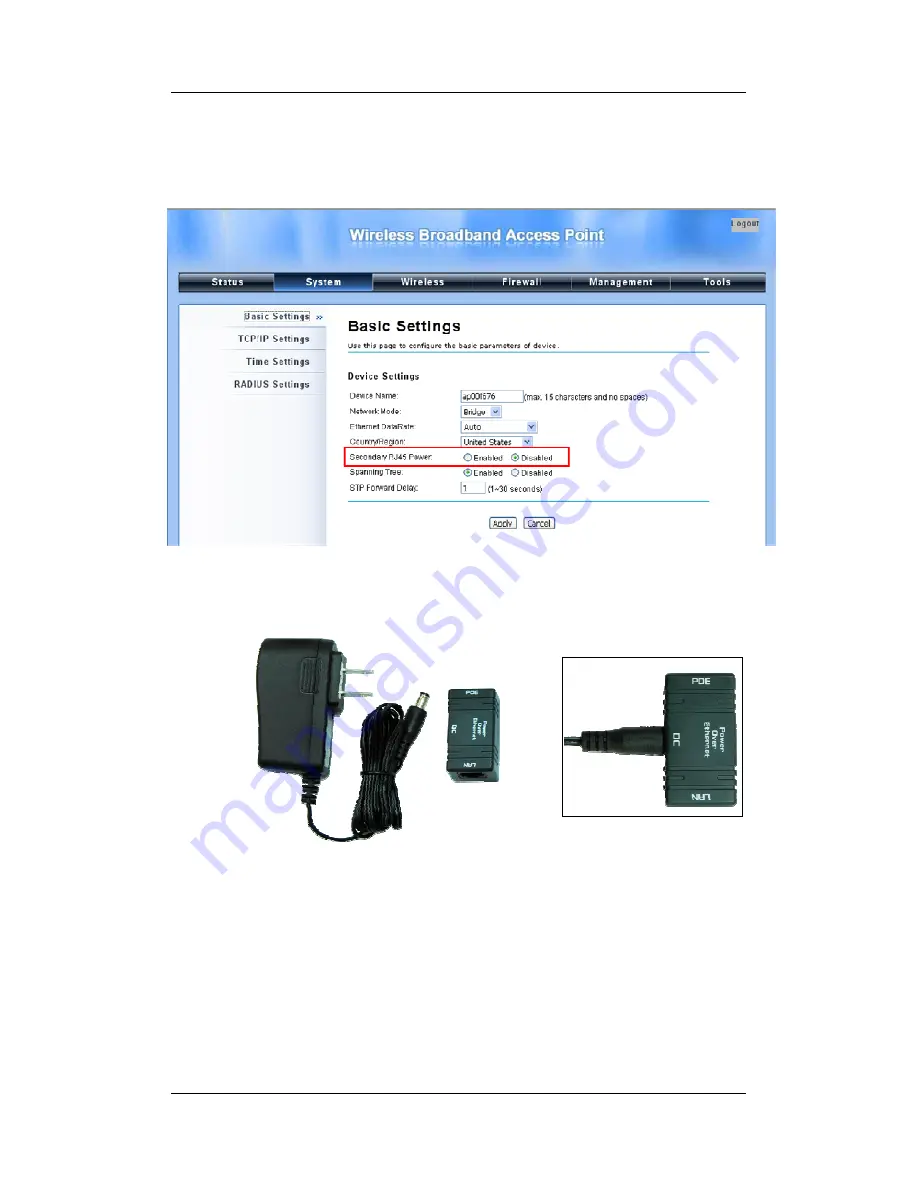
The secondary Ethernet port (labeled LAN 2) is for IP video integration.    To use it you 

need  to  enable  the  secondary  port  in  advance  before  connecting  with  the  IP  camera 

from the CPE’s Web Management as shown below. 


3. 

Take out the power cord and PoE injector from the gift box, and plug the power cord into 

the DC port of the PoE injector as the below picture shows. 


4. 

Put what  in the  Step.2 and Step.3  together  by  plugging the  other  side of the  Ethernet 

cable in the Step.2 into the PoE port of the PoE injector in the Step.3.    When you finish 

the Step.4, the set will be like the following picture: 

Summary of Contents for ZCN-1523H-5-16

Page 1: ...IEEE 802 11a n Wireless Outdoor CPE Quick Installation Guide V 2 0 July 2010...

Page 2: ...tten permission of the supplier About the Quick Installation Guide This Quick Installation Guide is intended to guide professional installer to install the IEEE 802 11a n Wireless Outdoor CP It covers...

Page 3: ...the access point the customer premises equipment CPE the WDS or the AP Repeater While being as the access point it can be deployed outdoors to provide outdoor wireless internet service In the other w...

Page 4: ...recautions 1 If you are installing the IEEE 802 11a n Wireless Outdoor CPE for the first time for your safety as well as others please seek assistance from a professional installer who has received sa...

Page 5: ...he CPE Use of other options will cause damage to the unit 3 Users MUST power off the CPE first before connecting the external antenna to it Do not switch from built in antenna to the external antenna...

Page 6: ...paration before Installation Page 6 Pole Mounting Ring Power cord PoE Injector Users MUST use the Power cord PoE Injector shipped in the box with the CPE Use of other options will cause damage to the...

Page 7: ...E 802 11a n wireless outdoor CPE is a movable cover Loosen the screw with a Philips screwdriver Grab the cover and pull it back harder to take it out as the figure shown below 2 Plug a standard Ethern...

Page 8: ...PE s Web Management as shown below 3 Take out the power cord and PoE injector from the gift box and plug the power cord into the DC port of the PoE injector as the below picture shows 4 Put what in th...

Page 9: ...Press the black PWR button beside the LAN 1 Ethernet port 6 Attach and fasten the removable cover to the bottom of the unit with the screw 7 Power on the IEEE 802 11a n Wireless Outdoor CPE by pluggin...

Page 10: ...below 1 Remove the two plugs as circled below 2 Connect your external antenna to the SMA type connectors at the bottom of the CPE Users MUST power off the CPE first before connecting the external ante...

Page 11: ...at you should unlock the pole mounting ring with a screw driver before putting it through the CPE as the following right picture shows 2 Mount the IEEE 802 11a n Wireless Outdoor CPE steadily to the p...

Page 12: ...port of PC in the other side Power on the CPE by PoE from PoE injector 1 Assign a static IP address to your PC which should be in the same network segment with the CPE As the default IP address of th...

Page 13: ...et each mode after successful log in AP Mode 1 Choose Wireless Basic Settings Then you will see the Wireless Basic Settings page The default is AP mode already Here you can set the parameters to optim...

Page 14: ...s page You may set the parameters like Network Authentication and Data Encryption for more secure network communication in your application Click Apply to save the parameters The following screenshot...

Page 15: ...nt from Wireless Mode and click Apply to save it Feel free to change the other parameters to optimize your application before clicking Apply Note For longer transmission of the CPE you may also use an...

Page 16: ...16 2 Click Site Survey and a Wireless Site Survey window will pop up The window lists all the available access points routers in the wireless network Select the one you prefer to connect to and click...

Page 17: ...n Page 17 3 If the AP you connect to needs authentication or password click Security Settings in the left column fill out the corresponding items and click Apply to build the connection otherwise the...

Page 18: ...of the connection is bad or unstable after choosing an available access point to connect to How can I solve it A Since the CPE comes with the built in directional antenna you should turn the unit to f...

Reviews: