background image

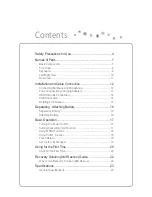
Contents

Safety Precautions for Use................................................. 4

Names of Parts................................................................... 7

%DVLF&RPSRQHQWV

..........................................................................7

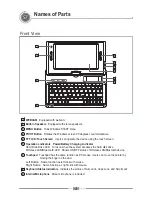
Front View .......................................................................................8
Keyboard .........................................................................................9

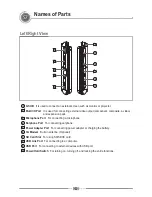
/HIW5LJKW9LHZ

..............................................................................10

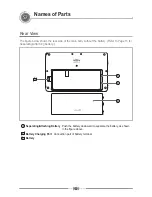
5HDU9LHZ

..................................................................................... 11

Installation and Cable Connection.................................... 12

Connecting Earphone and Microphone.........................................12

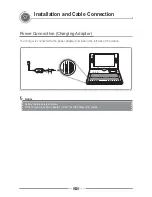
3RZHU&RQQHFWLRQ&KDUJLQJ$GDSWRU

..........................................13

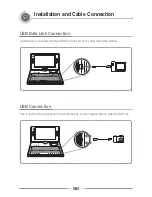
86%'DWD/LQN&RQQHFWLRQ

............................................................14

86%&RQQHFWLRQ

............................................................................14

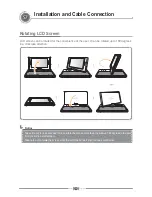
5RWDWLQJ/&'6FUHHQ

....................................................................15

Separating ·

$WWDFKLQJ%DWWHU\

.......................................... 16

6HSDUDWLQJ%DWWHU\

.........................................................................16

$WWDFKLQJ%DWWHU\

...........................................................................16

%DVLF2SHUDWLRQ

................................................................ 17

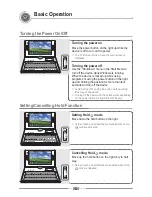
7XUQLQJWKH3RZHU2Q2II

..............................................................17

Setting/Cancelling Hold Function ..................................................17
Using MENU Function .................................................................18

8VLQJ3,927)XQFWLRQ

..................................................................18

Touch Screen ................................................................................18
Set Up for villv Manager ..............................................................19

Using for the First Time .................................................... 20

Using for the First Time .................................................................20

5HFRYHU\6ROXWLRQ$0,5HVFXH*XLGH

........................... 22

:D\WR8VH5HFRYHU\6ROXWLRQ$0,5HVFXH

...............................22

6SHFL¿FDWLRQV

................................................................... 23

*HQHUDO6SHFLILFDWLRQV

..................................................................23

Summary of Contents for Viliv S7

Page 1: ...S7 This guide may be changed for product improvement without prior notice User s Manual Mobile Internet Device...

Page 2: ...Thanks for purchasing viliv Please read the precautions throughly before using the product...

Page 3: ...ies for the infringement of copyright or intellectual property rights from the use of this device lie with the user Improper Use The manufacturer of this device is not liable for any damage or imprope...

Page 4: ...WLRQ 14 86 RQQHFWLRQ 14 5RWDWLQJ 6FUHHQ 15 Separating WWDFKLQJ DWWHU 16 6HSDUDWLQJ DWWHU 16 WWDFKLQJ DWWHU 16 DVLF 2SHUDWLRQ 17 7XUQLQJ WKH 3RZHU 2Q 2II 17 Setting Cancelling Hold Function 17 Using ME...

Page 5: ...XPLG SODFH VXFK DV D EDWKURRP Keep the device away from credit cards bankbooks or a communication ticket R QRW XVH DFFHVVRULHV WKDW DUH QRW SURYLGHG ZLWK WKLV GHYLFH R QRW WRXFK WKH VFUHHQ ZLWK D VKDU...

Page 6: ...XSSOLHG RU DQ DSSURYHG DQWHQQD 8QDXWKRUL HG DQWHQQDV PRGL FDWLRQV RU attachments could impair call quality damage your S7 or result in violation of FCC regulations 6 ZDV WHVWHG IRU W SLFDO ERG ZRP RSH...

Page 7: ...SUHYHQW HOHFWURPDJQHWLF SUREOHPV RU RWKHU GDQJHUV WXUQ RII WKH OXHWRRWK VHWWLQJ ZKHUHYHU WKH XVH RI OXHWRRWK LV LQKLELWHG If you use a certain medical device such as a pacemaker or a hearing aid ask...

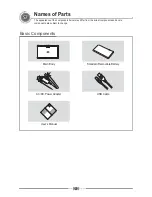
Page 8: ...e 7 English MID Names of Parts The appearance of the components below may differ from the actual components and some components are subject to change DVLF RPSRQHQWV 0DLQ RG 3RZHU GDSWHU User s Manual...

Page 9: ...ndicators 3RZHU DWWHU KDUJLQJ QGLFDWRU Hard Disk Drive LED Turns on when the system accesses the hard disk drive LUHOHVV 1 OXHWRRWK 6KRZV 21 2 VWDWXV RI LUHOHVV 1 OXHWRRWK GHYLFH Touchpad Touchpad has...

Page 10: ...ally used for terminating or interrupting programs DSV RFN H English characters will be in upper case when entered with Caps Lock light on Pressing this key one more time will turn off the light This...

Page 11: ...FRPSRVLWH V YLGHR DQG H SDQVLRQ SDFN 0LFURSKRQH 3RUW For connecting a microphone Earphone Port For connecting earphone 3RZHU GDSWHU 3RUW For connecting power adapter or charging the battery 0RGHP XLOW...

Page 12: ...H JXUH EHORZ VKRZV WKH UHDU VLGH RI WKH PDLQ ERG ZLWKRXW WKH EDWWHU 5HIHU WR 3DJH IRU 6HSDUDWLQJ WWDFKLQJ EDWWHU 6HSDUDWLQJ WWDFKLQJ DWWHU Push the battery downward to separate the battery as shown LQ...

Page 13: ...LRQ DQG DEOH RQQHFWLRQ RQQHFWLQJ DUSKRQH DQG 0LFURSKRQH Connect earphone and microphone to the ports located on the left of the device KHQ FRQQHFWLQJ H WHUQDO VSHDNHUV EH VXUH WR FRQQHFW WKH VWDQGDUG...

Page 14: ...ID QVWDOODWLRQ DQG DEOH RQQHFWLRQ 3RZHU RQQHFWLRQ KDUJLQJ GDSWRU The charger is connected to the power adapter terminal on the left side of the station DWWHU FKDUJLQJ VWDWXV LQGLFDWRU KLOH FKDUJLQJ XV...

Page 15: ...glish MID QVWDOODWLRQ DQG DEOH RQQHFWLRQ 86 DWD LQN RQQHFWLRQ 86 FDEOH LV FRQQHFWHG WR WKH 86 DWD LQN SRUW RQ WKH ULJKW VLGH RI WKH VWDWLRQ 86 RQQHFWLRQ 7KLV LV XVHG IRU WKH FRQQHFWLRQ RI H WHUQDO GHY...

Page 16: ...WDWHG IRU WKH FRQYHQLHQFH RI WKH XVHU W FDQ EH URWDWHG XS WR GHJUHHV in a clockwise direction 7DNH FDUH QRW WR XVH H FHVVLYH IRUFH WR URWDWH WKH VFUHHQ PRUH WKDQ WKH DOORZHG GHJUHHV RWKHUZLVH it may r...

Page 17: ...UH EHORZ 5HPRYH WKH EDWWHU WWDFKLQJ DWWHU Align the battery in the groove and press it down until a clicking sound is heard Separate the charger after turning the power of the station off If not you m...

Page 18: ...tivated DQFHOOLQJ ROG mode Move up the hold button on the right only to half way Screen touch and all buttons are enabled when Hold Z mode is released Turning the power off Use the Shutdown menu in th...

Page 19: ...ct as a right click Double Touch It has the same effect as a double click of a PC mouse Touch the desired location twice consecutively Drag Touch the desired location move to the desired ORFDWLRQ ZKLO...

Page 20: ...ction 4 Windows Booting Option 2 OZD V VWDUW ZLWK 2 VWDWXV 2 Last Status Start with the last status 21 OZD V VWDUW ZLWK 21 VWDWXV 5 ULJKWQHVV RI Adjust by status bar or button 6 Setting Vibration 1R 8...

Page 21: ...s Please wait until the installation is complete Along with the start of Microsoft Windows XP Home the preparation screen for starting LQGRZV DSSHDUV DV LQ WKH IROORZLQJ JXUH The Windows start screen...

Page 22: ...xt The screen showing completion of the installation process appears Click next The installation of Microsoft Windows XP Home is complete Please wait for a moment The screen for Windows wallpaper will...

Page 23: ...WKH UHFRYHU RI 26 I WKH SURFHVV RI 26 UHFRYHU LV FRPSOHWHG D PHVVDJH WKDW FRQ UPV WKH VXFFHVVIXO UHFRYHU LV GLVSOD HG 3DUWLWLRQ RQ GLVN ZDV VXFFHVVIXOO UHVWRUHG If you press OK button the system is bo...

Page 24: ...66 1 IEEE 802 11b g Bluetooth OXHWRRWK 9HU 5 RQQHFWRU XGLR 0LF 86 86 LQN 0XOWL 2 6 6 6ORW 9 XGLR Stereo speakers Battery LWKLXP 3RO PHU 5HPRYDEOH Voltage 7 4V Capacity 4 700mAh Dimension 7 PP OS Wind...

Page 25: ...S7 MobileIn t e r n e t D e v i c e 24 English MID 0HPR...

Page 26: ...Rev 1 0...

Reviews: