


21
YT-1000/1050 series
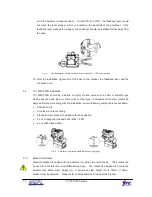
5. After setting fork lever position, assemble lock nuts
which are located on the bottom of the fork lever.
Ensure to set the height of the upper fork lever
between
6~11mm
, which is lower than the upper
bracket’s height.
6. Attach the positioner to the bracket. Fix the
clamping pin on the main shaft’s center of the
positioner and insert connection pin into the fork
lever slot. This will lock to the fork lever spring.
Setting alignment of the main shaft of the positioner
and center of the actuator’s stem is very important.
Poor alignment of the main shaft and the actuator’s
stem decreases the positioner’s durability due to
unnecessary forces on the main shaft.
7. Tighten the positioner and the bracket with hexagon-headed bolts and plate washer
after
checking the positioner’s position.
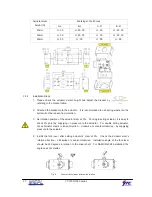
4. Connections
4.1
Safety
Supply pressure should be clean and dry air – avoiding moisture, oil or dust.
Always recommended to use air filter regulator (i.e. YT-200 series).
Young Tech Co., Ltd
has not tested positioner’s operation with any other gases
other than clean air. Please contact Young Tech Co., Ltd for any questions.
4.2
Supply Pressure Condition
Dry air with at least 10
℃
lower than ambient temperature.
Avoid from dusty air. Positioner’s inner filter can only filter 5 micron or larger.
Avoid oil.
Comply with ANSI/ISA-57.3 1975(R1981) or ISA S7.3-1975(R1981).
Supply pressure range is 1.4 ~ 7 kgf/cm
2
(140-700 kPA)
Set air filter regulator’s pressure level 10% higher than actuator’s spring range pressure.
4.3
Piping Condition
Ensure inside of pipe is clean of obstructions.
Do not use pipeline that is squeezed or shows any type of damamges.
Summary of Contents for YT-1000L
Page 1: ...Electro Pneumatic Positioner PRODUCT MANUAL YT 1000 1050 SERIES VERSION 1 01...
Page 7: ...7 YT 1000 1050 series 2 4 2 YT 1000R...
Page 8: ...8 YT 1000 1050 series 2 4 3 YT 1050...
Page 11: ...11 YT 1000 1050 series 2 6 Parts and Assembly 2 6 1 YT 1000 1050L 2 6 2 YT 1000 1050R...
Page 12: ...12 YT 1000 1050 series 2 6 3 YT 1000L SPTM Internal 2 6 4 YT 1000R SPTM Internal...
Page 13: ...13 YT 1000 1050 series 2 6 5 YT 1000R L S Internal 2 6 6 YT 10000R SPTM L S Internal...
Page 16: ...16 YT 1000 1050 series 2 7 8 YT 1050L 2 7 9 YT 1050R...