5120416-XIM-C-0216
Johnson Controls Unitary Products
47
When the "Cancel" button is pressed multiple times to exit each menu level and the screen returns to the first "Status, Alarms" dis-
play the next demonstration can begin. In this demonstration the information below steps through the "Commissioning" menu.
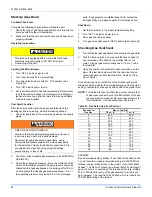
Step 1-
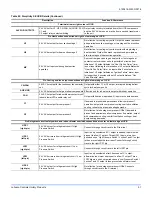
Beginning at the status/alarm screen toggle the joystick down three times. This accesses
the “Commissioning “ screen. In this menu section various settings can be changed. Please see
WKH8QLW&RQWURO%RDUGPHQXIRUDOLVWRISDUDPHWHUVWKDWFDQEHPRGL¿HG
ENTER
CANCEL
JOY +
-
C PWR
7
7
7 7
T
>Status
Alarms
Joy
S
tick Dow
n
ENTER
CANCEL
JOY +
-
C PWR
7
7
7 7
T
Status
>Alarms
Joy S
tick Dow
n
ENTER
CANCEL
JOY +
-
C PWR
7
7
7 7
T
Alarms
>Summary
Joy
S
tick Dow
n
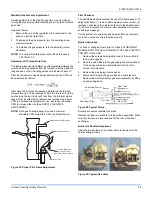
Step 2-
Once commission
appears next to the cursor,
press “ENTER” to begin
viewing parameters.
ENTER
CANCEL
JOY +
-
C PWR
7
7
7 7
Summary
>Commisn
Step 3-
After “ENTER”
is pressed the various
parameter sections
appear, such as: HVAC
zone, Indoor Fan, Clg,
Htg, Econ and others.
ENTER
CANCEL
JOY +
-
C PWR
7
7
7 7
>HVAC Zone
Indoor Fan
T
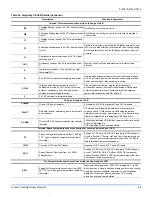
Step 4-
After toggling the
joystick down two times
“Clg” appears. This allows
items, such as lead-lag and
OCC/UNOCC cooling set
points, to be changed.
ENTER
CANCEL
JOY +
-
C PWR
7
7
7 7
Indoor Fan
>Clg
T
Joy S
tick Dow
n
2
Step 5-
At the “Clg” screen
once “ENTER” is pushed the
status indicates if cooling
is engaged/disengaged
and lead-lag is engaged/
disengaged.
ENTER
CANCEL
JOY +
-
C PWR
7
7
7 7
Clg-Engaged
LeadLag-Engaged
Press Enter
Joy S
tick Dow
n
2
Step 6-
By toggling down
twice the screen reaches
the “ClgOcc-SP” screen
or “Cooling Occupied Set
Point”.
ENTER
CANCEL
JOY +
-
C PWR
7
7
7 7
LeadLag-Engaged
>ClgOcc-SP
Press Enter
T
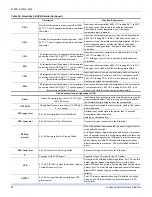
Step 8-
In order to change set points push the
toggle switch left or right. Note: The screen
ÀDVKHV/HIWGHFUHDVHVWKHYDOXHULJKW
increases. In this demonstration the ClgOCC
setpoint is changed from 72F to 95F.
Screen Will
Flash
Toggle Left to Decrease
Toggle Right to Increase
a
a
DOWN UP
a
a
Step 9-
The joystick was toggled right
to increase the set point temperature.
7KHVFUHHQÀDVKHVZKHQLQWKH
change mode. Once the desired
set point/value is reached press the
““ENTER”” button to save the value.
Step 7-
After pressing “ENTER” at
the “ClgOCC-SP” screen the space
temperature set point appears. NOTE:
Only applies to units controlled by a
space sensor.
ENTER
CANCEL
JOY +
-
C PWR
7
7
7 7
ClgOcc-SP
95 F
ENTER
CANCEL
JOY +
-
C PWR
7
7
7 7
ClgOcc-SP
72 F
127(,)23(5$7,1*7+((48,30(17:,7+$7+(50267$77+(8&%6(732,176$1'3$5$0(7(566+28/'127
5(48,5($/7(5$7,21+2:(9(57+(5(0$<%(7+(&$6(:+(5(0,1,0802876,'($,5/($'/$*2527+(5
&867206(77,1*6$5(5(48,5('3/($6(5($'7+,6'2&80(17,1'(7$,/7281'(567$1'7+(,03/,&$7,2162)
0$.,1*&+$1*(6%()25(352&((',1*,7,667521*/<5(&200(1'('7+$7$%$&.832)3$5$0(7(56(77,1*6
%(6$9('21$86%'5,9(%()25(0$.,1*$1<0$-25&+$1*(6727+(&21752/
These few pages provide a simple demonstration how to navigate the menu’s of the Simplicity SE control containing
9HUVLRQ¿UPZDUH3OHDVHXWLOL]HWKLVGRFXPHQWDORQJZLWKWKHDGGLWLRQDOLQIRUPDWLRQLQWKH8VHUV*XLGHDQGGHWDLOHG
QDYLJDWLRQPHQXWRDGMXVWWKHFRQWUROWRFXVWRPHUSUHIHUHQFHVRUMREVSHFL¿FDWLRQV

