PAGE 3
MAXA-MI$ER
Ô
UNITARY ENERGY RECOVERY VENTILATOR
MODEL VR011A12H & B12H (STATIONARY)
INSTALLATION
INSTRUCTIONS
5257541-UAI-A-0616 / R11A-29YSDW
Figure 8
Figure 9
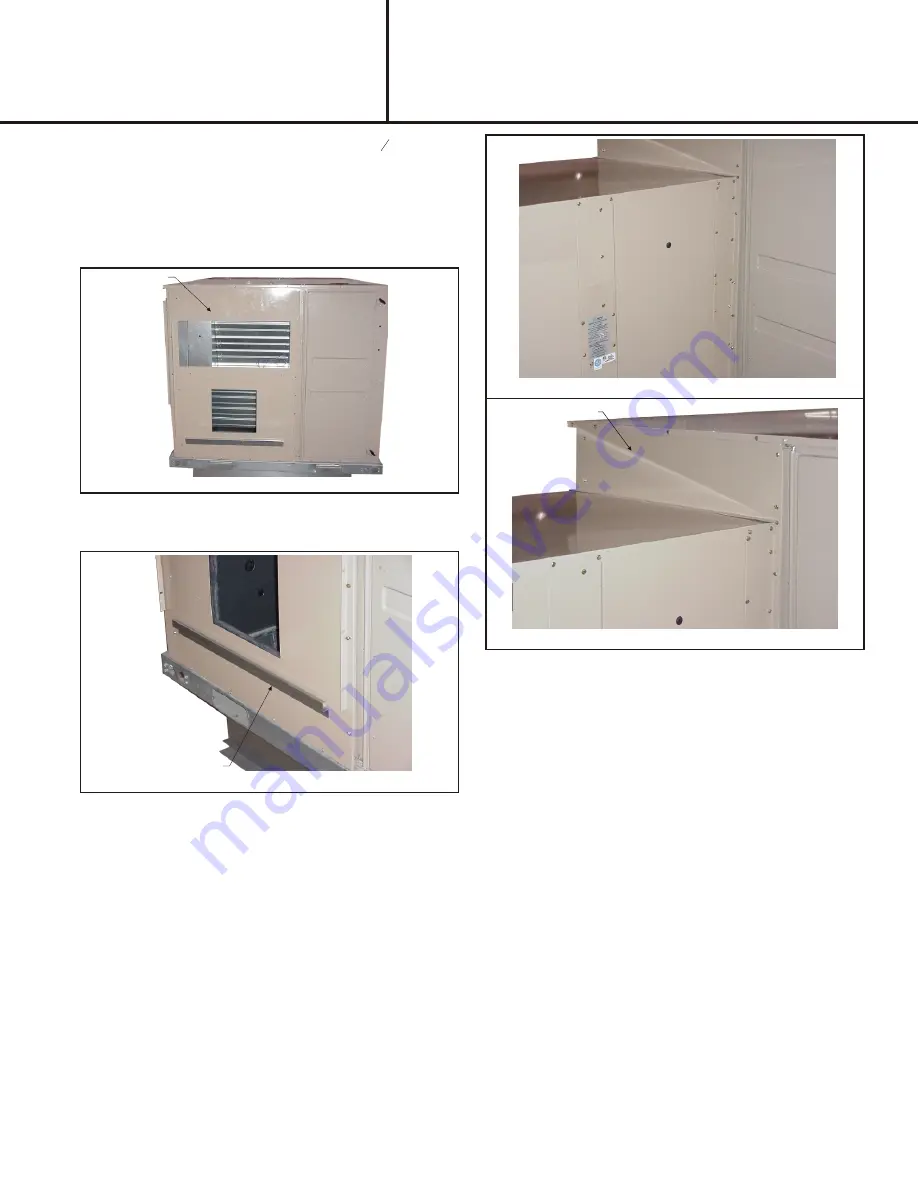
TOP FILLER PANEL
Figure 7
PLATFORM SUPPORT RAIL
ADAPTOR
Figure 6
11. Locate the provided adaptor panel. Apply
1
8
" gasket to
the perimeter of the panel to seal the contact between
the UERV and the RTU. Install the adaptor panel on
the RTU replacing the return air access panels
removed earlier and secure with provided screws,
screw holes will line up. (VR011A12H may also
require a filler panel installed after the UERV).
See
Figure 6.
12. Secure the platform support rail to the bottom of the
adaptor panel using the provided screws.
See Figure
7.
13. Lift the UERV at least 3' (feet), remove the 4 screws
holding each leg to its guide and pull out the legs.
Reinsert each leg from the bottom with the flat foot
under the unit then reinsert one of the screws to hold it
in place. Do not insert other screws at this time as the
legs will have to be adjusted once the unit is finally set
in place.
14. Position the UERV in front of the return air section of
the rooftop unit, line up the UERV with the adaptor
panel.
See Figure 8.
15. Lower the UERV on to the platform support rail, then
secure the UERV to the adaptor panel using the
provided screws.
16. On units requiring a top filler panel install panel by
tucking the top of the panel under the top of the RTU
and angling in so that the bottom of the panel covers
the top flange of the UERV. Secure with provided
screws.
See Figure 9.
Note: An equipment support or pressure treated
2x6x48" piece of wood should be placed under the
end of the UERV to prevent roof penetration by the
standoff legs.
17. Remove the screw placed in the standoff legs in
Step
13
and adjust the legs on the UERV so that it is level.
Insert all 4 screws into each leg so that the legs are
secure and the UERV sits in a leveled position.
18. Check along the edges where the UERV meets the
adaptor panels and where the adapter panels meet
the RTU and seal where necessary. There should be
no air leakage and the final UERV assembly should be
weather tight. Final assembly should resemble
Figure
10
.
19. On the UERV open the access panel on the right side
of the name plate.
20. Connect the wiring harness to the 3 prong connector
located near the bottom of this access panel on one
end and the "ex-fan" and "com" connectors on the
other.
21. Once high voltage connections are complete and unit
is ready to start, power RTU and UERV and program
SE controller to run the UERV.


