background image

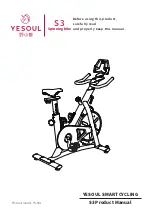
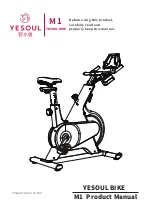
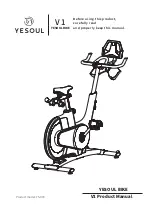
C1H

Before using this product,
carefully read
and properly keep this manual.

YESOUL Bike

Product model: YS-BC1

C1H Product Manual

YESOUL Bike

Summary of Contents for C1H

Page 1: ...C1H Before using this product carefully read and properly keep this manual YESOUL Bike Product model YS BC1 C1H Product Manual YESOUL Bike...

Page 2: ...de Power supply Connection mode of sensing system Height limit Rated maximum load Net weight Gross weight Overall dimensions Maximum tablet width 10 1 inch IOS 10 0 or higher Android 5 0 or higher Mag...

Page 3: ...tight tting sportswear and sports shoes and tighten foot straps to avoid injury caused by pulling or entanglement by this product 12 Never use this product with inappropriate shoes or barefoot 13 Inco...

Page 4: ...me Quantity Picture Installation Guide List of Parts Frame Handlebar assembly Pedal set left right Tablet mobile phone holder Front tube Rear tube Head tube 2 hexagon socket button head screw M8 45 wa...

Page 5: ...rative cover Cross round head self drilling screw 4 2 16 Hexagon socket button head screwM6 30 Hexagon socket button head screw M8 12 Bottle holder In order to facilitate assembly some accessories hav...

Page 6: ...Installation Guide List of Parts Installation Guide STEP 2 Installation of bottom tube Washer 1 Take L type cross head hex wrench 6 A out of the ziplock bag 2 Remove four hexagon socket button head sc...

Page 7: ...of the tube of bike frame and then tighten by hand turning the handle to the right 2 Take seat out of the ziplock bag 3 Place the seat onto the seat post and tighten with the provided open ended wren...

Page 8: ...ead tube and align it with the mounting hole of the frame with the other hand First loosen the handle until the head tube can be inserted 2 Insert the head tube into the frame and keep the scale paral...

Page 9: ...agon socket button head screw into the red hole without tightening Insert the mobile phone holder into the round hole of the hand as indicated by the arrow Align the holes correctly and manually rotat...

Page 10: ...the tablet holder with the provided hex wrench 4 D Hex wrench 4 D Note Tighten the screws M6 10 with the hex wrench 4 D otherwise the bike may shake during riding 3 Insert the tablet mobile phone hold...

Page 11: ...5 The illustrations of pedals may di er from the actual product Please refer to the actual product Open ended wrench C Screw the pedal into the crank manually rst and then tighten the pedal assemblie...

Page 12: ...ly tighten the two Phillips pan head self drilling screws 4 2 16 washer D5 D12 d5 3 1 0t and bottle holder with the provided L type cross head hex 6 A STEP 9 Battery Dismantling and Installation 1 Pul...

Page 13: ...nob Adjust the head height Lockable pulley Statement This manual contains the functional introduction and operating instructions as much as possible when printed With the continuous improvement of har...

Page 14: ...PP will be enabled or the course will be automatically accessible 3 Before connecting the APP with bike make sure that the Bluetooth of your mobile phone tablet PC has been enabled and no other device...

Page 15: ...knob as much as possible The head tube must not exceed the MAX mark during handlebar adjustment Tight Loose 2 Saddle height adjustment Loosen the front column knob with one hand and lift or press the...

Page 16: ...ddle slide the saddle back and forth to the desired position and tighten the knob as much as possible Horizontal adjustment of saddle 4 Body level adjustment There are four adjustment pads at the bott...

Page 17: ...until they are stopped at 6 o clock and the leg can be fully stretched Fig 2 Hip joint Leg straight Fig 1 Fig 2 Horizontal position of saddle Put the right foot into the clamp and step on the pedals u...

Page 18: ...new users Fig 1 and ush with or slightly lower than the saddle for experienced users Fig 2 Users subject to lumbar muscle strain and lumbar spondylosis may ride the bike with the consent of doctors I...

Page 19: ...the open ended wrench C and press the front part of the seat cushion to a comfortable angle it is recommended to adjust the seat cushion until its front part is one division lower Then tighten the tw...

Page 20: ...roove to prevent the belt from jumping out of the groove Inspection of body screws Always check the screws of all body parts for loosening or falling and tighten or replace them in time Inspection of...

Page 21: ...Antes de usar este producto lea este manual detenidamente y gu rdelo bien Bicicleta C1H YESOUL Modelo del producto YS BC1 Manual del producto C1H Bicicleta YESOUL...

Page 22: ...n Alimentaci n Modo de conexi n del Sistema de detecci n L mite de altura Carga m xima nominal Peso neto Peso bruto Dimensiones totales Ancho m ximo de la tableta 10 1 pulgadas IOS 10 0 o superior An...

Page 23: ...calzado deportivo y apriete las correas de los pies para evitar lesiones causadas por tirones o enredos de este producto 12 No utilice nunca este producto con un calzado inadecuado o descalzo 13 Un e...

Page 24: ...i n Lista de piezas Marco Ensamblaje del manubrio Juego de pedales izquierdo derecho Soporte para tableta tel fono m vil Tubo frontal Tubo tresero Tubo de direcci n 2 tornillo de cabeza de bot n con h...

Page 25: ...D13 d6 5 1 5t Cubierta decorativa Tornillo de cabeza redonda en cruz 4 2 16 Tornillo de cabeza de bot n hexagonal M6 30 Tornillo de cabeza de bot n hexagonal M8 12 Soporte de botella Para facilitar el...

Page 26: ...de piezas Gu a de instalaci n PASO 2 Instalaci n del tubo inferior Arandela 1 Saque la llave hexagonal de cabeza cruzada tipo L 6 A de la bolsa ziplock 2 Retire los cuatro tornillos de cabeza de bot...

Page 27: ...er cie superior del tubo del cuadro de la bicicleta y luego apriete con la mano girando la manija hacia la derecha 2 Saque el asiento de la bolsa ziplock 3 Coloque el asiento en la tija de asiento y a...

Page 28: ...inea con el agujero de jaci n del cuadro con la otra mano Primero a oje la manija hasta que el tubo de direcci n pueda ser insertado 2 Inserte el tubo de direcci n en el cuadro y mantenga la escala pa...

Page 29: ...hexagonal en el ori cio rojo sin apretarlo Inserte el soporte del tel fono m vil en el ori cio redondo de la mano como indica la echa Alinee los agujeros correctamente y gire manualmente tres tornill...

Page 30: ...la llave hexagonal 4 D suministrada Llave hexagonal 4 D Nota Apriete los tornillos M6X10 con la llave hexagonal 4 D de lo contrario la bicicleta podr a moverse durante la conducci n 3 Inserte el sopor...

Page 31: ...traciones de los pedales pueden ser diferentes al producto real Consulte el producto real Llave inglesa C Atornille el pedal en la manivela manualmente primero y luego ajuste los ensambles del pedal L...

Page 32: ...o apriete los dos tornillos autoperforantes de cabeza plana Phillips 4 2 16 la arandela D5 D12 d5 3x1 0t y el portabotellas con el hex gono de cabeza en cruz tipo L suministrado 6 A PASO 9 Montaje e i...

Page 33: ...e ajuste de la columna delantera Ajustar la altura de la cabeza Polea con bloqueo Declaraci n Este manual contiene la introducci n y las instrucciones de funcionamiento en lo posible al momento de su...

Page 34: ...el modo de ejercicio de la APP o se podr acceder autom ticamente al circuito 3 Antes de conectar la APP con la bicicleta aseg rese de que el Bluetooth de su tel fono m vil tableta ha sido activado y n...

Page 35: ...al m ximo El tubo de direcci n no debe sobrepasar la marca MAX durante el ajuste del manubrio Apretado Suelto 2 Ajuste de la altura del asiento A oje la perilla de la columna delantera con una mano y...

Page 36: ...asiento hacia delante y hacia atr s hasta la posici n deseada y ajuste la perilla al m ximo Ajuste horizontal del asiento 4 Ajuste del nivel del cuerpo Hay cuatro pastillas de ajuste en la parte infer...

Page 37: ...6 en punto y la pierna pueda estirarse completamente Fig 2 Articulaci n Pierna Fig 1 Fig 2 Posici n horizontal del asiento Coloque el pie derecho en la abrazadera y pise los pedales hasta que el peda...

Page 38: ...m s bajo que el asiento para los usuarios experimentados Fig 2 Los usuarios que sufran tensiones musculares lumbares y espondilosis lumbar pueden utilizar la bicicleta con el consentimiento del m dic...

Page 39: ...nto con la llave inglesa C y presione la parte delantera del asiento hasta conseguir un ngulo c modo se recomienda ajustar el asiento hasta que su parte delantera est un poco m s baja y luego ajuste l...

Page 40: ...para evitar que sta se salga de la ranura Inspecci n de los tornillos Compruebe siempre que los tornillos de todas las piezas de la bicicleta no se hayan a ojado o ca do y aj stelos o sustit yalos a...

Reviews: