EN
50
SAFETY INSTRUCTIONS
substantial footwear and long
trousers. Do not operate the
equipment when barefoot or
wearing open sandals;
b) Thoroughly inspect the area where
the equipment is to be used and
remove all objects which can be
thrown by the machine;
c) Never pick up or carry a machine
while the engine is running;
d) Stop the engine;
- whenever you leave the machine;
Operation
• Do not operate the machine while
under the influence of alcohol or
drugs.
• Keep all safety devices in place and
in proper working order. Do not
operate with missing or damaged
components.
• Ensure the controls (start/
stop) function properly before
cultivating.
• Hold onto the cultivator
with both hands during operation.
Ensure the grips are dry. Push the
safety lock button and then hold
the ON/OFF trigger in order to start
the machine.
• Contact with rotating parts can
amputate hands and feet. Keep
hands and feet away from all
rotating parts.
• Only operate the cultivator
when there is good visibility or
light and dry conditions. Always
watch your footing and keep a firm
hold on the grips. Walk; don't run!
• Do not operate the
cultivator on slippery surfaces.
Check your footing during use.
• Exercise caution when changing
direction and operating the tool
on slopes. Always keep feet and
legs a safe distance away from the
machine. Look for hidden obstacles
or hazards.
• Do not overload machine capacity
by attempting to cultivate too
deeply. It will cause excessive
resistance.
• Release the ON/OFF trigger in
order to stop the machine. Stop the
cultivator and disconnect
the electric cord before leaving
the operating position (behind
the handles) to adjust or inspect
the unit. Wait until the tines have
come to a complete stop.
• If the cultivator should start
to vibrate abnormally, stop the
machine and inspect thoroughly
for damage.
•
Turn the machine OFF and
disconnect the electrical power
when moving to a new work area.
Allow the tines to completely stop
rotating before transporting the
unit.
Summary of Contents for YT5601-01
Page 3: ......
Page 4: ...3 A x1 C x1 B x1 D x4 30 E x2 3 EN Assembly IT EL Montaggio...
Page 6: ...5 B D x2 A C 1 2 5 EN Assembly IT EL Montaggio...
Page 7: ...6 D x2 E x2 3 4 6 EN Assembly IT EL Montaggio...
Page 8: ...7 3 1 2 1 2 7 EN Use IT EL Uso...
Page 9: ...8 1 2 3 4 8 EN Use IT EL Uso...
Page 10: ...9 5 EN Use IT EL Uso...
Page 11: ...10 2 3 1 1 2 10 EN Maintenance IT EL Manutenzione...
Page 12: ...11 3 4 11 EN Maintenance IT EL Manutenzione...
Page 13: ...12 5 6 12 EN Maintenance IT EL Manutenzione...
Page 14: ...13 7 8 13 EN Maintenance IT EL Manutenzione...
Page 15: ...14 1 14 EN Winter storage IT Rimessaggio EL...
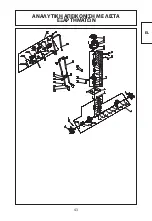
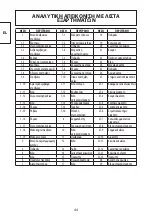
Page 28: ...27 IT VISTA ESPLOSA ED ELENCO DELLE PARTI...
Page 31: ...30 EL 15 50ft 93dB A WEEE STOP R...
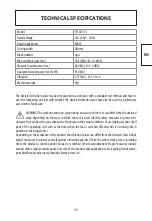
Page 32: ...31 EL 1 5601 01 800W 2 3 4 1 2 3...
Page 33: ...32 EL 4 5 6 7 8 9 10 11...
Page 34: ...33 EL 16 17 18 12 13 14 15...
Page 35: ...34 EL 19 c d...
Page 36: ...35 EL ON OFF ON OFF a b c d...
Page 37: ...36 EL OFF a b c OFF...
Page 38: ...37 EL 30 i ii iii iv...
Page 39: ...38 EL 1 2 3 4 5 6 1 2 1 2 3...
Page 40: ...39 EL...
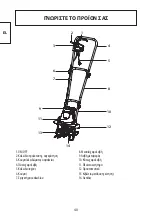
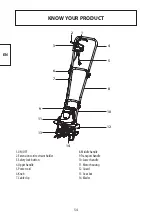
Page 41: ...40 EL 14 12 3 1 2 10 8 5 4 6 7 9 11 13 1 ON OFF 2 3 4 5 6 7 8 9 10 11 12 13 14...
Page 43: ...42 EL 2012 19...
Page 44: ...43 EL...

