background image


42

3.9.1

Delete 

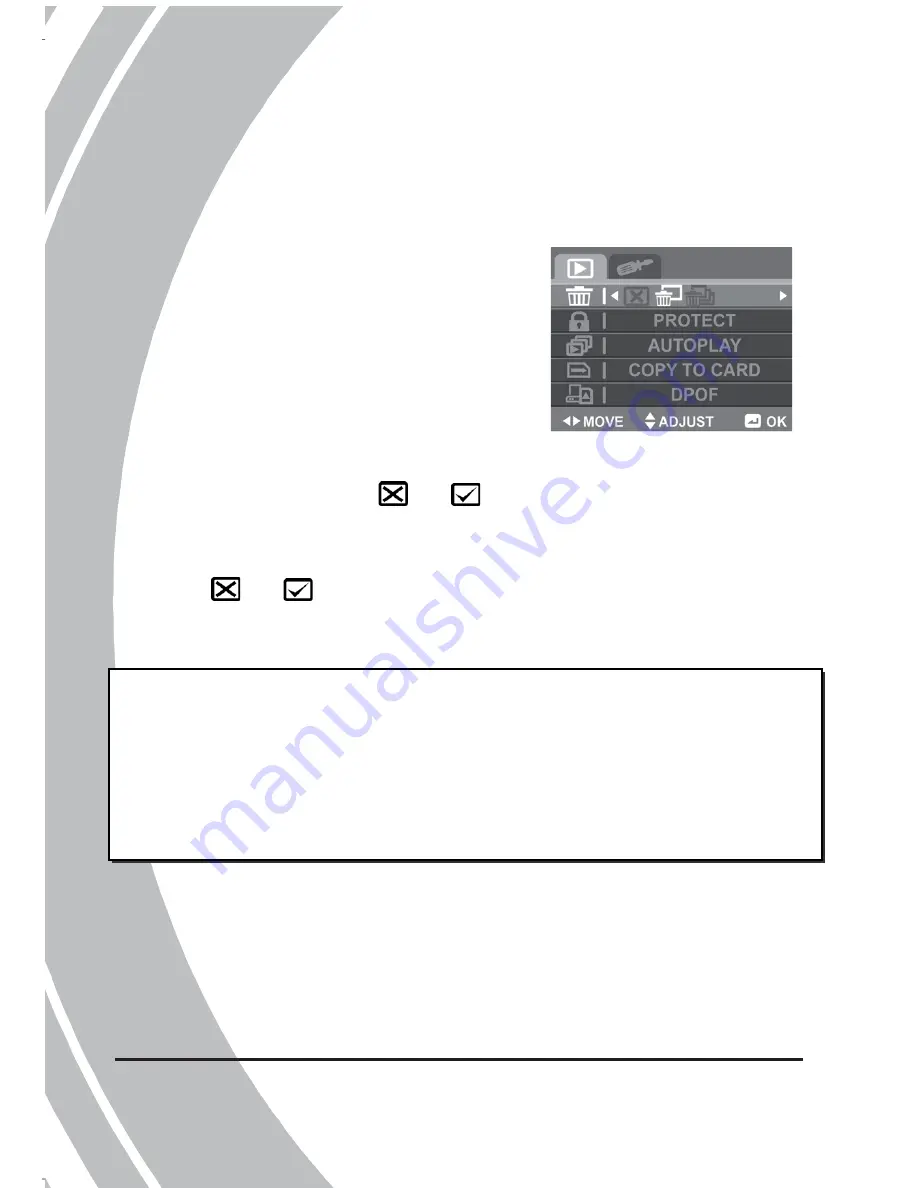
The Delete selection allows you to delete files. 

To delete files, please do the following: 

1.

Use the 

Left/Right Navigation 

Button

 to select 

Cancel

Delete 

One

, or 

Delete All

2.

Press the 

Middle Navigation 

Button

 to confirm. 

x

Delete One:

 Use the 

Left/Right Navigation Button


to select the desired file. Use the 

Up/Down Navigation 

Button

 to select 

 or 

 and press the 

Middle 

Navigation Button

 to confirm. 

x

Delete All:

 Use the 

Left/Right Navigation Button

 to select 

 or 

 and press the 

Middle Navigation Button

 to 

confirm. 


z

Note

Once deleted, files cannot be recovered. Ensure the files are 
transferred to the PC via the USB cable or saved to another 
storage device. Files that have been protected will not be 
deleted. You have to unlock the files first before deleting 
them. 

Summary of Contents for APW-10

Page 1: ...DV CAMERA APW 10 USER MANUAL...

Page 2: ...bout the video camera 3 1 4 1 Front view 3 1 4 2 Top view 3 1 4 3 Bottom view 3 1 4 4 Right and Left views 4 1 4 5 Back view 4 1 4 6 About the LEDs 7 2 Getting started 8 2 1 Inserting an SD card 8 2 2...

Page 3: ...olution 19 3 2 2 White Balance 19 3 2 3 Quality 20 3 2 4 EV 20 3 2 5 Capture Mode 21 3 3 Playing Videos 22 3 4 Video Playback Menu 24 3 4 1 Delete 25 3 4 2 Protect 26 3 4 3 Copy to Card 27 3 5 Voice M...

Page 4: ...3 Autoplay 44 3 9 4 Copy to Card 44 3 9 5 DPOF 45 3 10 System Menu 46 3 10 1 Format 47 3 10 2 Default 47 3 10 3 Language 48 3 10 4 Auto Power Off 48 3 10 5 Beep 48 3 10 6 Frequency 48 3 10 7 TV Stand...

Page 5: ...ture 51 3 13 Diving mode 52 4 Installing software and drivers 53 4 1 Drivers 53 4 1 1 Mass Storage 53 4 1 2 PC Camera 54 4 2 Presto Video Works 55 4 3 Presto Mr Photo 56 Specification 57 Troubleshooti...

Page 6: ...d our company reserves the right to change the contents or technical rules without notice in advance Also the manufacturer reserves the right to change the technical specification in advance without n...

Page 7: ...internal components x Do not use harsh chemicals cleaning solvents or strong detergents to clean the product Wipe the product with a slightly damp soft cloth x Do not fire the flash while it is too c...

Page 8: ...aterproof Waterproof performance x The camera s waterproof performance is equivalent to the IPX8 standard x The supplied accessories are not waterproof When using the camera x The waterproof propertie...

Page 9: ...ap water or soak it in a bowl of fresh water for 2 or 3 minutes x Do not use any soapy water mild detergents alcohol or similar liquids to clean the camera They may make the camera less resistant to w...

Page 10: ...Taking test shots Before taking pictures with this DV camera in any important occasion such as a wedding ceremony or an overseas trip do test the DV camera beforehand to ensure that it functions prop...

Page 11: ......

Page 12: ...MD Athlon 64 or higher x At least 512 MB of RAM or higher x Graphic card with DirectX 9 support DirectX 10 recommended x Standard USB 1 1 port or higher x At least 800 MB of available disk space 1 2 F...

Page 13: ...Unpacking the video camera The following items should be present in the package If any item is missing or appears damaged contact your dealer immediately Video camera Pouch USB AV cable CD ROM User s...

Page 14: ...illustrations to familiarize yourself with the buttons and controls of this video camera 1 4 1 Front view LED light Lens Microphone 1 4 2 Top view Speaker Power button Record button 1 4 3 Bottom view...

Page 15: ...4 1 4 4 Right and Left views Strap hole Macro button 1 4 5 Back view LCD screen Zoom button Playback button Mode button Menu button Power LED 4 way Navigation button...

Page 16: ...Press again to stop In Photo mode x Press to take a picture Zoom Button In Video and Photo modes x Press the T W Button to zoom out in In Video Playback and Photo Playback modes x Press the T Button...

Page 17: ...Navigation Button to select items in the menu and press the middle button to confirm In Video and Photo modes x Press the Down Navigation Button to toggle the display mode In Photo mode x Press the Up...

Page 18: ...nu Button Press to display the menu for the current mode 1 4 6 About the LED The following table describes the camera LED LED Color Definition Green Power on Green Blinking Low battery Power Red Blink...

Page 19: ...liminary settings See later chapters for advanced functions 2 1 Inserting an SD card An SD card can be installed in the video camera to provide additional storage space for still images video clips or...

Page 20: ...bottom cover lock 2 2 Inserting the batteries This video camera is designed to use two AAA alkaline batteries z Note Install the batteries exactly as described here Installing the batteries incorrectl...

Page 21: ...to open the bottom cover lock then push right to open the bottom cover 2 Push left to open the battery cover 3 Insert the batteries Ensure that the and symbols on the batteries line up with the and sy...

Page 22: ...11 4 Close and push right to secure the battery cover 5 Close the bottom cover 6 Push the tab downwards to secure the bottom cover lock...

Page 23: ...video camera Press and hold the Power Button to turn the video camera on off 2 4 Connecting to TV with a USB AV Cable To view pictures or videos on a TV connect the video camera to a TV using the supp...

Page 24: ...13 2 5 Connecting to PC with a USB AV Cable To manage your pictures or videos on a PC connect the video camera to a computer with the supplied USB AV cable as shown...

Page 25: ...2 7 1 Setting the date and time To adjust the date and time please do the following 1 Press the Menu Button to display the OSD menu 2 Use the Left Right Navigation Button to select the Setting tab 3 U...

Page 26: ...Right Navigation Button to select the desired language 6 Press the Middle Navigation Button to confirm 2 7 3 Setting the beep To adjust the beep please do the following 1 Press the Menu Button to disp...

Page 27: ...n to turn on the video camera 2 Press the Mode Button to switch to Video mode 3 Press the Record Button to start recording the video To adjust the video you may x Use the Zoom Button to zoom in and ou...

Page 28: ...ion 4 Indicates the current Quality setting 5 Indicates the current date and time 6 Indicates the remaining recording time 7 Indicates the current image histogram 8 Indicates the current battery statu...

Page 29: ...if not 2 Press the Menu Button to open the Video menu 3 Use the Up Down Navigation Button to scroll through the selections until the desired one is highlighted 4 Press the Middle Navigation Button to...

Page 30: ...on for 640 x 480 resolution x HD Select this option for 1280 x 720 resolution 2 Press the Middle Navigation Button to confirm 3 2 2 White Balance The White Balance selection allows you to set the whit...

Page 31: ...red To select the quality please do the following 1 Use the Left Right Navigation Button to select the desired option x Fine Select this option for fine quality x Normal Select this option for normal...

Page 32: ...allows you to select the capture mode for recording movie or recording voice To select the capture mode please do the following 1 Use the Left Right Navigation Button to select Video Mode or Voice Mod...

Page 33: ...to play the desired video x To pause during playback press the Middle Navigation Button To resume press the Middle Navigation Button x To rewind fast forward press and hold the Left Right Navigation B...

Page 34: ...video and the total number of videos 2 Indicates the elapsed time and total clip length 3 Indicates the current battery status 4 Indicates that the file is protected 5 Indicates that the video camera...

Page 35: ...o switch to the Video Playback mode 2 Press the Menu Button to open the Video Playback menu 3 Use the Up Down Navigation Button to scroll through the selections until the desired one is highlighted 4...

Page 36: ...n to select the desired file Use the Up Down Navigation Button to select and press the Middle Navigation Button to confirm x Delete All Use the Left Right Navigation Button to select or Press the Midd...

Page 37: ...tion Button to select the desired file Use the Up Down Navigation Button to select and press the Middle Navigation Button to protect the file A lock icon is displayed on the screen to show that the fi...

Page 38: ...allows you to copy all saved files in the internal memory to the inserted memory card To copy all files to the memory card please do the following 1 Use the Left Right Navigation Button to select or...

Page 39: ...Video menu 3 Use the Up Down Navigation Button to select Capture Mode 4 Press the Middle Navigation Button to confirm 5 Use the Left Right Navigation Button to select Voice Mode 6 Press the Middle Na...

Page 40: ...dicates that the video camera is in Voice mode 3 5 2 Playing voice files To play a voice file please do the following 1 Make sure you are in the Video mode Press the Playback Button to enter the Video...

Page 41: ...3 Press the Record Button to capture a photo To adjust the camera you may x Use the Zoom Button to zoom in and out x Press the Left Navigation Button to set the self timer x Press the Up Navigation B...

Page 42: ...rnal memory is used 3 Indicates the current file size 4 Indicates the current Quality setting 5 Indicates the current Self timer setting 6 Indicates that Face Detect is enabled 7 Indicates the current...

Page 43: ...is set to On 14 Indicates the current White Balance setting 15 Indicates the current Flash mode 16 Indicates that the video camera is in Photo mode 17 Indicates the current EV compensation value 18 In...

Page 44: ...nu Button to open the Photo menu 3 Use the Up Down Navigation Button to scroll through the selections until the desired one is highlighted 4 Press the Middle Navigation Button to confirm 5 Press the M...

Page 45: ...ution x 5M Select this option for 2592 x 1944 resolution x 8M Select this option for 3264 x 2448 resolution x 16M Select this option for 4616 x 3462 resolution 2 Press the Middle Navigation Button to...

Page 46: ...o the following 1 Use the Left Right Navigation Button to select the desired option x Auto Select this option to let the video camera set the white balance automatically x Sunny Select this option for...

Page 47: ...Middle Navigation Button to confirm 3 7 5 Effect The Effect selection allows you to change the camera effect To set the effect please do the following 1 Use the Left Right Navigation Button to select...

Page 48: ...igation button to confirm 3 7 7 Burst Mode The Burst Mode selection allows you to take three consecutive photos by pressing the Record Button To set the Burst mode please do the following 1 Use the Le...

Page 49: ...o select or to disable or enable the face detection 2 Press the Middle Navigation Button to confirm 3 7 9 Date Stamp The Date Stamp selection allows you to turn on or off the date stamp while taking a...

Page 50: ...browse the recorded photos x Press the W Button to enter the Zoom mode Press the T W Button to select the desired zoom view up to 16X Use the Up Down Left Right Navigation Button to view the zoomed im...

Page 51: ...ription 1 Indicates the number of current image and total number of saved images 2 Indicates the current battery status 3 Indicates that the file is protected 4 Indicates that the video camera is in P...

Page 52: ...to the Photo Playback mode 2 Press the Menu Button to open the Photo Playback menu 3 Use the Up Down Navigation Button to scroll through the selections until the desired one is highlighted 4 Press the...

Page 53: ...o select the desired file Use the Up Down Navigation Button to select or and press the Middle Navigation Button to confirm x Delete All Use the Left Right Navigation Button to select or and press the...

Page 54: ...tion Button to select the desired file Use the Up Down Navigation Button to select and press the Middle Navigation Button to protect the file A lock icon is displayed on the screen to show that the fi...

Page 55: ...ss the Middle Navigation Button to confirm 3 The image will be displayed one after another 4 Press the Middle Navigation Button to stop the slide show 3 9 4 Copy to Card The Copy to Card selection all...

Page 56: ...nt All 2 Press the Middle Navigation Button to confirm x Single Print Use the Up Down Navigation Button to select the desired file Press the T W Button to select the number of prints The maximum of pr...

Page 57: ...tion Button to select the Setting tab 3 Use the Up Down Navigation Button to scroll through the selections until the desired one is highlighted 4 Press the Middle Navigation Button to confirm The foll...

Page 58: ...e following 1 Use the Left Right Navigation Button to select 2 Press the Middle Navigation Button to confirm 3 10 2 Default The Default selection allows you to reset the video camera to factory defaul...

Page 59: ...to select x Off Disable the Auto Power Off function x 1 min Auto power off after 1 minute x 5 min Auto power off after 5 minutes 2 Press the Middle Navigation Button to confirm 3 10 5 Beep See section...

Page 60: ...lection allows you to select the TV standard of the recorded videos To adjust the TV standard please do the following 1 Use the Left Right Navigation Button to select NTSC or PAL 2 Press the Middle Na...

Page 61: ...e 2 The most recent image video clip audio clip is displayed on the screen 3 Press the T Button to enter the Thumbnail mode 4 Use the T W Button to toggle four or nine thumbnail view 5 Press the Left...

Page 62: ...the desired selection and press the Middle Navigation Button to confirm 3 12 1 Using the PC Cam feature When set as PC Cam the video camera can be used as a webcam for video conferencing 3 12 2 Using...

Page 63: ...White Balance setting To switch to the Diving mode please do the following 1 Press the Mode Button to switch to the Video in Diving or Photo in Diving mode 2 An icon is displayed on the screen to indi...

Page 64: ...offers Mass Storage function via the built in card reader You can treat this digital video camera as a USB device Windows 2000 XP SP2 Vista Windows 7 is a plug and play operating system and does not r...

Page 65: ...tions below 1 Insert the supplied CD ROM in the CD ROM drive 2 If the CD ROM does not automatically boot use Windows Explorer to execute the InstallMgr exe file in the root directory The following scr...

Page 66: ...drive 2 If the CD ROM does not automatically boot use Windows Explorer to execute the InstallMgr exe file in the root directory The following screen is displayed Install button 3 Click the Install but...

Page 67: ...e 2 If the CD ROM does not automatically boot use Windows Explorer to execute the InstallMgr exe file in the root directory The following screen is displayed Install button 3 Click Install to begin th...

Page 68: ...sh Memory SD Card SDHC Compatible Up to SDHC 16GB Class6 Color effects Color B W Sepia Lens F3 2 f 5 1mm Fixed lens Focus range Normal 1 5m infinity Macro 20 21 cm Still image Formats JPEG EXIF 2 2 DC...

Page 69: ...al Zoom 16X max TFT Monitor 2 5 TFT 480 x 234 pixels LED Flash Effective range 1 2 1 8 m Mode Auto Off Forced White balance Auto Sunny Cloudy Tungsten Fluorescent EV compensation 2 0 EV 2 0 EV Self ti...

Page 70: ...59 General Auto power off Off 1 min 5 min Power supply 2 x AAA Alkaline Ni cd Ni MH Dimension 98 W x 63 H x 31 D mm Weight Approx 106r5g without batteries...

Page 71: ...s off The video camera is running out of battery power Replace the batteries The captured image is not stored in memory Before the image is saved the power has been cut off When the battery indicator...

Page 72: ...ion The memory card is protected Unlock the memory card Memory card cannot be used The memory card contains non DCF images taken by other video cameras Format the memory card Before formatting the car...

Page 73: ......

Reviews: