background image

13

8

Trouble 

Shooting 

Guide

WARNING

Do not move the gear 
selection handle 
with the wheels or 
tines engaged. Make 
certain the unit is 
stopped completely 
before changing the 
gear selection. A 
partial engagement 
may be necessary 
when engaging tines. 
Do not push down 
on the handles so 
that the wheels are 
lifted off the ground 
while using the tine 
drive, or the tiller 
could move backward 
and cause personal 
injury.
Never attempt to 
make any adjust-
ments while the 
engine is running, 
except where speci-
fied in operator’s 
manual.

Off-Season Storage

If the tiller will not be used for a period longer than 30 days, the 
following steps should be taken to prepare the tiller for storage.

•  Clean the exterior of engine and the entire tiller 

thoroughly. Lubricate the tiller as described in the 
lubrication instructions.

•  We do not recommend the use of pressure washers 

to clean your unit. They may cause damage to 
electric components, spindles, pulleys, bearings or 
the engine. The use of pressure washers will result 
in shortened life and reduce serviceability.

•  Refer to the engine manual for correct engine 

storage instructions.

•  Wipe tines with oiled rag to prevent rust.
•  Store tiller in a clean, dry area. Do not store next to 

corrosive materials, such as fertilizer.

NOTE:  

When storing any type of power equipment in an 

unventilated or metal storage shed, care should be taken 
to rustproof the equipment. Using a light oil or silicone, coat 
the equipment and especially any springs, bearings, and 
cables.

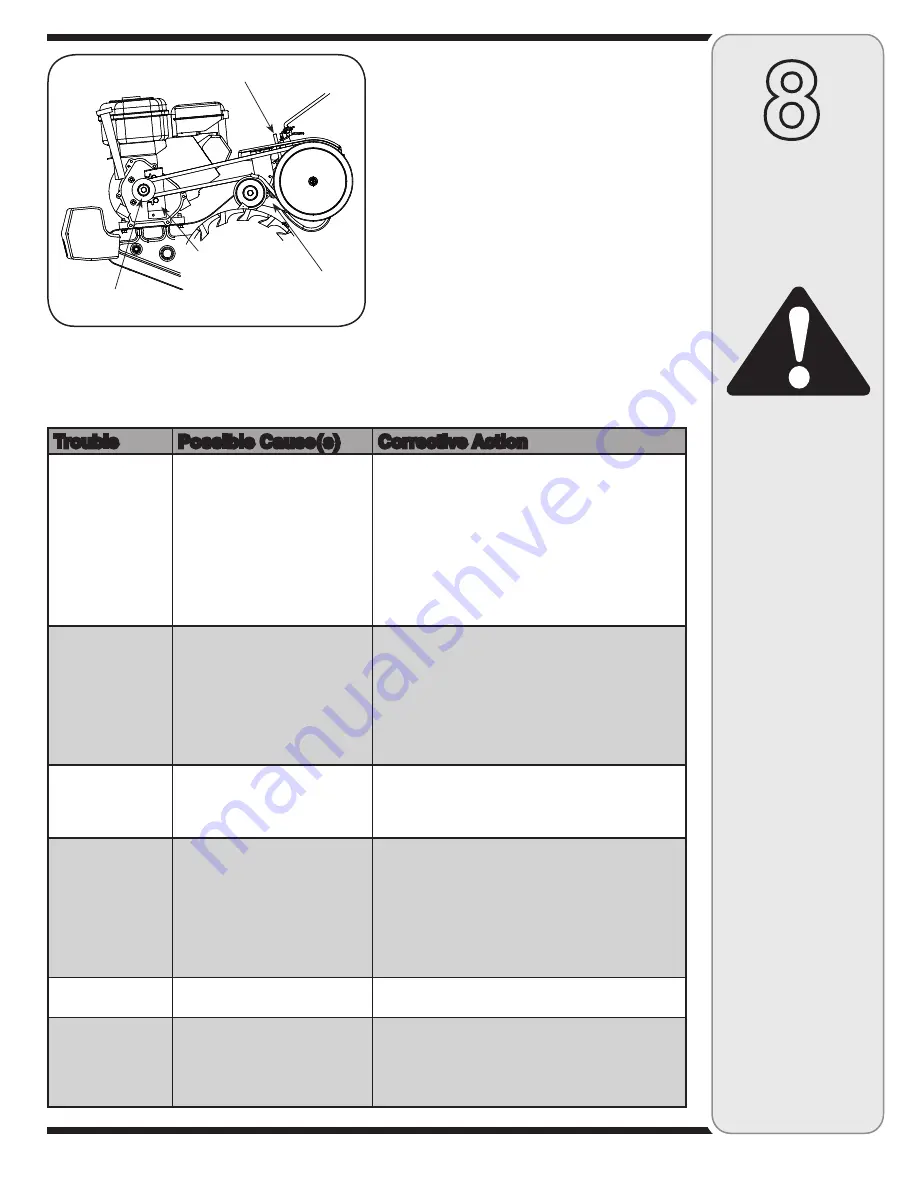
Idler Pulley Rod

Belt Keeper 

Bracket

Idler Bracket

Engine Pulley

Figure 9

Trouble

Possible Cause(s)

Corrective Action

Engine fails to start

Fuel tank empty, or stale fuel.

Throttle control lever not in correct 

starting position (if so equipped).

Blocked fuel line.

Dirty air cleaner.

Choke not in ON position.

Spark plug wire disconnected.

Faulty spark plug.

Engine flooded.

Fill tank with clean, fresh gasoline. Fuel will not last 

over thirty days unless a fuel stabilizer is used. 

Move throttle lever to start position.

Clean fuel line.

Refer to the engine manual packed with your unit.

Move switch to ON position.

Connect wire to spark plug.

Clean, adjust gap or replace.   

Refer to the engine manual packed with your unit.

Engine runs erratic

Unit running on CHOKE.

Spark plug wire loose.

Blocked fuel line or stale fuel.

Vent in gas cap plugged.

Water or dirt in fuel system.

Dirty air cleaner.

Carburetor out of adjustment. 

Move choke lever to OFF position.

Connect and tighten spark plug wire.

Clean fuel line; fill tank with clean, fresh gasoline. Fuel will 

not last over thirty days unless a fuel stabilizer is used.

Clear vent.

Drain fuel tank. Refill with fresh fuel.

Refer to the engine manual packed with your unit.

Refer to the engine manual packed with your unit.

Engine overheats

Engine oil level low.

Dirty air cleaner.

Air flow restricted.

Carburetor not adjusted properly.

Fill crankcase with proper oil.

Refer to the engine manual packed with your unit.

Refer to the engine manual packed with your unit.

Adjust carburetor as instructed in separate engine manual.

Tines do not 

engage

Foreign object lodged in tines.

Tine clevis pin(s) missing.

Pulley and idler not in correct 

adjustment.

Not shifting properly.

Control cable not adjusted properly.

Belt worn and/or stretched.

Dislodge foreign object.

Replace tine clevis pin(s).

Take unit to authorized service dealer.

Refer to Controls section of operator’s manual for 

proper shifting procedures.

Adjust control cable (see assembly instructions).

Replace belt.

Tines skip over 

ground

Improper rotation.

Forward rotation should only be used on soil that has 

already been tilled, not on virgin soil.

Wheels do not 

engage

Clevis pin missing.

Tiller is not being shifted properly.

Control cable not adjusted properly.

Belt worn and/or stretched.

Replace clevis pin.

Refer to Controls section of operator’s manual for 

proper shifting procedures.

Adjust control cable (see assembly instructions).

Replace belt.

Summary of Contents for 450 Series

Page 1: ...ined in effective working order by the operator In the State of California the above is required by law Section 4442 of the California Public Resources Code Other states may have similar laws Federal...

Page 2: ...orized service dealer Please do NOT return the unit to the retailer from which it was purchased without rst contacting Customer Support Customer Support If you have difficulty assembling this product...

Page 3: ...CHILDREN OR UNINSTRUCTED ADULTS TO OPERATE TILLER 5 SHUT OFF ENGINE BEFORE U NCLOGGING TINES OR MAKING REPAIRS 6 KEEP BYSTANDERS AWAY FROM M ACHINE 7 KEEP AWAYFROM ROTATING PARTS 8 USE EXTREME CAUTION...

Page 4: ...ry can occur when gasoline is spilled on yourself or your clothes which can ignite Wash your skin and change clothes immediately 7 Use only an approved gasoline container 8 Extinguish all cigarettes c...

Page 5: ...es Check their proper operation regularly 2 Check bolts and screws for proper tightness at frequent intervals to keep the machine in safe working condition Also visually inspect machine for any damage...

Page 6: ...pth stake assembly Place flat washer on the hex bolt and thread T knob onto the hex bolt Tighten securely See Figure 1 Tip the tiller back down so it rests on the tines Attaching Handle Assembly Remov...

Page 7: ...bail engaged adjust by unthreading the internally threaded tube at the end of the cable a few turns clockwise when standing in operator s position and then retighten the nut against the tube Now move...

Page 8: ...he reverse tine drive when tilling virgin ground sod or hard soil Use the forward tine drive when cultivating or tilling soft ground NOTE If difficulty is encountered in moving the gear selection hand...

Page 9: ...to enrich the fuel mixture in the carburetor when starting a cold engine This symbol points out important safety instructions which if not followed could endanger the personal safety and or property...

Page 10: ...ace the engine speed control in the START position Move choke lever to CHOKE position or if equipped push primer two 2 or three 3 times Wait about two 2 seconds between each push NOTE A warm engine ma...

Page 11: ...t the wheel drive only WARNING Do not push down on the handles so that the wheels are lifted off the ground while using the tine drive or the tiller could move backward and cause personal injury For b...

Page 12: ...remely dusty conditions Poor engine performance and flooding usually indicates that the air cleaner should be serviced To service the air cleaner refer to the separate engine manual packed with your u...

Page 13: ...Fill tank with clean fresh gasoline Fuel will not last over thirty days unless a fuel stabilizer is used Move throttle lever to start position Clean fuel line Refer to the engine manual packed with y...

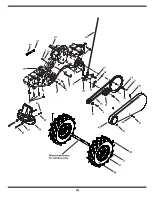
Page 14: ...13 29 35 16 53 35 16 46 31 28 12 45 17 17 44 36 6 3 33 15 27 5 36 43 4 20 40 21 1 34 18 10 42 23 7 22 36 8 47 32 37 50 25 10 9 24 36 51 34 45 26 41 36 35 16 29 19 49 44 33 14 35 16 2 14 28 35 16 14 11...

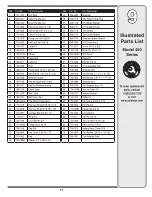
Page 15: ...fting Fork 22 717 1582 Spur Gear 44T 23 717 1583 Spur Gear 30T 24 717 1584 Spur Gear 30T 25 717 1585 Spur Gear 44T 26 717 1587 Spur Gear 44T Ref Part No Part Description 27 717 1594 Spur Gear 16T 28 7...

Page 16: ...23 10 1 60 61 37 62 25 34 27 64 30 39 63 26 32 36 33 31 29 66 26 41 30 30 24 28 35 40 26 49 44 50 59 51 65 53 55 56 54 57 58 44 46 42 4 9 11 16 6 3 14 7 19 5 17 2 60 61 12 15 12 38 21 22 67 70 70 68 6...

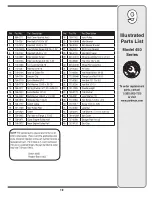
Page 17: ...69 Lock Washer 3 8 30 712 04063 Flange Nut 5 16 18 31 726 0106 Cap Nut 32 738 0849 Hex Screw 5 16 18 x 75 33 747 0432 Rod 34 750 0885A Spacer 322 x 625 x 2 0 Ref Part No Part Description 35 786 0090 S...

Page 18: ...18 33 35 4 38 37 34 24 7 41 3 16 15 13 21 25 14 1 11 2 8 6 27 5 39 20 31 32 29 Wheel shaft shown for reference only 36 18 12 26 43 42 17 28 40 44 45 9...

Page 19: ...ey Half 23 756 0972 Inner Engine Pulley Half Ref Part No Part Description 24 756 1162 Input Pulley 25 786 0064A Idler Bracket 26 786 0185 Belt Keeper Bracket 27 786 0187 Shift Cover Bracket 28 786 019...

Page 20: ...the exterior finish due to use or exposure d Service completed by someone other than an authorized service dealer e MTD does not extend any warranty for products sold or exported outside of the United...

Reviews: