8
STEP 6:
FINAL ADJUSTMENTS.
When you finished all above steps, You don't need to do the following steps.
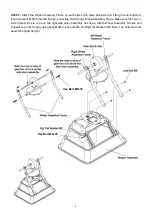
If they are not match neatly, you may need to do the following steps. To operate this spreader, push the handle
to the top position (upwards). You may move the position of Wing nut on Gauge & Lever to adjust the spacer of
three holes between hopper and adjustable plate as per your need when spreading.
(*) Push the adjustable handle on Gauge & Lever assembly to the proper setting while spreading.
(*) Push the adjustable handle on Gauge & Lever assembly to the lowest position when stop spreading.
Summary of Contents for YTL31507
Page 10: ...10 PARTS DRAWING ...


