FUEL SYSTEM
TNV DI Service Manual
7-39
Fuel Injectors
5. Pump the operating lever slowly to hold the
pressure steady at a point just below the
opening pressure and hold it for 5 seconds.
Observe the injector to see that it is sealing
properly and is not “dripping”. If fuel leaks from
the return line fitting, check that the nozzle case
nut is tight. Service or replace the injector if fuel
continues to leak from either the return line
fitting or nozzle.
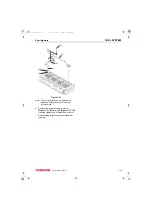
6. Pump the operating lever more rapidly to
repeatedly “pop” the injector and observe the
spray pattern. The pattern should be a very fine
uniform spray (Figure 7-53). If a dripping or an
uneven pattern is seen (Figure 7-54), service
or replace the injector.
Figure 7-53
Figure 7-54
If the fuel injector fails any of these tests, it should
be serviced or replaced as necessary. If the
pressure is outside specified limits, adjust the
pressure. See Adjusting Fuel Injector Pressure
on page 7-41.
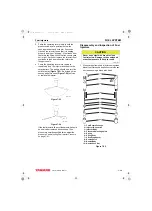
Disassembly and Inspection of Fuel
Injectors
1. Clean carbon from used injectors using clean
diesel fuel. Hardened deposits or varnish can
be cleaned using a brass wire brush.
1 – Fuel Return Passage
2 – Injector ID Location
3 – Injector Body
4 – Pressure Adjusting Shims
5 – Spring
6 – Spring Seat
7 – Valve Stop Spacer
8 – Nozzle Valve
9 – Nozzle Body
10 – Nozzle Case Nut
Figure 7-55
0001336A
0001337A
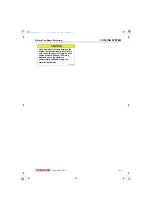
CAUTION
Never use a steel wire brush to clean
fuel injectors. Damage to the nozzle and
other components is likely to result.
0000172en
(10)
(9)
(8)
(7)
(6)
(5)
(4)
(3)
(1)
(2)
TNV_DI_SM_A4.book 39 ページ 2007年12月6日 木曜日 午前9時23分
Summary of Contents for 3TNV82A-B
Page 8: ...INTRODUCTION 1 2 TNV DI Service Manual This Page Intentionally Left Blank TNV_DI_SM_A4 book 2...
Page 18: ...SAFETY 3 2 TNV DI Service Manual This Page Intentionally Left Blank TNV_DI_SM_A4 book 2...
Page 320: ...TURBOCHARGER 10 2 TNV DI Service Manual This Page Intentionally Left Blank TNV_DI_SM_A4 book 2...


