background image

1

Adjusting 
the sound setting

The sound settings can be
changed to suit your personal 
preferences and usage.

DVD

VCD

MP3

CD

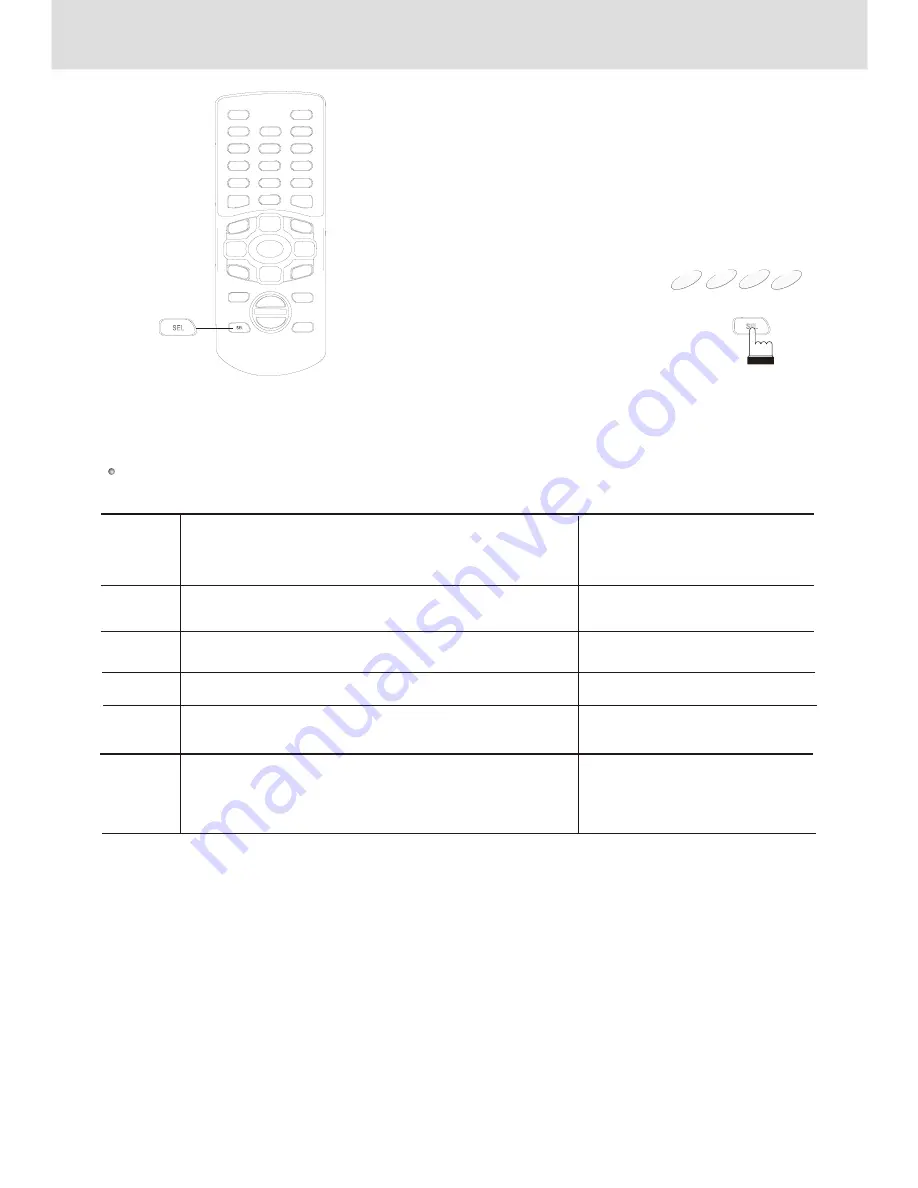
To select the audio functions as you like:

To

Balance

Bass

Treble

Loudness

Press SEL button on the remote repeatedly
until  the item you want to adjust appears on the screen

BALANCE  

BASS        

TREBLE        

LOUDNESS       

 Press the VOL +,- button
  adjust  the setting
  as you like

The level  changes from 
 L08~L00 and L00~R08

    
 ON or OFF 

:  L00

:  -00

:  -00

ON

The level  changes from -07~+07

The level  changes from -07~+07


17

Adjusting the sound setting

Volume

VOLUME      18

The level  changes from 00~36

Summary of Contents for DVD-MP12i

Page 1: ...MOBILE DVD PLAYER DVD MP12i User manual Ver 1 0 ...

Page 2: ...audio function level forward and backward motion esume stop and repeat function This DVD player can play the following discs DVD CD VCD DVCD MP3 CD R CD RW POWER SYSTEM FUNCTIONS ADDITIONAL VIDEO FEATURES COMPATIBILITY 20 10 1 L R Audio Output 1 L R Audio Input 1 AUX Video Input 1 Rear Camera Video Input 3 Video Outputs with one dedicated self switching rear view monitor output ...

Page 3: ...ng fast reversing Finding the beginning of chapters or tracks Playing from the desired location Chapter track title repeat playback Switching the audio language Switching the angle Switching the subtitles Displaying the disc status Adjusting the sound setting Changing the default settings setup MP3 instruction Others Note Specifications Accessories and Hardware 1 2 3 4 5 6 7 8 9 10 11 12 13 14 15 ...

Page 4: ...ICING TO QUALIFIED PERSONNEL ONLY WARNING class I laser product Avoid Long Term viewing of Direct Laser Radiation WARNING OF DEW FORMATION Dew may form on the pickup lens in the following conditions Immediately after a heater has been turned on In a steamy or very humid room When the unit is suddenly moved from a cold environment to a warm one If dew forms inside this unit it may not operate prope...

Page 5: ... stop the vehicle in a safe location before performing these function Failure to do so may result in an accident Do not watch video while driving Watching the video may distract the driver from looking ahead of the vehicle and cause an accident Keep the volume at a level where you can still hear outside noise while driving Failure to do so may result in an accident Use this product for mobile 12V ...

Page 6: ...it is being pulled back into the player by the automatic reloading mechanism Do not attempt to insert a disc into the unit when the unit power is off Never attempt the following Your player accepts only one disc at a time for playback Do not attempt to load more than one disc Make sure the label side is facing up when you insert the disc Playing a disc while driving on a very bumpy road may result...

Page 7: ...Player AUX Monitor indicators POWER Power on off bypressing this button The button Play Pause To stop playback To locate previous next chapter or track 10 11 12 12 EJECT To eject a disc 9 RESET button Resetting the unit Press the RESET button with a pointed object such as a ballpoint pen as shown Unit will turn off momentary after the RESET button is pressed Note Pressing the RESET button will era...

Page 8: ...tton to change the default settings VOL button to control the volume SEL button to select the audio functions EJECT button toeject the disc DISPLAY button to display the disc status ANGLE button to select the camera angle Button Playing Pausing MENU Button to locate a specific title chapter or track Button to stop playback Goto Button to Locate a location by entering its corresponding track number...

Page 9: ...th new one Direct the remote control at the remote sensor of the DVD player Do not drop or give the remote control a shock Do not leave the remote control near an extremely hot or humid place Do not spill water or put anything wet on the remote control Do not disassemble the remote control Operating with the remote control With about 4m 1 Open the cover pull the cover as illustrated 2 Insert cell ...

Page 10: ...UT BLACK GROUND INPUT FRONT VIDEO OUT REAR VIDEO OUT To monitor with rear view camera input To headrest or ceiling mount monitors RCA input for rear view camera MONITOR VIDEO IN DIGITAL COAXIAL DC 12V REMOTE OUT IN R AUDIO L VIDEO MON IN OUT REAR VIDEO FRONT Amplifier equipped with a Dolby digital decoder or a DTS decoder or an MPEG 2 audio decoder 75c o a x i a l c a b l e Front speaker Front spe...

Page 11: ...IDEO CON lead And so the front display only will be on while detecting the parking brake ON Or if the EX MONITOR CON and MONITOR VIDEO IN are used the front display will be on while backing the car 2 This product s REAR VIDEO OUT and VIDEO OUT are for connections of displays to enable passengers in the rear seats to watch the DVD or Video CD Warning NEVER install the display in a location that ena...

Page 12: ...CT Tips DVD VCD MP3 CD These indicate the discs for which the function can be used You can use this function with DVD discs You can use this function with VIDEO CDs You can use this function with CDs You can use this function with MP3 discs DVD VCD CD MP3 About this owner s manual This owner s manual explains the basic instructions of this DVD player Some DVD discs are produced in a manner that al...

Page 13: ...rn the power off Press POWER button again 2 Connect AV SEL Using AUDIO and VIDEO OUT connect the monitor or audio system Using AUDIO and VIDEO IN connect the DVD video player to a VTR TV VTR combination or video selector AUX Video Input INTERNAL VIDEO 10 Switching between External and Internal Video Turning the power on and off Adjusting the volume Adjusting the volume 3 Press the button to increa...

Page 14: ... the Joystick or the number keys 0 9 to select the desired item then press ENTER or Or Or Note For some discs it is not possible to select items for the menu to menu screen using the number buttons 0 9 Tips Using the Number keys This describes use of the Number keys Toinput 16 Press the 1 button and then press the 6 key Toinput 28 Press the 2 key and then press the 8 key Toinput 108 Press the 1 ke...

Page 15: ...k to main page Fast forwarding fast reversing 1 During playback press 7 fast reverse or8 fast forward 2 Each time you press the or button the playback speed changes to X1 X2 X3 X4 the normal speed or normal speed 7 8 Press to return to normal playback Notes No sound or subtitles are played during fast forwarding fast reversing of DVDs or Video CDs However sound is played during fast forwarding fas...

Page 16: ...spond to this process Some scenes may not be located precisely as you specified This method for accessing specific locations is available only within the current title of the DVD video disc or within the current track of the VIDEO CD audio CD Press ENTER Playback starts from the selected chapter track or the time When 1 hour 30 minutes is input as the elapsed time When chapter 12 is input Press GO...

Page 17: ...he different audio modes recorded on the disc each time the button is pressed Notes The language selected with the default setting is set when the power is turned on or the disc is replaced If the disc does not include that language the disc s default language is set For some discs it is not possible to switch the audio language during playback Some time may be required for the audio language to c...

Page 18: ... press SUB The subtitle language switches between the languages recorded and you also can select whether to display the subtitles on the disc each time the button is pressed Note Some time may be required for the subtitle to change The language selected with the default setting is replaced If the disc does not include that language the disc s default language is set For some discs the subtitles wi...

Page 19: ...disc status Use the procedure described below to display the status track number etc of the currently playing Video CD or Audio CD on the screen During playback press DISPLAY VCD CD TITLE 01 01 CHAPTER 001 057 xx xx xx TITLE REMAIN xx xx xx CHAPTER ELAPSED xx xx xx CHAPTER REMAIN xx xx xx The playback status switches each time the button is pressed TOTAL ELAPSED xx xx xx PLAY 1 1 TOTAL 22 TOTAL RE...

Page 20: ...Loudness Press SEL button on the remote repeatedly until the item you want to adjust appears on the screen BALANCE BASS TREBLE LOUDNESS Press the VOL button adjust the setting as you like The level changes from L08 L00 and L00 R08 ON or OFF L00 00 00 ON The level changes from 07 07 The level changes from 07 07 17 Adjusting the sound setting Volume VOLUME 18 The level changes from 00 36 ...

Page 21: ...MP OSD LANG ENGLISH GENERAL SETUP GENERAL SETUP SPEAKER SETUP AUDIO SETUP PREFERENCES EXIT SETUP SCR SAVER AUTO HI RES N FLICKER ON OFF ON OFF ON OFF TV DISPLAY SET TV DISPLAY MODE NORMAL PS NORMAL TV PAN SCAN NORMAL LB NORMAL TV LETTER BOX WIDE WIDE SCREEN TV PIC MODE SET PICTURE MODE AUTO AUTO MODE HI RES HIGH RESOLUTION MODE N FLICKER NONFLICKER MODE ANGLE MARK ANGLE ON OFF EXT AMP TURN EXT AMP...

Page 22: ...PDIF PCM DUAL MONO DYNAMIC PRO LOGIC OFF ON AUTO LPCM OUTPUT LINE OUT RF REMOD STEREO L MONO R MONO MIX MONO FULL 6 8 4 8 2 8 OFF LPCM 48K LPCM 96K AUDIO OUT AUDIO RELATED ANALOG ANALOG OUTPUT SETUP MENU MAIN PAGE GENERAL SETUP SPEAKER SETUP AUDIO SETUP PREFERENCES EXIT SETUP SPDIF RAW RAW DATA VIA SPDIF SPDIF PCM PCM DATA VIA SPDIF 19 Changing the default settings setup ...

Page 23: ...MONO DYNAMIC DYNAMIC RANGE COMPRESSION FULL FULL DYNAMIC RNG COMPRESSION 6 8 4 8 2 8 OFF DYNAMIC RNG COMPRESSION 7 8 5 8 3 8 1 8 OFF 2 PRO LOGIC SET PRO LOGIC ON OFF OFF PRO LOGIC OFF PRO LOGIC ON ON AUTO PRO LOGIC AUTO LPCM OUTPUT SET LPCM TO 48K OR 96K LPCM 48K LPCM OUTPUT 48K LPCM OUTPUT 96K LPCM 96K 20 Changing the default settings setup DYNAMIC RNG COMPRESSION DYNAMIC RNG COMPRESSION DYNAMIC ...

Page 24: ...V SET TV STANDARD LOCALE GRB UNITED KINGDOM PREFERRED LOCALITY CODE 21 Changing the default settings setup MULTI NTSC PAL LOCALE DEFAULTS SMART NAV LOGO CHANGE PARENTAL CHINA FRANCE HONG KONG JAPAN TAIWAN GBR USA 1 G 2 3 PG 4 PG 13 5 6 PG R 7 NC 17 8 ADULT NO PARENTAL TV TYPE PASSWORD OLD PASSWORD NEW PASSWORD CONFIRM PWD RESET WITH MENU MPG LOGO JPG LOGO ...

Page 25: ...U SMART NAV TYPE LOGO MPG LOGO JPG LOGO OPEN SCREEN LOGO PARENTAL SET PARENTAL CONTROL 1 G 2 3 PG 4 PG 13 5 6 PG R 7 NC 17 8 ADULT NO PARENTAL SET TO G LEVEL 2 PG PG13 LEVEL 5 PG R NC 17 ADULT OR NO PARENTAL CHANGE PASSWORD OLD PASSWORD NEW PASSWORD CONFIRM PWD 22 Changing the default settings setup DEFAULTS LOAD FACTORY SETTINGS RESET ...

Page 26: ...or to PLAY MODE with joy stick pressing joy stick to change PLAY MODE SINGLE REP ONE FOLDER FOLDER REP DISC SCAN DISC DISC REP RANDOM SHUFFLE ON PROGRAM P0 Select the play mode then move the cursor back to the track menu and you desired track with finally press PLAY to start playback again desired DISPLAY STATUS DISPLAYED CHAPTER ELAPSED XX XX XX CHAPTER REMAIN XX XX XX 3 4 23 MP3 instruction Play...

Page 27: ... you want to see Playback does not start Disc is loaded upside down Check the disc and load it with the labeled side facing upward Disc is dirty Clean the disc A disc not able to playback with this unit is loaded Check if the disc is able to be played back Parental lock is set Cancel the parental lock or change the rating level Picture is unclear or noisy Disc is being fast forwarded or fast rever...

Page 28: ... ratio more than 90 dB Dynamic range more than 85dB Distortion less than 0 08 Video Video output 1V 0 2V 75Ù Resolution more than 500 lines 20 10 Normal operating temperature range 23 F to131 F Specifications The illustrations in this manual may appear different from the actual product due to printing conditions There are 2 mounting screws on the case of the DVD player shows to protect the unit du...

Page 29: ... 14 X 4 INSTALLATION Mounting bracket x 2 Mounting bracket X 1 Hex bolt M5 x 6 X 4 Power cable x 1 Service Support In the case of technical problems or support questions please refer to your dealer In case of malfunction or technical questions you can also use the direct manufacturer service center with eMail and telefone hotline You can find the contact information under www yamakawa de in the se...

Reviews: