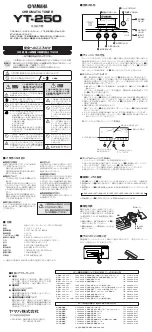
保証書
持込修理
品 名 / 品 番
保 証 期 間
※お買上げ日
お
客
様
クロマチックチューナー/YT-250
本体:お買上げの日から1ヶ年間
年 月 日
ご住所 〒
お名前
様
電 話
(
)
印
(
)
この度はヤマハクロマチックチューナーをお買上げ戴きましてありがとうござ
いました。
本書は、本書記載内容で修理を行なう事をお約束するものです。お買上げの
日から左記期間中に故障が発生した場合は、本書をご提示の上お買上げの販
売店に修理をご依頼ください。
(詳細は裏面をご覧ください)
修理(サービス)メモ
内 容
年 月 日
印
担 当 者
ご販売店様へ ※印欄は必ずご記入してお渡しください。
※
販
売
店
店
名
住
所
電
話
弦打楽器営業部 営業課
〒430-8650 静岡県浜松市中沢町10番1号
TEL 053-460-2433
435
→
436
→
437
→
438
→
439
→
440
→
441
→
442
→
443
→
444
→
445
→
446
■
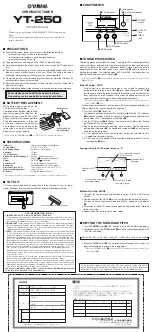
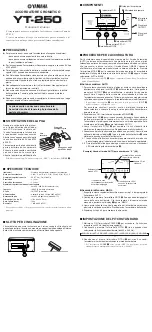
COMPONENTS
YT-250
YT-250
FCC INFORMATION (U.S.A.)
1. IMPORTANT NOTICE: DO NOT MODIFY THIS UNIT!
This product, when installed as indicated in the instructions contained in this manual,
meets FCC requirements. Modifications not expressly approved by Yamaha may void
your authority, granted by the FCC, to use the product.
2. IMPORTANT:
When connecting this product to accessories and/or another product
use only high quality shielded cables. Cable/s supplied with this product MUST be used.
Follow all installation instructions. Failure to follow instructions could void your FCC
authorization to use this product in the USA.
3. NOTE:
This product has been tested and found to comply with the requirements listed
in FCC Regulations, Part 15 for Class ”B” digital devices. Compliance with these re-
quirements provides a reasonable level of assurance that your use of this product in a
residential environment will not result in harmful interference with other electronic de-
vices. This equipment generates/uses radio frequencies and, if not installed and used
according to the instructions found in the users manual, may cause interference harmful
to the operation of other electronic devices. Compliance with FCC regulations does not
guarantee that interference will not occur in all installations. If this product is found to
be the source of interference, which can be determined by turning the unit ”OFF” and
”ON”, please try to eliminate the problem by using one of the following measures:
Relocate either this product or the device that is being affected by the interference.
Utilize power outlets that are on different branch (circuit breaker or fuse) circuits or
install AC line filter/s.
In the case of radio or TV interference, relocate/reorient the antenna. If the antenna
lead-in is 300 ohm ribbon lead, change the lead-in to co-axial type cable.
If these corrective measures do not produce satisfactory results, please contact the
local retailer authorized to distribute this type of product. If you can not locate the
appropriate, please contact Yamaha Corporation of America, Electronic Service Divi-
sion, 6600 Orangethorpe Ave, Buena Park, CA 90620
The above statements apply ONLY to those products distributed by Yamaha
Corporations of America or its subsidiaries.
OWNER’S MANUAL
Thank you for purchasing the YAMAHA YT-250 Chromatic Auto
Tuner.
Please read this manual thoroughly and keep it in a safe place for
future reference.
CHROMATIC TUNER
■
PRECAUTIONS
◆
To prevent damage, do not use the tuner in the following locations:
• places where the unit will be in direct sunlight;
• places subject to temperature and humidity extremes;
• places that are sandy or dusty.
◆
To power the tuner, use only a 6F22 or 006P 9V dry cell battery.
◆
For maximum battery life, always be sure the tuner is turned OFF when not in
use.
◆
If an exhausted battery is left in the unit for an extended period of time, it may
leak and cause malfunctioning of the unit. When the battery becomes
exhausted, always remove it and replace it as soon as possible.
◆
Do not subject the tuner to strong physical shock or vibration. Do not use
excessive force on any of the controls.
◆
Never use solvents such as benzene or thinner to clean the tuner. Wipe clean
with a soft, dry cloth.
◆
After reading the owner's manual, keep it in a safe place for future reference.
Never dispose of used batteries by burning them.
Also make sure to keep batteries away from children.
■
BATTERY REPLACEMENT
When battery power runs down, the
LCD indicator will grow dim.
Continued use of the tuner may result in
inaccurate operation. Replace the
battery with a new one (6F22 or 006P
9V dry cell battery) as soon as possible.
The battery compartment is in the rear
of the tuner. Remove the old battery
and replace it with a new one of the
same type. Be careful to connect the
battery in the correct polarity.
Battery cover
Bottom side
6F22 or 006P 9V
dry cell battery
* Always turn the POWER switch
u
to “OFF” before changing the battery.
■
SPECIFICATIONS
Indicators
: Liquid crystal display, Tuning guides
Tuning Notes
: C, D, E, F, G, A, B,
#
Note Setting Range
: A0 (27Hz) – C8 (4186Hz)
Accuracy
:
±
1 cent
In Pitch Accuracy
:
±
3 cent
Standard Pitch Setting Range
: A4=435 – 446Hz (1Hz steps)
Input
: INPUT (6
monaural), microphone
Output
: OUTPUT (6
monaural)
Power Source
: 9V dry cell battery (006P or 6F22)
Battery Life
: Approximately 50 hrs. (AUTO mode)
Dimensions (W x H x D)
: 118 x 63 x 24.5 mm (4.6" x 2.5" x 1.0")
Weight (including battery)
: 130 g (4.6 oz)
Accessory
: 9V dry cell battery (6F22) x 1
* Specifications and external appearance are subject to change without notice.
■
TILT SLIT
The tuner can be tilted back by using the slit in the rear panel. Insert a coin or
similar flat object into the slit and tilt back as shown in the diagram below.
w
Tuning guide
q
LCD indicator
e
MODE switch
r
PITCH switch
t
NOTE switch
y
Built-in microphone
u
POWER
switch
i
OUTPUT
jack
■
TUNING PROCEDURES
Two tuning modes are available for tuning. The Auto (AUTO) mode automatically
selects the closest note name to the pitch received by the tuner and indicates
whether the pitch is high or low. The Manual (MANL.) mode allows the user to
manually select the note to be tuned. Press the MODE
e
switch to select the
desired tuning mode. The selected mode, AUTO or MANL., is displayed on the
lower left hand corner of the LCD display
q
.
* Pressing the NOTE
t
switch while in the Auto mode also switches the tuner to the
Manual mode.
●
Auto Tuning : AUTO
1. To tune electric or electronic instruments, use a cable to connect the
instrument directly to the tuner’s INPUT
o
jack. (Connecting the OUTPUT
i
jack to an amp allows the amp to receive the instrument’s signal whether the
tuner’s power is on or off. However, it might result in added noise to the line
so you should switch the tuner’s power off during performance.)
* The built-in microphone
y
will not operate when a cable is connected to the
tuner’s INPUT
o
jack.
To tune acoustic instruments, use the tuner’s built-in microphone and play the
note as close to the tuner as possible during step 4.
2. Turn the POWER
u
switch ON.
The standard pitch (factory preset A4=440Hz) will flash on the LCD indicator
q
for about 2 seconds. After that, the tuner will automatically enter the Auto
tuning mode (AUTO will appear on the display
q
).
3. Use the PITCH switch
r
to change the standard pitch (refer to the “Setting
the Standard Pitch” section below).
4. Play a note on the instrument (only play 1 note at a time). Use the note name
indicated on the display
q
, the needle and tuning guide
w
as a reference
while tuning the instrument.
4-1. First, approximately tune the instrument so that the indicator for the
appropriate note name flashes.
4-2. Next, tune until the needle rests in the middle and the green LED of the
tuning guide
w
lights.
o
INPUT
jack
●
Manual Tuning : MANL.
1. Carry out the same settings as described in steps 1-3 in the AUTO tuning
section.
2. Continue to press the NOTE
t
switch until the desired note name flashes.
The tuner is now in the manual mode and “MANL.” appears on the display
q
.
3. As in step 4 of the AUTO tuning section, pluck the string to be tuned. Proceed
to tune the string.
4. Repeat steps 2 and 3 to tune the other strings.
Example) Using the AUTO mode to tune an “E”.
Select the AUTO
mode.
The note name of the string
to be tuned flashes.
When this LED lights,
the string is tuned.
Standard Pitch is
displayed.
Tune until needle comes to
rest in the center.
■
SETTING THE STANDARD PITCH
1. Turn the
POWER
switch
u
ON. The pitch is set to 440 Hz (flashing display).
2. Continuously press the
PITCH
switch
r
until the desired standard pitch (435
– 446Hz) is selected.
3. When the
PITCH
switch
r
has not been pressed for about 2 seconds, the
tuner will automatically return to the tuning mode.
* When the POWER switch
u
is turned OFF, the standard pitch setting will be
reset to A=440Hz.
THIS DIGITAL APPARATUS DOES NOT EXCEED THE “CLASS B” LIMITS FOR RADIO
NOISE EMISSIONS FROM DIGITAL APPARATUS SET OUT IN THE RADIO INTERFER-
ENCE REGULATION OF THE CANADIAN DEPARTMENT OF COMMUNICATIONS.

