– 69 –
DRIV
FRONT CONSTANT VELOCITY JOINTS AND
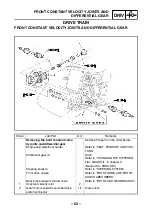
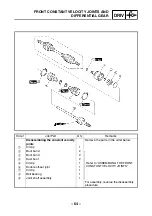
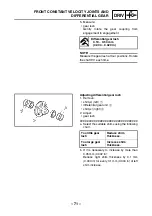
b. Install the dust boots.
c. Install the dust boot bands.
NOTE:
• The new boot bands may differ from the orig-
inal ones.
• The dust boots should be fastened with the
dust boot bands
3
at the grooves in the joint
shaft.
▲▲▲
▲
▲ ▲▲▲
▲
▲ ▲▲▲
▲
▲ ▲▲▲
▲
▲ ▲▲▲
▲
▲ ▲▲▲
▲
▲▲▲
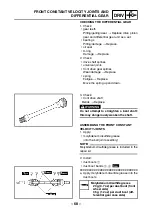
3. Check:
• free play (thrust movement)
Excessive play
→
Replace the constant
velocity joint assembly.
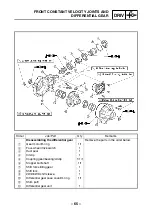
ASSEMBLING THE DIFFERENTIAL GEAR
1. Measure:
• gear lash
Refer to “MEASURING AND ADJUSTING
THE DIFFERENTIAL GEAR LASH”.
2. Install:
• gear motor
▼▼▼
▼
▼ ▼▼▼
▼
▼ ▼▼▼
▼
▼ ▼▼▼
▼
▼ ▼▼▼
▼
▼ ▼▼▼
▼
▼▼▼
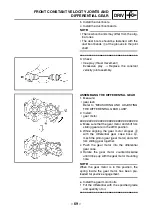
a. Make sure that the gear motor and shift fork
sliding gear are in the 2WD position.
b. While aligning the gear motor stopper
a
with the differential gear case boss
b
,
mesh the pinion gear (gear motor) and shift
fork sliding gear together.
c. Push the gear motor into the differential
gear case.
d. Rotate the gear motor counterclockwise
until it lines up with the gear motor mounting
hole.
NOTE:
When the gear motor is in this position, the
spring inside the gear motor has been pre-
loaded for positive engagement.
e. Install the gear motor bolts.
f. Fill the differential with the specified grade
and quantity of oil.
▲▲▲
▲
▲ ▲▲▲
▲
▲ ▲▲▲
▲
▲ ▲▲▲
▲
▲ ▲▲▲
▲
▲ ▲▲▲
▲
▲▲▲

