Firmware Update Procedure for RX-V467/RX-V567
Page.3 of 5
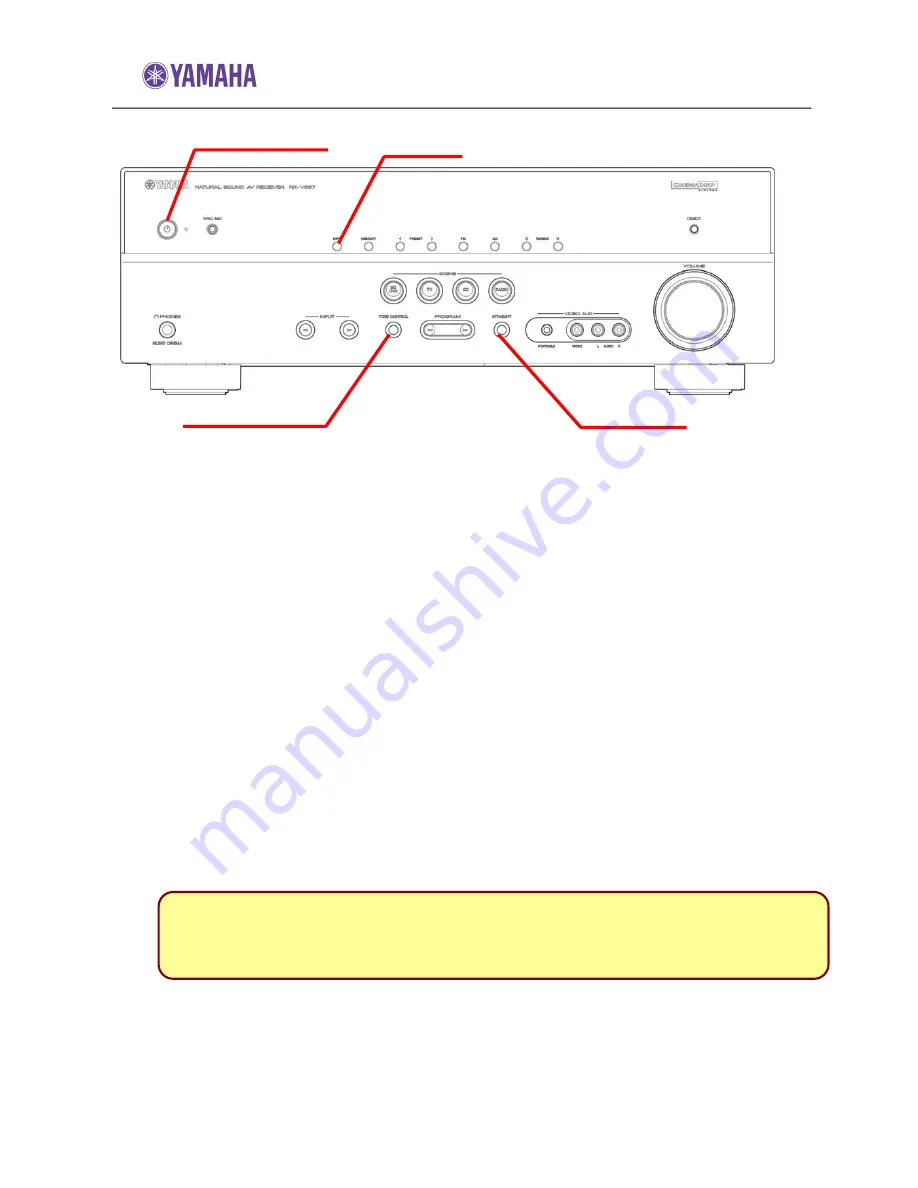
STEP3 ENTER FIRMWARE UPDATE MODE
Plug the AC power cable of the AV receiver.
Press and hold the
[STRAIGHT]
button on the front panel and keep it pressed
while you press the
[STANDBY/ON]
button. Once the front panel displays
"Advance Setup", release the
[STRAIGHT]
button. Then, press and hold the
[INFO]
button for about 3 seconds until front panel displays
“CDDA Upgrader”
.
Now your AV receiver is ready for firmware update.
STEP4 START
FIRMWARE
UPDATE
Turn on the BD/DVD/CD player.
Load the Firmware Update CD (Audio CD) and press
[PLAY]
button on the
BD/DVD/CD player.
“Found Header”
will appear on the AV receiver for few seconds. Then, the
firmware update starts.
“Found Header”
appears within 10 seconds from starting update disc playback.
In case display doesn’t change after 10 seconds, retry the update process again
from the beginning or check requirements for the update disc and connection.
See
IN CASE OF ERROR
for details.
When completed,
“Update Success”
,
“Please...”
and
“Power off!!”
are
displayed repeatedly. Turn off the power of AV receiver.
Stop the BD/DVD/CD player, remove update disc and power off.
While update is in progress,
DO NOT interrupt the AV receiver by pressing any buttons or
switching off the power.
STANDBY/ON
INFO
TONE CONTROL
STRAIGHT


