

5
y
y
y
y
Power User
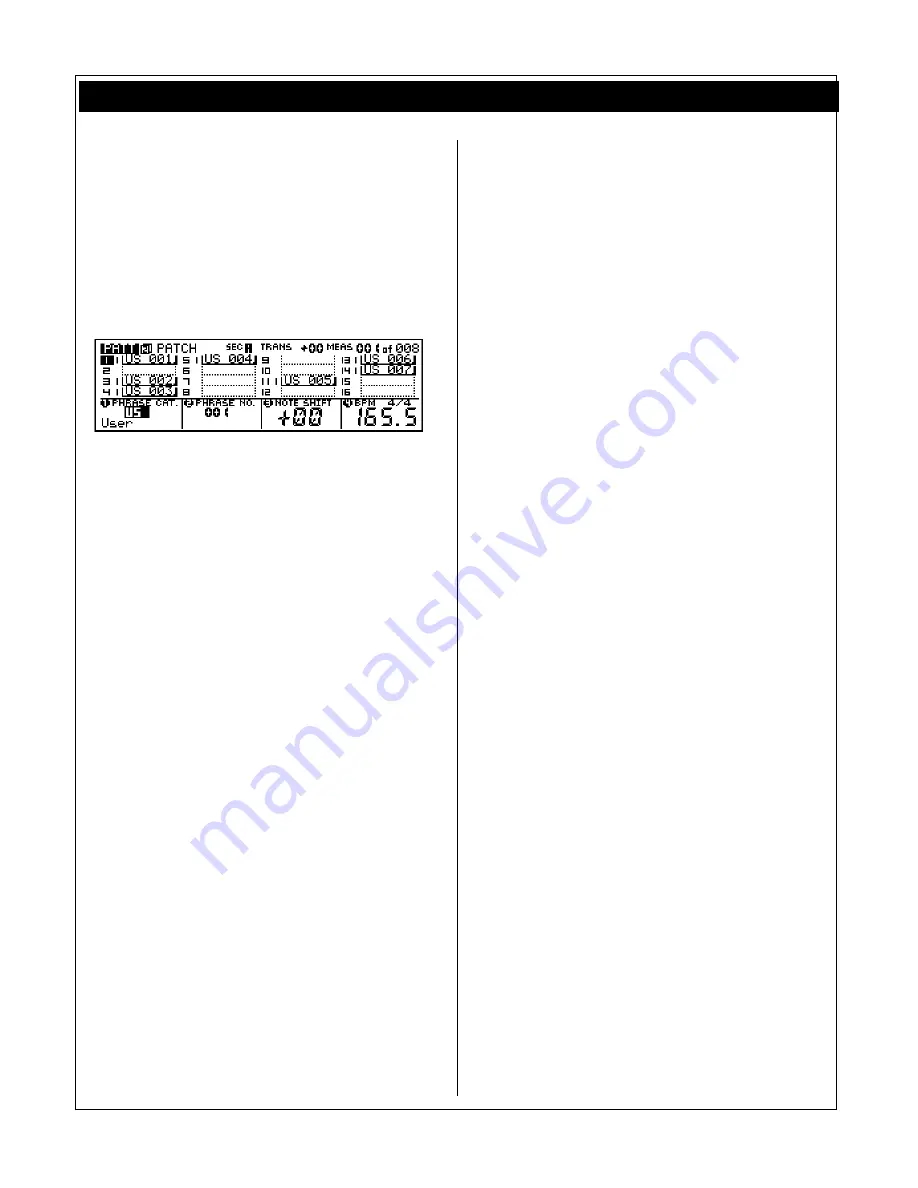
Press the [PATTERN] button a second time to
arrive at the Pattern 2 or PATCH screen. This is
where you can combine Phrases into your own
unique Pattern Styles. Knob 1 selects the Phrase
Category: Preset (over 7000 phrases from the
Preset Pattern Styles – refer to the Owner’s
Manual and List Book for more information on the
Preset phrases) or User (256 phrases per User
Pattern). Knob 2 selects the Phrase number.
Knob 3 allows you to transpose the selected part
by half steps. Knob 4 sets the BPM and time
signature.
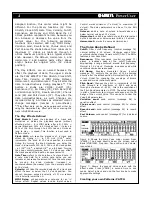
Figure 8: PATCH page is the second Pattern mode
screen. Here you can construct individual phrases into
Pattern Sections. When you put a User Pattern into
record you are recording a User Phrase – the RM1x will
automatically select the next, lowest numbered User
Phrase (US xxx). A maximum of 256 User Phrases per
Pattern Style. Phrases can be a maximum length of
256 measures. Presets and User Phrases can be used
simultaneously in a Pattern Section.
If you are going to record your own data in a
Pattern select a User Pattern (U01 – U50). Each
has room for a maximum of 16 tracks. There is
no
need to assign a phrase to a track if you wish
to create original data. When you select a new
track and press the [REC] button the RM1x will
automatically
place the lowest numbered blank
Phrase on that track. It is recommended that
when you record your own original data that you
enter RECORD from the Pattern 1 screen. This is
where you can determine the record type (real-
time Replace or Overdub, Step or Grid). You can
write up to 256 original Phrases per Pattern Style
because there are 16 tracks per Section and 16
Sections per Pattern Style. Phrases can be
copied, cut, pasted, appended, split and event
edited, as necessary. Phrases can be captured
from linear Song data using a RM1x Job called
‘GET PHRASE’. Phrases can be placed on linear
tracks using the Job called ‘PUT PHRASE’.
Pump-Up the Bass
The RM1x has a +/-24dB low boost/cut. Located
in the edit matrix under the [SETUP] button. You
can select a frequency (display knob 3) and
boost or cut (display knob 4). Be careful of your
sp24 is a lot!
Record Modes
Data can be created via an external MIDI
controller keyboard or generated right on-board
the RM1x. You have several different record
methods. To select the record type: press [REC]
from the main Pattern (1) or main Song screen.
Use the display knob to select Record type, time
signature, etc. (REPL)
Replace
record is suitable
when you are recording linear Song tracks and
wish to write over existing material. (OVER)
Overdub
record is suitable for recording in either
Song or Pattern mode when you want to add
additional material to existing material.
Punch
record let’s you set a punch-in and punch-out
point for automated record functions.
Step
record let’s you enter note data without the
pressure of playing to the metronome. This is
appropriate when entering data from a score or
creating difficult/impossible runs and fills.
Grid
record combines Step and Overdub methods
because it lets you record without pressure of the
metronome yet let’s you hear the data you input.
Grid record works one measure at a time (each
of the 16 white keys represents a subdivision of
the beat) and let’s you see and hear your data
during entry.
Pattern Edit Jobs
The RM1x is a professional sequencer and
features edit parameters where the region can be
defined down to the measure, beat and clock
pulse. Although too numerous to detail each in
this article (please check out your Owner’s
Manual for details), let’s take a look at some of
the more exotic, fun functions.
Glide
automatically replaces notes with precise Pitch
Bend values. This makes a phrase playback with
a smooth glissando.
Create Roll
,
as the name
implies, will create note-on data for drum rolls.
You can set the distance between note-on events
and can control the velocity value increase or
decrease over time.
Chord Sort
will
automatically place the note event data
appearing on the same clock pulse in order from
lowest note to highest or vice versa. This greatly
eases the task of editing data and is useful in
creating realistic guitar-like strums when used in
conjunction with
Chord Separate.
This job let’s
you define the number of clock pulse between
notes of a chord. If, for example, you have a 5-
note chord on beat 1 and you set Chord Separate
to a value 012, the five-note chord will be re-
programmed with 12 ticks between note-ons. By
setting the direction of the chord with the Chord
Sort job you can specify up and/or down strokes
for your strums.
Get Phrase and Put Phrase
jobs allow you to move data back and forth
between Song and Pattern. This opens the door
to importing data from Standard MIDI File songs


