

2
y
y
y
y
Power User
buttons. Holding [SHIFT] while changing
values moves rapidly through the numbers.
•
Press and illuminate the LED for the
[SECTION] mode (when active it flashes).
•
Press the [PLAY] button
•
Try changing sections by pressing a white
key [A]-[P].
•
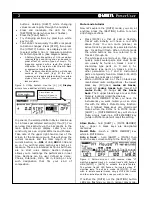
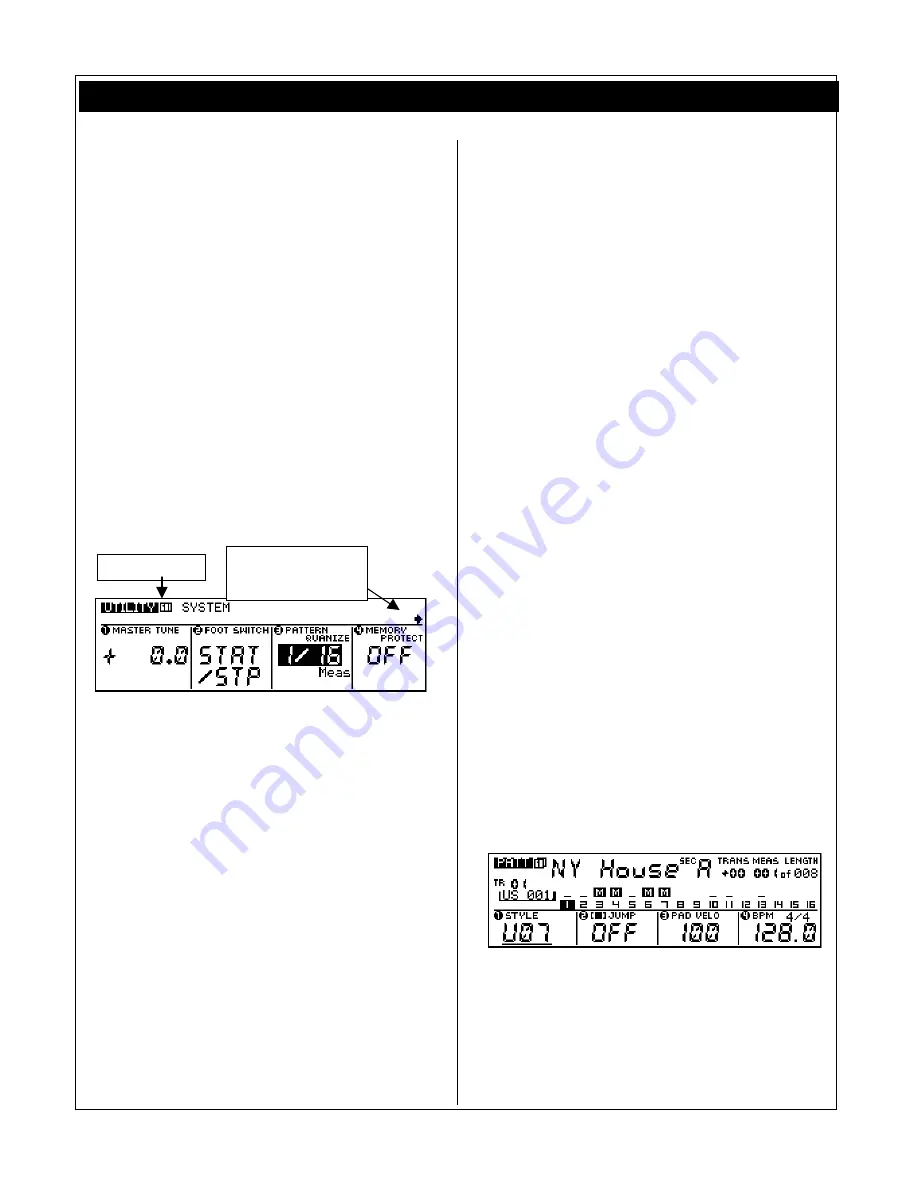
You can set how quickly the RM1x responds
to Section changes. Press [STOP], then press
the [UTILITY] button. Use display knob #3
to select either 1/16 or 1 measure resolution
for Pattern Quantize. (See diagram below).
•
A Pattern Quantize setting of 1/16 resolution
requires fairly good timing and can be used to
great effect on certain types of music. Try
triggering sections with a rapid-fire, stutter-
step action. This is great on fast Drum & Bass
or aggressive Jungle patterns.
•
The 1 measure resolution setting will change
sections at the start (top) of the next
measure and is appropriate setting for certain
styles of music, like slo’ grooves. It requires
less precision.
•
Figure 2: Utility System. Use the [
Å
] [
Æ
]
Display
arrows to see additional Utility screens
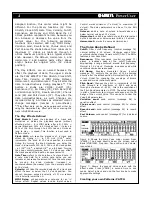
In general, the selected Pattern Style contains up
to 16 tracks per lettered section [A] thru [P]. You
can view track activity via the bar graphs in the
main Pattern screen display. Later you can
construct your own original Patterns and Phrases.
Take note of the upper right-hand corner of the
screen for the measure count. This will show the
current measure and the total length of the
current Section, i.e.,
001
of 008,
002
of 008 and
so on. You will find some sections as short as 1
measure. These are intended as fill-ins but there
are no strict rules. Pattern Section changes
allows you to rearrange the performance in real
time. Sections can be user defined as Verse,
Chorus, Interlude, Intro, Fill in, Ending or any
such designation that fits your kind of
composition.
Mute mode tutorial
Now let’s explore the [MUTE] mode, you can, at
anytime, press the [SECTION] button to return
and change sections.
•
Press [MUTE] so that its LED is flashing.
Tracks with activity will have a red LED
above them. You can mute (silence) an
active track by pressing its associated white
key. Its LED will flash. When in Mute mode
the white buttons are now referred to as
Tracks 1 through 16.
•
The white keys are laid out so that you can
quickly mute several parts. Kick drum tracks
can usually be found on tracks 1 and 2,
snare/clap type parts on 3 and 4, hi-
hat/shaker type parts on tracks 5 and 6,
other percussion on 7 and 8. Instrument
parts are typically found on tracks 9-16. With
the bass line normally on track 9.
•
While in MUTE mode 9 of the 10 black keys
recall stored mute configurations: the lowest
black key (F#)/(ALL)
mutes all tracks
;
lowest G#
mutes tracks 1~8
; lowest A#
mutes 9~16
; C# brings
all the tracks
back
. The 5 upper black keys are user Mute
Memory locations (described below).
•
USER MUTE MEMORY: When you have the
instruments you want muted you can store
this with the RM1x’s Mute Memory function.
The 5 highest black keys can store/recall
mutes when the RM1x is in MUTE mode.
[SHIFT] + [MUTE MEMORY] key will store a
Mute, simply touching a MUTE MEMORY key
(while in MUTE mode) will recall the setting.
Store Mute
– hold [SHIFT] + [MUTE MEMORY]
key - Upper 5 black keys are designated
memories
Recall Mute
–touch a [MUTE MEMORY] key
while in MUTE mode
Solo a track
– hold [SHIFT] + [MUTE] then
touch the key corresponding to the track [1]-[16]
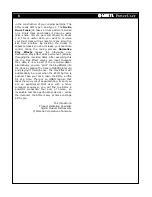
Figure 3: Pattern screen 1 with reverse video “M”
signifying
m
uted tracks. A muted track’s LED flashes.
Hold [SHIFT] + [MUTE] to activate the Solo feature.
The soloed track’s LED flashes. An inverse video “s”
signifies
s
olo. To exit solo mode hit [MUTE]. If you
wish to isolate several tracks, simply MUTE ALL tracks
and then activate only the ones you wish to hear.
If neither the [MUTE] nor the [SECTION] button
LEDs are flashing you are in normal play mode.
Arrow means use
Display [
Æ
] arrow to
see additional screens
Screen number


