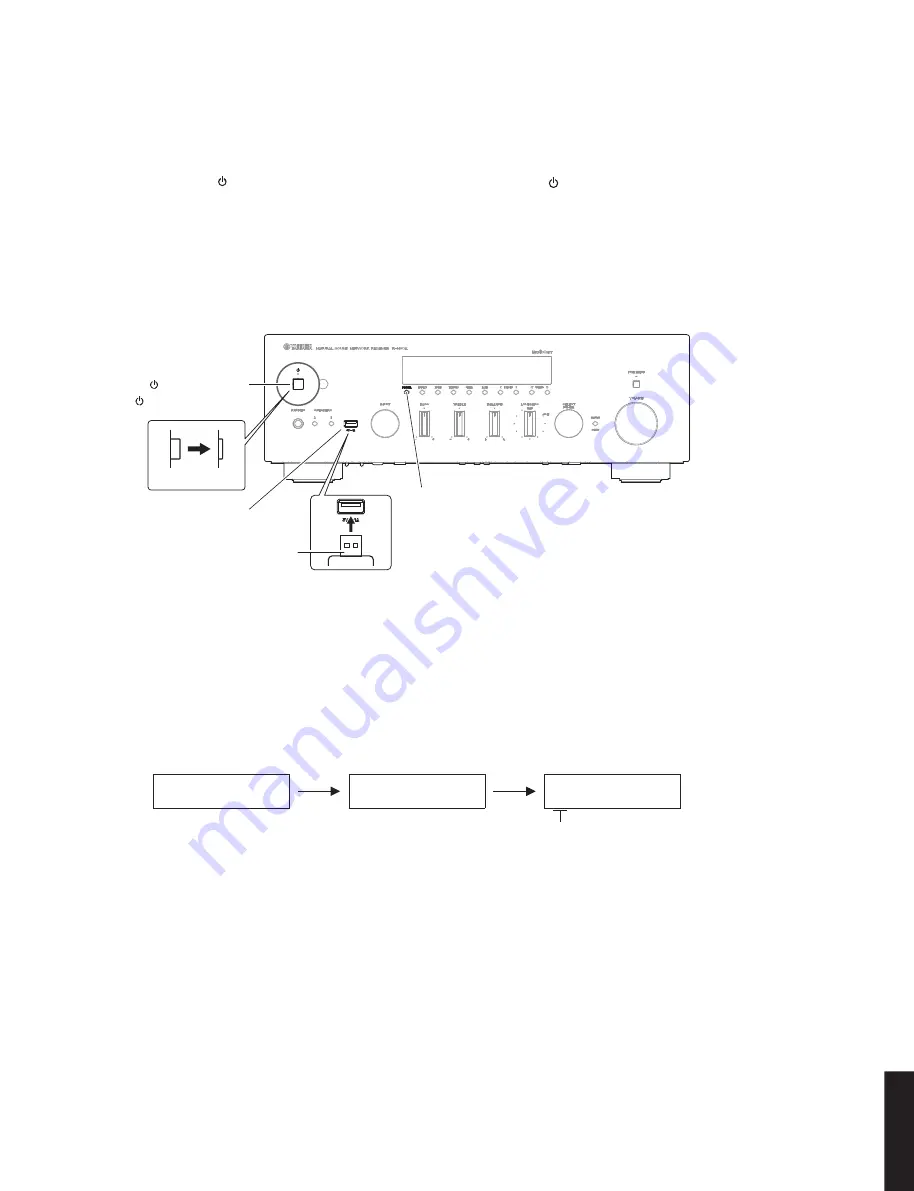
Fig. 1
●
Operation
Procedures
*
Disconnect the power cable of this unit from the
AC outlet.
1. Press the “ ” (Power) switch to the ON position.
(Fig. 1)
2. Insert the USB storage device to the USB jack.
(Fig. 1)
3. While pressing the “DIMMER” key, connect the
power cable to the AC outlet. (Fig. 1)
4. The USB UPDATE mode is activated and “USB
UPDATE” is displayed. Writing of the firmware
starts automatically. (Fig. 2)
*
If error message is displayed during writing of
the firmware, refer to “List of Error Messages” to
determine the cause and perform the updating
procedure again from the beginning.
● 操作手順
※ 本機の電源コードを AC コンセントから抜きます。
1. “ ”(電源)スイッチを ON にします。(Fig. 1)
2. USB 端子に USB フラッシュメモリーを差し込みま
す。(Fig. 1)
3. “DIMMER” キーを押しながら、電源コードを AC
コンセントに接続します。(Fig. 1)
4. USB UPDATE モードが起動し、“USB UPDATE” が
表示されて、ファームウェアの書き込みが自動的
に開始されます。(Fig. 2)
※ ファームウェアの書き込みの途中でエラー
メッセージが表示された場合、“エラーメッ
セージ一覧” で原因を参照し、アップデート
の操作を最初からやり直してください。
Fig. 2
Writing is started. /
書き込み開始
Writing being executed. /
書き込み中
U S B U P D A T E
V E R I F Y I N G . . .
S x - x : x x %
S1: NET (Network module) section
S2: MAIN (IC22 on DIGITAL P.C.B.) section
S3: (Not for service)
S4: (Not for service)
S5: (Not for service)
ON
OFF
USB jack
USB 端子
USB storage device
USB フラッシュメモリー
"DIMMER" key
"DIMMER" キー
" " (Power) switch
" "(電源)スイッチ
17
R-N602
R-N602


