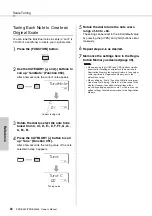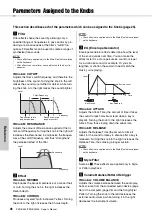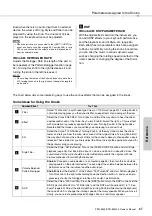
background image

PSR-E453/PSR-EW400  Owner’s Manual

45

Re

fe

re

n

c

e

Voice Settings

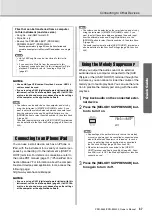
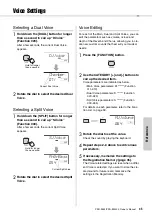
Selecting a Dual Voice

1

Hold down the [DUAL] button for longer 
than a second to call up “D.Voice” 
(Function 020).

After a few seconds, the current Dual Voice 
appears.

2

Rotate the dial to select the desired Dual 
Voice. 

Selecting a Split Voice

1

Hold down the [SPLIT] button for longer 
than a second to call up “S.Voice” 
(Function 030).

After a few seconds, the current Split Voice 
appears.

2

Rotate the dial to select the desired Split 
Voice. 

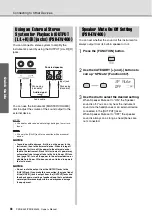
Voice Editing

For each of the Main, Dual and Split Voices, you can 
edit the parameters such as volume, octave and 
depth of the Reverb and Chorus, allowing you to cre-
ate new, custom sounds that best suit your musical 
needs. 

1

Press the [FUNCTION] button.

2

Use the CATEGORY [+] and [-] buttons to 
call up the desired item. 

Voice parameters are indicated as below.

• Main Voice parameters: M.****** (Function 

011–019)

• Dual Voice parameters: D.****** (Function 

020–029)

• Split Voice parameters: S.****** (Function 

030–035)

For details on each parameter, refer to the Func-
tion List on page 59

3

Rotate the dial to set the value. 

Check the sound by playing the keyboard. 

4

Repeat steps 2–3 above to edit various 
parameters. 

5

If necessary, memorize the settings to 
the Registration Memory (page 35). 

The Voice-related settings are reset when a differ-
ent Voice is selected. If you want to store the cre-
ated sound for future recall, memorize the 
settings to the Registration Memory. 

D.Voice

020

Chamber

071

020

Current Dual Voice

Hold for longer 
than a second.

S.Voice

030

FngrBass

054

030

Current Split Voice

Hold for longer 
than a second.

M.Volume

064

011

Summary of Contents for PSR-EW400

Page 1: ... can fully take advantage of the advanced and convenient functions of the instrument We also recommend that you keep this manual in a safe and handy place for future reference Before using the instrument be sure to read PRECAUTIONS on pages 5 7 Setting Up Reference Appendix Quick Guide DIGITAL KEYBOARD Owner s Manual ...

Page 2: ...vi ronmentally friendly We sincerely believe that our products and the production methods used to produce them meet these goals In keep ing with both the letter and the spirit of the law we want you to be aware of the following Battery Notice This product MAY contain a small non rechargeable battery which if applicable is soldered in place The average life span of this type of bat tery is approxim...

Page 3: ...interference will not occur in all installations If this product is found to be the source of interference which can be determined by turning the unit OFF and ON please try to elimi nate the problem by using one of the following measures Relocate either this product or the device that is being affected by the interference Utilize power outlets that are on different branch circuit breaker or fuse c...

Page 4: ...at plugs convenience receptacles and the point where they exit from the apparatus 11 Only use attachments accessories specified by the manufacturer 12 Use only with the cart stand tri pod bracket or table specified by the manufacturer or sold with the apparatus When a cart is used use caution when moving the cart apparatus combination to avoid injury from tip over 13 Unplug this apparatus during l...

Page 5: ... place the power cord near heat sources such as heaters or radiators Also do not excessively bend or otherwise damage the cord or place heavy objects on it Only use the voltage specified as correct for the instrument The required voltage is printed on the name plate of the instrument Use the specified adaptor page 72 only Using the wrong adaptor can result in damage to the instrument or overheatin...

Page 6: ... follow the basic precautions listed below to avoid the possibility of physical injury to you or others or damage to the instrument or other property These precautions include but are not limited to the following Do not connect the instrument to an electrical outlet using a multiple connector Doing so can result in lower sound quality or possibly cause overheating in the outlet When removing the e...

Page 7: ...mical impregnated wiping cloths Saving data Some of the data of this instrument page 39 are retained when the power is turned off However the saved data may be lost due to some failure an operation mistake etc Save your important data onto USB flash drive an external device such as a computer pages 36 64 Before using a USB flash drive make sure to refer to page 62 To protect against data loss thro...

Page 8: ...Lesson Feature 30 Making Practice Perfect Repeat Learn 31 Recording Your Performance 32 Track Structure of a Song 32 Quick Recording 32 Recording to a Specified Track 33 Clearing a User Song 34 Clearing a Specified Track from a User Song 34 Memorizing Your Favorite Settings Registration Memory 35 Memorizing Panel Settings to the Registration Memory 35 Recalling Panel Settings from the Registration...

Page 9: ... Dictionary 55 Song Settings 56 BGM Background Music Playback 56 Random Song Playback 56 Tempo Setting of the Song 57 Tap Start 57 Song Volume 57 Melody Voice Setting of the Preset Song 57 The Functions 58 Basic Procedure in the Function Display 58 USB Flash Drive Operations 62 Connecting a USB Flash Drive 63 Formatting a USB Flash Drive 64 Saving User Data to a USB Flash Drive 64 Saving a User So...

Page 10: ...t support GM System Level XGlite As its name implies XGlite is a simplified version of Yamaha s high quality XG tone genera tion format Naturally you can play back any XG song data using an XGlite tone generator However keep in mind that some songs may play back differently compared to the original data due to the reduced set of control parameters and effects USB USB is an abbreviation for Univers...

Page 11: ... iPhone iPad etc To obtain these materials access the Yamaha Downloads website then enter the model name for searching the desired files Yamaha Downloads http download yamaha com The illustrations and displays as shown in this manual are based on the PSR E453 Please note that the PSR EW400 and PSR E453 have different numbers of keys the PSR EW400 has 76 keys and the PSR E453 has 61 keys Downloadin...

Page 12: ...72 C4 084 C5 096 C6 Voice List Data List Style List Data List Song List Data List Pattern List Data List Dial page 18 Display page 19 As illustrated each note of the key board has a specific note number and name e g 036 C1 which is used in making various settings such as Split Point page 53 PSR E453 036 C1 096 C6 PSR EW400 028 E0 103 G6 The illustration is of the PSR E453 ...

Page 13: ...tons Page 35 1 4 buttons Page 35 8 PATTERN button Page 27 9 SONG button Page 28 0 STYLE button Page 26 1 VOICE button Page 20 2 PATTERN SONG STYLE Control buttons When the PATTERN lamp is on Pages 27 and 52 When the SONG lamp is on Page 29 When the STYLE lamp is on Pages 26 50 and 51 3 TRACK CONTROL buttons When the PATTERN lamp is on Page 27 When the SONG lamp is on Pages 29 32 When the STYLE lam...

Page 14: ... not be reliable enough to last through these crucial operations Use the specified AC adaptor page 72 only Using the wrong AC adaptor can result in damage to the instrument or overheating When using the AC adaptor with a removable plug make sure to keep the plug attached to the AC adaptor Using the plug alone can cause electric shock or fire Never touch the metallic section when attaching the plug...

Page 15: ...he volume may be reduced the sound may be distorted and other problems may occur When this happens make sure to replace all batteries with new ones or already recharged ones PSR EW400 PSR EW400 PSR E453 NOTICE This instrument cannot charge the batteries Use only the specified charger device when charging Power will be automatically drawn from the AC adaptor if an AC adaptor is connected while batt...

Page 16: ...The built in speakers are automatically shut off when a plug is inserted into this jack Connecting an External Device PSR E453 This jack also functions as an external output By connecting to a computer keyboard amplifier recorder or other audio device you can Even when the power is off a small amount of electricity is still being consumed by the instrument When you are not using the instrument for...

Page 17: ...ectronic com ponents turn off the power of all the components Also before turning any components on or off make sure to set all volume levels to minimum Otherwise damage to the components or electrical shock may occur To avoid possible damage to the external device first turn on the power to the instrument then to the external device When turning off the power do so in reverse order first turn off...

Page 18: ...n briefly to increase the value by 1 or press the NO button briefly to decrease the value by 1 Press and hold either button to continu ously increase or decrease the value in the corresponding direc tion Pressing both buttons simultane ously lets you reset a parameter to the default value YES NO buttons Decrease Press briefly to decrease The Press Hold Symbol Buttons having this indication can be ...

Page 19: ... above the staff are indicated by 8va For a few specific chords not all notes may be shown due to space limitations in the display NOTE Indicates the source from which this instrument obtains power AC adaptor or batteries page 15 Appears when USB flash drive is con nected to this instrument page 63 Power source status USB connection status Indicates the current beat of playback page 28 Indicates t...

Page 20: ...set various settings to default and simply play a Piano sound press the PORTA BLE GRAND button The Voice for the entire keyboard will be set to 001 Grand Piano PSR E453 or Live Grand Piano PSR EW400 Selecting a Main Voice Voice number 001 on the PSR EW400 is Live Grand Piano 001 237 Instrument Voices 238 261 Drum SFX Kit Various drum percussion or SFX sounds are assigned to individual keys Details...

Page 21: ...rent Voice between the Left hand and Right hand areas 1 Press the SPLIT button to turn Split on The keyboard is divided into left and right hand area at the Split Point You can play a Split Voice on the left hand area while playing a Main Voice and Dual Voice on the right hand area of the key board The Split Voice page 45 and the Split Point can be changed as desired page 53 2 Press the SPLIT butt...

Page 22: ...own on the display 2 Rotate the dial to select the number of beats per measure A chime will sound on the first beat of each mea sure while a click sounds the other beats If 0 is selected a click sounds for all beats with no chime accent Select 6 for this example 3 Press the CATEGORY button once to call up TimeSigD Time Signature Denominator The length of one beat is shown on the display 4 Rotate t...

Page 23: ... appears 3 Rotate the dial to select the desired Har mony type The operation differs depending on the Harmony type Try playing the keyboard by referring to How to sound each Harmony Type at right and the Harmony Type List 4 Press the HARMONY button again to turn Harmony off Adjusting the Harmony Volume You can adjust the Harmony volume in the Function Settings page 60 Function 043 Adding Harmony A...

Page 24: ...you select a Main Voice but you can also select any other Arpeggio type For a list of available Arpeggios refer to the Arpeggio List in the separate Data List 1 Hold down the ARPEGGIO button for longer than a second to call up ARP Type Function 044 After a few seconds the current Arpeggio type appears 2 Rotate the dial to select the desired Arpeggio type Triggering Arpeggios Selecting a Voice numb...

Page 25: ...right hand while operating the knob A with your left Assigning Functions to the Knobs Function Target 1 Filter Cutoff Resonance Main Voice and Dual Voice 2 Effect Reverb Chorus 3 EG Attack Release 4 Style Filter Cutoff Resonance Style page 26 or Pattern page 27 5 Volume Balance Pattern Retrigger Knob A Audio input from the external device and Style Pattern Song Knob B Pattern 6 DSP The DSP part se...

Page 26: ... right hand and chords with the left hand 5 Press the START STOP button to stop playback You can easily add variations to your perfor mance by changing the section of the Style For details refer to page 50 With this function you can easily call up suitable panel settings such as Voice and Style simply by selecting your desired music genre 1 Press the MUSIC DATABASE button Both the ACMP and Synchro...

Page 27: ...a the TRACK CONTROL buttons Changing the Section via the A E buttons Using the Retrigger function Pattern Retrigger is a function which repeats the first part of the current Pattern for a rhyth mic break effect For details refer to page 52 Transposing playback by pressing any note in the Auto Accompaniment area Changing the sound via the Knobs Press the ASSIGN button several times to select 4 STYL...

Page 28: ...signed to the Songs in the following sequence Songs transferred from a computer Songs in the USB flash drive When you transfer a Song from a computer while the USB flash drive is connected to the instrument the transferred Song will be inserted before the first USB Song number moving all USB Song numbers later in sequence Gives you an idea of the advanced capabilities of this instrument Demonstrat...

Page 29: ...ly will toggle the on off status Song Fast Forward Fast Reverse and Pause When the A B repeat is specified the Fast Reverse and Fast Forward will only work within the range between A and B The and buttons cannot be used for Demo Song playback started by using the DEMO button Playing a Specified Section of a Song Repeatedly A B Repeat Fast Reverse During playback press this button to rapidly return...

Page 30: ...art play back of the Song Pressing the LESSON button repeatedly will change the lesson number from 1 LISTEN 2 TIMING 3 WAITING off 1 Press this button until the desired number is shown on the display To stop the lesson press the Start Stop button Even during playback you can change the lesson number by pressing the LESSON button 4 When Song playback reaches to the end check your evaluation Grade o...

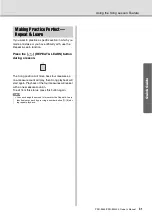
Page 31: ...RN button during a lesson The Song position will move back four measures a one measure count will play then Song playback will start again Playback of the four measures will repeat with a one measure count in To exit from this status press this button again Making Practice Perfect Repeat Learn You can change the amount of measures the Repeat Learn function jumps back by pressing a number button 1 ...

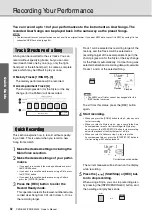
Page 32: ...ack 1 will be selected as recording target of the melody and the Track A will be selected as recording target of the accompaniment part the chord progression for the Style or the key change for the Pattern automatically If a User Song was selected beforehand recording data will overwrite Tracks 1 and A of the selected Song To exit from this status press the REC button again 4 Start recording When ...

Page 33: ...he STYLE button select the desired Style then simultaneously hold down the REC button and press the A button ACMP is automatically turned on Never attempt to turn the power off when Writing is shown in the display Doing so can result in a loss of data When recording Pattern playback with Retrigger Note that the beat indicator in the display metronome and Arpeggio playback are not synchronized with...

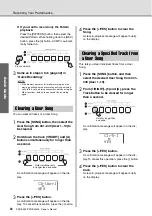
Page 34: ...n progress message will appear briefly on the display This lets you clear individual tracks from a User Song 1 Press the SONG button and then select the desired User Song from 031 040 User 1 10 2 From 1 RIGHT 5 and A press the Track button to be cleared for longer than a second A confirmation message will appear on the dis play 3 Press the YES button A confirmation message will appear on the dis p...

Page 35: ...ved to the Registration Memory during Song playback If you select a Registration Memory number that already contains data the previous data is deleted and overwritten by the new data Never attempt to turn the power off when Writing is shown in the display Doing so can result in a loss of data NOTE Bank 1 Bank number Press and hold NOTICE Recalling Panel Settings from the Registration Memory When t...

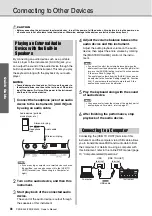
Page 36: ...al page 11 Computer related Operations Before connecting the instrument to external devices turn off the power of all the devices Also before turning the power on or off make sure to set all volume levels to minimum Otherwise damage to the devices or electrical shock may occur CAUTION Playing an External Audio Device with the Built in Speakers To avoid damage to the devices first turn on the power...

Page 37: ...he computer and also by using the instrument s MASTER VOLUME control If you want to adjust the volume balance between the audio input from the external device and Song Style Pattern use the ASSIGN button to select Function number 5 then turn Knob A page 46 The audio input volume from the USB TO HOST terminal can also be adjusted in the Function Settings page 58 Function 005 Connecting to an iPhone...

Page 38: ...ack OUTPUT L L R R jacks PSR EW400 Use audio cables and adaptor plugs having no zero resis tance Use only the L L R jack for connection with a monaural device To avoid possible damage first turn on the power to the instrument then to the external device When turning off the power first turn off the power to the external device then to the instrument Since this instrument s power may automatically ...

Page 39: ...omputer Note that Style data loaded to Style numbers 221 230 will be maintained While simultaneously holding the highest white key and the three highest black keys press the Standby On switch to turn the power on Backup Parameters Backup parameters User Songs page 32 Style data transferred from a computer and loaded to Style numbers 221 230 page 67 Registration Memory page 35 FUNCTION Settings pag...

Page 40: ...utton 2 Use the CATEGORY and buttons to call up Chorus Function 037 After a few seconds the current Chorus type appears 3 Rotate the dial to select a Chorus type Play the keyboard to check the sound For infor mation about the available Chorus types refer to the Effect Type List in the separate Data List Some Songs and Styles use Reverb Types which cannot be selected via panel operation If such a S...

Page 41: ... Press the FUNCTION button 2 Use the CATEGORY and buttons to call up Tuning Function 007 3 Use the dial to set the Tuning value Pitch Controls the PITCH BEND wheel The PITCH BEND wheel can be used to add smooth pitch variations to notes you play on the key board Roll the wheel upward to raise the pitch or downward to lower the pitch You can change the amount of pitch bend produced by the wheel in ...

Page 42: ...second to call up Master EQ Function 038 After a few seconds the current Master EQ type appears 2 Rotate the dial to select the desired Mas ter EQ type Master EQ types 1 Soft Allows maximum loudness to be pro duced with relatively light key pres sure 2 Medium Produces a fairly standard keyboard response 3 Hard Requires that the keys be played quite hard to produce maximum loudness 4 Fixed All note...

Page 43: ...rent scale appears 3 Rotate the dial to select a scale The default setting is 1 Equal Preset Scale types Setting the Base Note for Each Scale Please make sure to specify the appropriate base note if you select a scale other than Equal Tempera ment or create an original scale via Scale Tune func tion 1 Press the FUNCTION button 2 Use the CATEGORY or button to call up BaseNote Function 049 After a f...

Page 44: ...e of 64 to 63 The setting can be reset to the initial default value by pressing the YES and NO buttons simul taneously 6 Repeat steps 2 5 as desired 7 Memorize the settings here to the Regis tration Memory as desired page 35 TuneNote 050 C 01 050 Current tuning note Tune C 051 00 Tune 051 Tuning value When pressing the YES and NO buttons simulta neously after recalling an original scale memorized ...

Page 45: ...ur musical needs 1 Press the FUNCTION button 2 Use the CATEGORY and buttons to call up the desired item Voice parameters are indicated as below Main Voice parameters M Function 011 019 Dual Voice parameters D Function 020 029 Split Voice parameters S Function 030 035 For details on each parameter refer to the Func tion List on page 59 3 Rotate the dial to set the value Check the sound by playing t...

Page 46: ...ive sound or slower for a violin like sound for example Or you can lengthen or shorten the sustain to best match the music you re playing Knob A ATTACK Adjusts the Attack Time the amount of time it takes the sound to reach maximum level when a key is played Turning the knob to the right increases the Attack Time thus slowing down the attack rate Knob B RELEASE Adjusts the Release Time the amount o...

Page 47: ... B all the way down to hear the direct unprocessed sound of the Voice As you turn Knob B toward the right a Chorus effect with modulation is gradually applied to the sound Turning Knob A to the right adds a Reverb effect that makes you sound like you are playing in a concert hall c EG Select the Voice 173 RSAnPad Turning Knob A all the way down makes the attack faster and lets you hear the crisp c...

Page 48: ... button several times to assign Function 6 to the knobs page 25 7 Turn the knobs while playing the part selected in step 5 to see how the DSP effects change 8 Press the DSP button again to turn DSP off DSP part Keyboard Main Voice Dual Voice Track 1 of a User Song When selecting the Keyboard part for DSP DSP ON OFF Type DSP part Style Style Pattern Track A of a User Song When selecting the Style p...

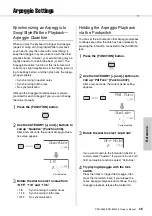
Page 49: ...antize Function 046 After a few seconds the current Arpeggio Quan tize value appears 3 Rotate the dial to select a value from OFF 1 8 and 1 16 1 8 Synchronizing to quarter notes 1 16 Synchronizing to 8th notes OFF No synchronization Holding the Arpeggio Playback via the Footswitch You can set the instrument so that Arpeggio playback continues even after the note has been released by pressing the f...

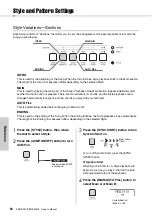
Page 50: ... in response on the chords you play with your left hand AUTO FILL This is automatically added before changing to Main A or B ENDING This is used for the ending of the Song When the Ending finishes the Style playback stops automatically The length of the Ending in measures differs depending on the selected Style 1 Press the STYLE button then rotate the dial to select a Style 2 Press the ACMP ON OFF...

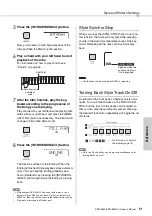
Page 51: ...g is playing back Style Synchro Stop When you press the SYNC STOP button to turn on this function the Style will only play while pressing chords in the Auto Accompaniment area of the key board Releasing all the notes will stop Style play back Turning Each Style Track On Off As printed on the front panel a Style consists of six tracks Turn on off each track via the TRACK CON TROL buttons Each of th...

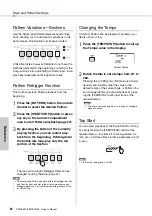
Page 52: ...of the Section The top portion length Retrigger Rate can be changed by using the knob page 47 Changing the Tempo A Style or Pattern can be played at any tempo you desire fast or slow 1 Press the TEMPO TAP button to call up the Tempo value in the display 2 Rotate the dial to set a tempo from 011 to 280 Pressing the YES and NO buttons simulta neously can instantly reset the value to the default temp...

Page 53: ...litPnt Function 009 You can call up this display also by pressing the STYLE then holding the ACMP button for lon ger than a second 3 Rotate the dial to set the Split Point between 036 C1 and 096 C6 on the PSR E453 or 028 E0 and 103 G6 on the PSR EW400 Playing Chords Without Style Playback Stop Accompaniment If you press the STYLE button press the ACMP ON OFF button to turn ACMP on the ACMP ON icon...

Page 54: ...t nothing is shown on the display In such a case only the rhythm and bass parts will be played Major Minor Seventh Minor Seventh Major Seventh Easy Chords This method lets you easily play chords in the Auto Accompaniment area of the keyboard using only one two or three fingers For root C To play a major chord Press the root note of the chord To play a minor chord Press the root note together with ...

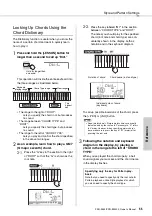
Page 55: ...HORD TYPE and ROOT The notes you should play for the specified chord root note and chord type are con veniently shown in the display both as notation and in the keyboard diagram To call up possible inversions of the chord press the YES or NO button 3 Following the notation and keyboard diagram in the display try playing a chord in the range to the left of CHORD TYPE When you ve played the chord pr...

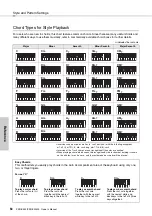
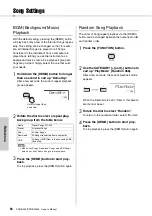
Page 56: ... the DEMO button to start play back To stop playback press the DEMO button again Random Song Playback The order of Song repeat playback via the DEMO button can be changed between the numerical order and random order 1 Press the FUNCTION button 2 Use the CATEGORY and buttons to call up PlayMode Function 066 After a few seconds the current playback mode appears When the DemoGrp is set to Demo this p...

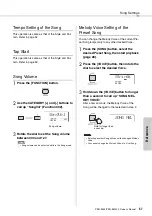
Page 57: ...the Melody Voice of the current Pre set Song temporarily to any other desired Voice 1 Press the SONG button select the desired Preset Song then start playback page 28 2 Press the VOICE button then rotate the dial to select the desired Voice 3 Hold down the VOICE button for longer than a second to call up SONG MEL ODY VOICE After a few seconds the Melody Voice of the Song will be changed to that se...

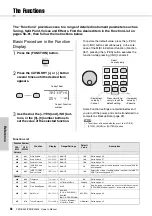
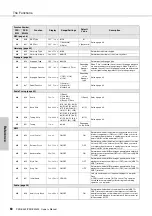
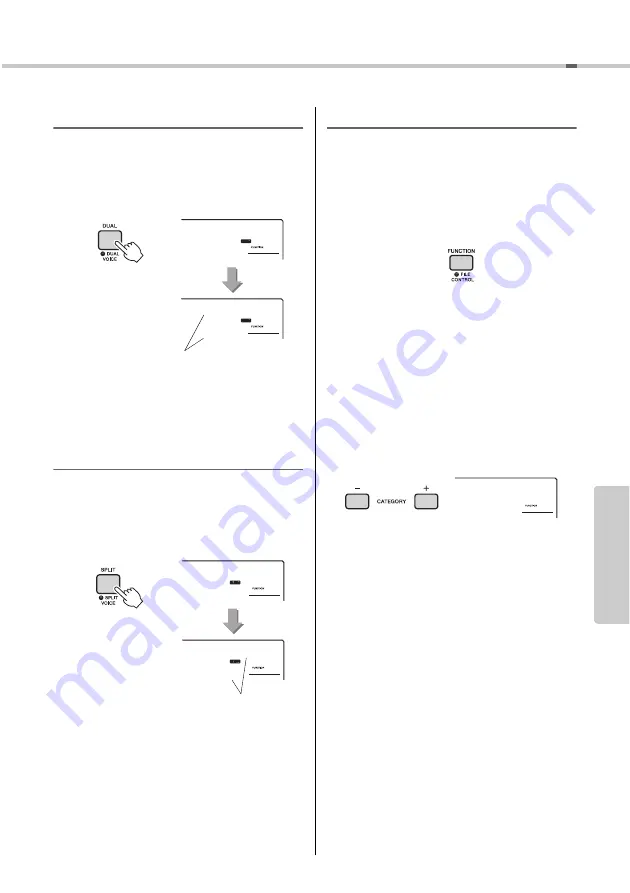
Page 58: ...the VOICE STYLE SONG or PATTERN button Direct numeric entry Press simultane ously to recall the default setting Increment value by 1 Execute Decrement value by 1 Cancel NOTE Function Number Function Display Range Settings Default Value Description PSR E453 PSR EW400 Volume 001 001 Style Volume StyleVol 000 127 100 Refer to page 53 002 002 Song Volume SongVol 000 127 100 Refer to page 57 003 003 Pa...

Page 59: ... how much of the Dual Voice s signal is sent to the Reverb effect 025 025 Chorus Depth D Chorus 000 127 Determines how much of the Dual Voice s signal is sent to the Chorus effect 026 026 Attack Time D Attack 000 127 064 Determines how fast the volume of the Dual Voice reaches the Attack level when the note is pressed The larger the value the slower the attack rate The smaller the value the faster...

Page 60: ...whether the instrument s keyboard controls the internal tone generator ON or not OFF When you record your keyboard performance to application software on a com puter via MIDI set this parameter to OFF 053 053 External Clock ExtClock ON OFF OFF Determines whether the instrument synchronizes to the inter nal clock OFF or an external clock ON When you record your keyboard performance to application s...

Page 61: ...NG When set to ON playback tempo will change to match the speed at which you are playing When set to OFF playback tempo will be main tained regardless of the speed at which you are playing Demo page 28 065 065 Demo Group DemoGrp 1 Demo 2 Preset 3 User 4 Down load 5 USB 1 Demo Refer to page 56 066 066 Demo Play Mode PlayMode 1 Normal 2 Random 1 Normal Refer to page 56 Speaker Mute page 38 067 Speak...

Page 62: ...ve you can save data you ve created to the connected device as well as read data from the connected device Number of USB flash drives that can be used Only one USB flash drive can be connected to the USB TO DEVICE terminal Formatting a USB flash drive You should format the USB flash drive only with this instrument page 64 A USB flash drive formatted on another device may not operate properly To pr...

Page 63: ...ng and only but tons related to File Control operations will be active NOTE Mounting flashes Mounted lights Load STY Hold for longer than a second NOTE NOTE Display File Control function Page Load STY Loading a Style File 67 Load USR Loading User Data from a USB Flash Drive 66 Save SMF Saving a User Song as SMF to a USB Flash Drive 65 Save USR Saving User Data to a USB Flash Drive 64 Del SMF Delet...

Page 64: ...ettings page 35 The User Data can be saved as a single User File usr to a USB flash drive 1 Hold the FUNCTION button for longer than a second to call up the File Control display 2 Use the CATEGORY and buttons to call up Save USR 3 Press the 0 EXECUTE button As the target file name USER number appears on the display If desired rotate the dial to select a different file name from USER001 USER100 4 P...

Page 65: ...CUTE button 4 Press the 0 EXECUTE button again As the target file name on the USB flash drive SONG number 1 100 appears on the display If desired rotate the dial to select the dif ferent file The Save operation cannot be cancelled during exe cution Never turn off the power or disconnect the USB flash drive during the operation Doing so may result in data loss The amount of time required for this o...

Page 66: ...n again or the YES button to execute the Load operation After a while a message indicating completion of the operation appears Overwriting existing files If a file that already contains data is selected an overwrite confirmation message will appear The Save operation cannot be cancelled during exe cution Never turn off the power or disconnect the USB flash drive during the operation Doing so may r...

Page 67: ...o select a different Style file 4 Press the 0 EXECUTE button again As the Load destination Load To 221 230 appears on the display If desired rotate the dial to select a different number 5 Press the 0 EXECUTE button again A confirmation message will appear To cancel the operation press the NO button 6 Press the 0 EXECUTE button again or the YES button to execute the Load operation After a while a m...

Page 68: ...ORY and buttons to call up Del SMF 3 Press the 0 EXECUTE button SMF file names in the USB flash drive appear on the display as SONG number If desired rotate the dial to select a different SMF file 4 Press the 0 EXECUTE button again A confirmation message will appear To cancel the operation press the NO button 5 Press the 0 EXECUTE button again or the YES button to execute the Delete operation Afte...

Page 69: ... be exe cuted since the memory becomes full Delete any unnecessary data or use another USB flash drive Error Displayed when a file error or operational error occurs File Ful Displayed when saving data cannot be exe cuted since the total number of files exceeds the capacity Delete the unnecessary data or use another USB flash drive no data There is no data in the memory no file There is no file in ...

Page 70: ...ower No sound is produced even when playing keys in the right hand area of the keyboard although chords played in the left hand area are recognized Check whether or not the Dictionary function page 55 is used When used this is normal Not all of the Voices seem to sound or the sound seems to be cut off when playing the keyboard Arpeggio Style or Pattern or Song You have exceeded 48 simultaneous not...

Page 71: ...P START STOP INTRO ENDING rit MAIN AUTO FILL TRACK ON OFF External Styles 10 Other Features Music Database 378 One Touch Setting OTS Yes Compatibility Style File Format SFF Patterns Preset Number of Patterns 25 Number of Sections 5 Songs MIDI Preset Number of Preset Songs 30 Recording Number of Songs 10 Number of Tracks 6 5 Melody 1 Style Pattern Data Capacity Approx 19 000 notes when only melody ...

Page 72: ... adaptor 11 W When using PA 300C AC adaptor Auto Power Off Yes Included Accessories Owner s Manual Data List AC adaptor PA 150 or an equivalent recommended by Yamaha May not be included depending on your area Check with your Yamaha dealer Music Rest Online Member Product Registration Owner s Manual Data List AC adaptor PA 300C or an equivalent recommended by Yamaha power cord May not be included d...

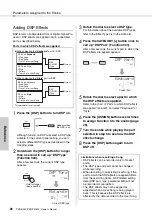
Page 73: ...g 41 Flash Clear 39 Footswitch 17 49 Formatting 64 Function 58 H Harmony 23 Harmony Type 60 Headphones 16 I Initial Send 60 Initialization 39 Intro 50 iPhone iPad 37 iPhone iPad Connection Manual 11 K Keyboard Out 60 Keyboard Stand 17 Knob 25 46 L Language 61 Lesson 30 61 Load STY 67 Load USR 65 Local Control 60 M Main 50 Main Voice 20 Master Volume 16 Melody Suppressor 37 59 Melody Voice 57 Messa...

Page 74: ...nse 42 Track 29 32 51 Transpose 41 Troubleshooting 70 Tuning 44 U USB Flash Drive 62 USB TO DEVICE 62 USB TO HOST 36 V Voice 20 45 Volume 16 Volume AUX IN 58 Volume Harmony 60 Volume Metronome 22 Volume Pattern 53 Volume Song 57 Volume Style 53 Volume USB TO HOST 58 Volume Voice 59 Volume Balance 46 Y Your Tempo 61 ...

Page 75: ...PSR E453 PSR EW400 Owner s Manual 75 MEMO ...

Page 76: ...ipment please contact your dealer or supplier for further information Information on Disposal in other Countries outside the European Union These symbols are only valid in the European Union If you wish to discard these items please contact your local authorities or dealer and ask for the correct method of disposal Note for the battery symbol bottom two symbol examples This symbol might be used in...

Page 77: ...ing or forgery of proof of purchase documents will cause this warranty to be void This warranty covers only the Original Owner and is not transferable In Order to Obtain Warranty Service Warranty service will only be provided for defective products within the Warranted Area Contact your local authorized Yamaha dealer who will advise you of the procedures to be followed If this is not successful co...

Page 78: ......
Page 79: ...185111 NORWAY Yamaha Music Europe GmbH Germany Norwegian Branch Grini Næringspark 1 1332 Østerås Norway Tel 47 6716 7800 ICELAND Hljodfaerahusid Ehf Sidumula 20 IS 108 Reykjavik Iceland Tel 354 525 5050 CROATIA Euro Unit D O O Slakovec 73 40305 Nedelisce Tel 38540829400 RUSSIA Yamaha Music Russia LLC Room 37 entrance 7 bld 7 Kievskaya street Moscow 121059 Russia Tel 7 495 626 5005 OTHER EUROPEAN C...

Page 80: ...ZT18040 Manual Development Department 2016 Yamaha Corporation Published 03 2016 POAP A0 Printed in China Yamaha Global Site http www yamaha com Yamaha Downloads http download yamaha com ...

Reviews: