9
PSR-E283 YPT-280 Reference Manual
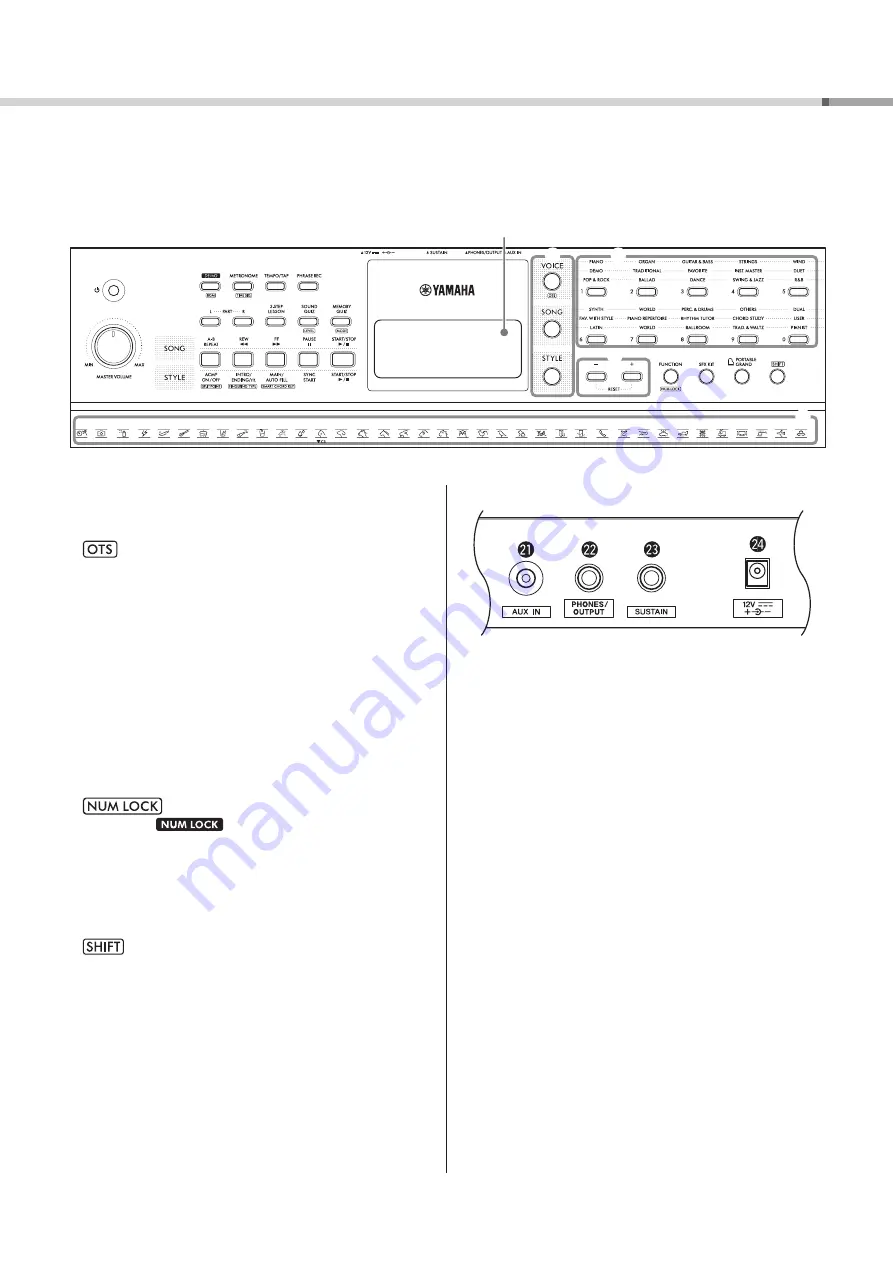
Panel Controls and Terminals
!3
Mode selection buttons ......................................page 10
Calls up the corresponding selection displays for Voices,
Songs, and Styles, and switches to each mode.
(One Touch Setting)
Automatically calls up the best Voice for the selected
Song or Style (page 14). When One Touch Setting is
enabled, the Voice number becomes “000.”
!4
VOICE/SONG/STYLE Category buttons,
Number buttons [0]–[9] ...........................page 14, 18, 23
Selects the desired Voice/Song/Style or allows direct
entering of setting values, etc.
!5
[+]/[-] buttons
Selects items or sets values. Press and hold either
button to continuously increase or decrease the value
in the corresponding direction. Press these buttons
simultaneously to reset the value to the default.
!6
[FUNCTION] button .............................................page 32
Calls up the Function setting display.
Calls up the
icon on the display and lets you
use the
!4
buttons as Number buttons.
!7
[SFX KIT] button ...................................................page 14
Lets you play various sound effects from the keyboard.
!8
[PORTABLE GRAND] button.................................page 14
Automatically selects “Grand Piano” with Voice Number
001 as the Voice.
!9
button
Holding down this button and pressing another button
calls up the alternate function of that button.
@0
SFX Kit illustrations .............................................page 14
These indicate the sound effects assigned to each key
when the SFX Kit is selected by pressing [SFX KIT]
!7
.
■
Rear Panel
@1
[AUX IN] jack ........................................................page 31
For connecting an audio device such as a smartphone.
@2
[PHONES/OUTPUT] jack .........................................page 7
For connecting external devices such as headphones and
speakers (sold separately).
@3
[SUSTAIN] jack ........................................................page 7
For connecting an optional foot switch and using it as a
sustain pedal.
@4
DC IN jack ...............................................................page 5
For connecting the AC adaptor.
!3
!5
!4
!6
!7
!8
!9
@0
Display


