PSR-A3000 Owner’s Manual
37
V
oi
ces – Pl
a
y
ing t
he k
e
yb
oar
d –
1
2
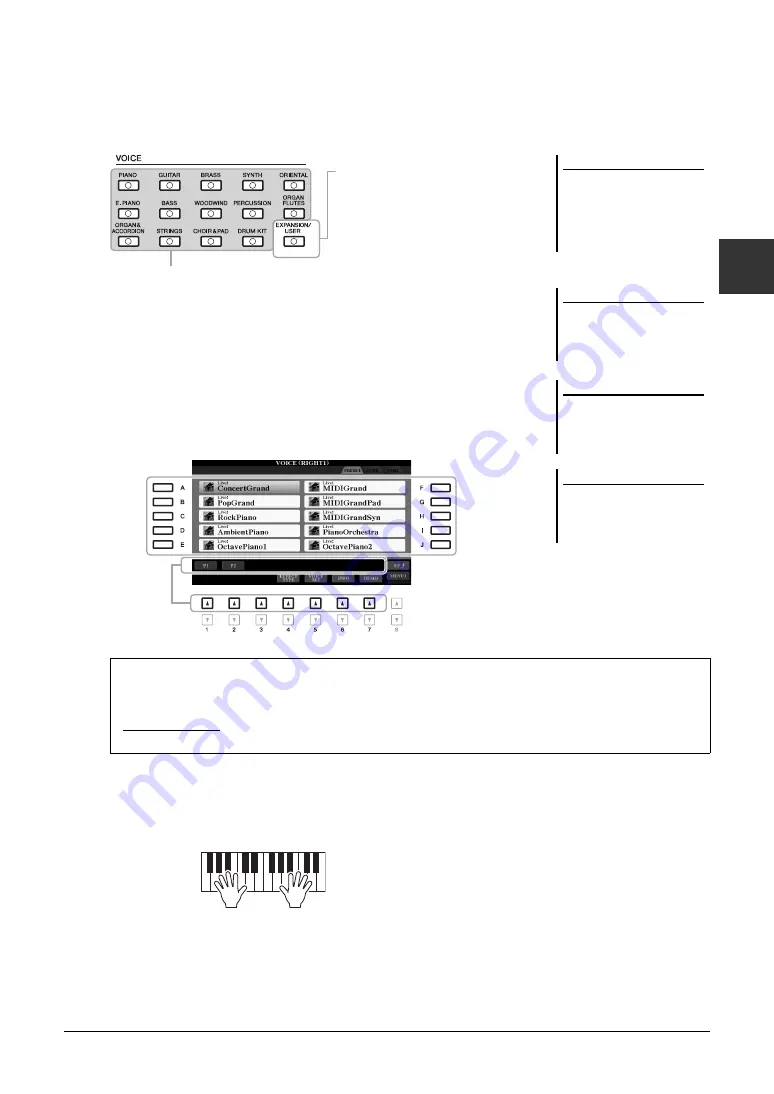
Make sure that the PART SELECT button corresponding to the
part you want to select the Voice is turned on.
3
Press one of the VOICE category selection buttons to select a
Voice category and call up the Voice Selection display.
The preset Voices are categorized and contained in appropriate folders. Voice
category selection buttons correspond to the categories of the preset Voices. For
example, press the [STRINGS] button to display various strings Voices.
4
Press one of the [A] – [J] buttons to select the desired Voice.
You can call up the other pages by pressing the buttons that correspond to the
page numbers (P1, P2 ...) or by pressing the same VOICE category selection
button several times.
5
If necessary, repeat steps 1 – 4 above to select the Voice for the
other part.
6
Play the keyboard.
NOTE
By pressing the [8
] (UP) button in
the Voice Selection display, you can
call up the Voice categories (folders),
including “GM&XG” and “GM2,”
which do not have any VOICE category
selection buttons.
NOTE
If you pressed the [ORGAN FLUTES]
button in step 3, press the [I] (PRE-
SETS) button before proceeding to
step 4.
Expansion Voices
Voices additionally installed (page 46).
User Voices
Voices created with the Voice Set function
(page 113), or Voices copied to the USER
drive (page 30).
Preset Voices
NOTE
The Voice characteristics are indicated
above the Preset Voice name. For
details on the characteristics, see
page 38.
NOTE
You can call up the information for the
selected Voice by pressing the [6
]
(INFO) button. (Some Voices do not
have an information window.)
To listen to the demo phrases for each Voice
Press the [7
] (DEMO) button to start the Demo for the selected Voice. To stop the demo, press the [7
]
button again.
NOTE
Make sure that MENU 1 is shown at the bottom right corner of the display (page 26).
Summary of Contents for PSR-A3000
Page 100: ...100 PSR A3000 Owner s Manual Memo ...
Page 218: ...Memo ...
Page 220: ......
Page 223: ......


