21
DRX-730/NX-E700
DRX-730/NX-E70
0
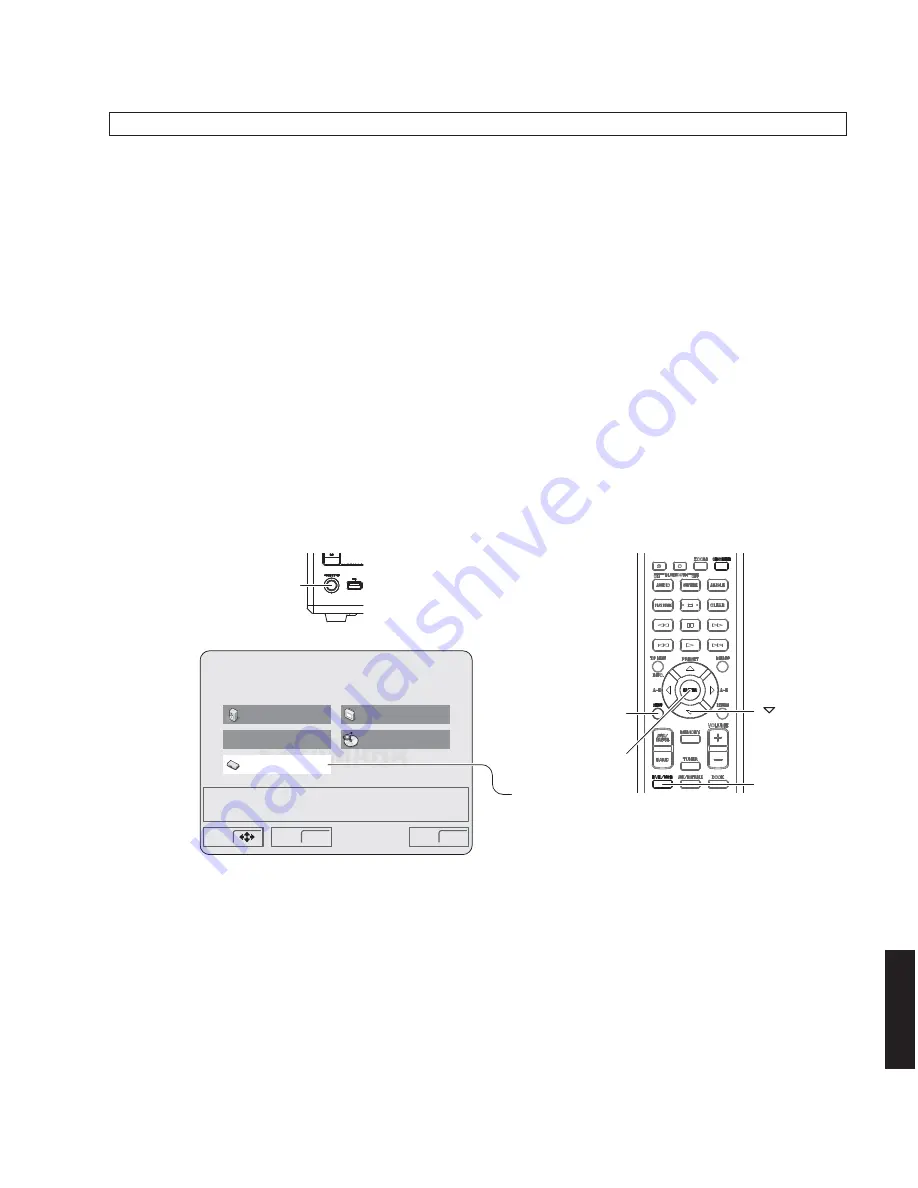
"STANDBY/ON" key
"SETUP" key
" " (down) key
"DVD/USB" key
"ENTER" key
This unit
Remote control
Make advanced settings
Disc Navigator
Audio Settings
Play Mode
Initial Settings
Move
Select
Exit
ENTER
SETUP
Video Adjust
"Initial Settings" select
After replacing the Module board with the replacement part, be sure to write the latest firmware.
●
Required Tools
Firmware CD
*
To make the firmware CD, download the latest firmware from the specified download source to PC.
When making a firmware CD, set the CD volume label to “PIONEER”.
Firmware: S8CAxxxx.BIN
●
Confirmation of Firmware Version
Before and after the writing firmware to the module board, follow the procedures below to check the firmware version.
1. Connect the VIDEO OUT terminal of this unit to the VIDEO IN terminal of the TV monitor with a video pin cable.
2. Connect the power cable of this unit to the AC outlet.
3. Press the “STANDBY/ON” key of this unit to turn on the power. (Fig. 6)
4. Press the “DVD/USB” key on the remote control to select the input DVD. (Fig. 6)
5. Press the “SETUP” key on the remote control. (Fig. 6)
The SETUP menu is displayed on the TV monitor. (Fig. 6)
6. Move the cursor to [Initial Settings] by pressing the “DOWN” key on the remote control and press the “ENTER” key.
(Fig. 6)
Writing to the Module Board
Fig. 6
Summary of Contents for NX-E700
Page 71: ...DRX 730 NX E700 ...


