background image

PERF

SONG

PATTERN

MIX

MASTER

REMOTE

UTILITY

QUICK SET

FILE

VOICE

MOXF6/MOXF8 Reference Manual

Mixing Mode

Mixing Play

[F1] VOL/PAN

[F2] VOICE

[F3] EF SEND

[F4] TEMPLATE

[F5] VCE ED

[F6] EFFECT

Mixing Edit

Common Edit

[F1] GENERAL

[F2] MFX 

[F3] MEQ

[F4] USB I/O

[F5] A/D IN

[F6] EFFECT

Part Edit

[F1] VOICE

[F2] OUTPUT

[F3] EQ

[F4] TONE

[F5] RCV SW

Mixing Job

[F1] INIT

[F2] RECALL

[F3] COPY

[F4] BULK

Mixing Voice Edit

Common Edit

[F1] GENERAL

[F2] OUTPUT

[F4] CTL SET

[F5] LFO

[F6] EFFECT

Element Edit

[F1] OSC

[F2] PITCH

[F3] FILTER

[F4] AMP

[F5] LFO

[F6] EQ

Mixing Voice Job

[F2] RECALL

[F3] COPY

[F5] DELETE

Supplementary Information

116

Mixing Edit

The Mixing Edit mode lets you control typical mixer settings such as volume balance, pan position and effects, allowing 

you to fine tune the Song/Pattern data. Mixing Edit consists of Part Edit and Common Edit. This section explains the 

parameters for Common Edit and Part Edit.

Common Edit

A.Func1 (Assignable Function 1)
A.Func2 (Assignable Function 2)

Determines whether the ASSIGNABLE FUNCTION [1] and [2] buttons function as latch (hold) type or momentary type in 

the selected Song/Pattern.

Settings:

momentary, latch

From this display you can set the Master Effect related parameters. The parameters are the same as in Performance 

Common Edit (

page 60

).

From this display you can set parameters related to the Master Equalizer. You can assign any of five different Equalizer 

bands to the entire Multi. The parameters are the same as in Performance Common Edit (

page 61

).

Determines the specific output(s) for the individual Part signal. The parameters are the same as in Performance 

Common Edit (

page 61

).

This display sets parameters related to the input from the A/D INPUT [L]/[R] jacks. The parameters are the same as in 

Performance Common Edit (

page 62

).

From this display you can set the Effect related parameters. The parameters are the same as in Performance Common 

Edit (

page 63

).


Operation

[SONG]/[PATTERN] 

 Song/Pattern selection 

 [MIXING] 

 [EDIT] 

 [COMMON]

[F1] GENERAL

[F2] MFX (Master Effect)

[F3] MEQ (Master EQ)

[F4] USB I/O

[F5] A/D IN (A/D Input)

[F6] EFFECT

Summary of Contents for MOXF8

Page 1: ... Song Job Mode 100 Pattern Mode 101 Supplementary Information 112 Pattern Playback Types 112 Loop Recording Pattern 113 Mixing Mode 114 Supplementary Information 124 Editing a Performance by using the Knobs 124 Creating an Arpeggio 125 Storing the Mixing settings as a Mixing Template 126 Master Mode 128 Remote Mode 133 Utility Mode 140 Quick Setup 151 File Mode 153 Supplementary Information 160 Fi...

Page 2: ...cate the related information anywhere in the document NOTE The most recent version of Adobe Reader can be downloaded from the following web page http www adobe com products reader NOTE The names and positions of menu items may vary according to the version of Adobe Reader being used Information The illustrations and LCD screens as shown in this Reference Manual are for instructional purposes only ...

Page 3: ...trument is equipped with a AWM2 tone generator block AWM2 Advanced Wave Memory 2 is a synthesis system based on sampled waves sound material and is used in many Yamaha synthesizers For extra realism each AWM2 Voice uses multiple samples of a real instrument s waveform Furthermore a wide variety of parameters envelope generator filter modulation and others can be applied 1 2 USB TO HOST MIDI OUT US...

Page 4: ...ght Elements Normal Voice or up to 73 keys Drum Voice An Element or Drum Key is the basic and the smallest unit for a Voice This means that only one Element or key can produce a musical instrument sound In addition a Normal Voice can produce even more realistic sound or various types of sound by combining multiple Elements Each Voice is created by editing parameters unique to each Element Key Elem...

Page 5: ...ce the sounds of notes on acoustic instruments being released The MOXF6 MOXF8 reproduces these special characteristic sounds by setting the XA Control parameter of certain Elements to keyOffSound Subtle sound variations for each note played Conventional synthesizers attempt to reproduce this by randomly changing the pitch and or filter However this produces an electronic effect and is different fr...

Page 6: ...pitch changes over time Pitch related parameters can be set in the PITCH display page 40 of the Voice Element Edit Note that the Pitch related parameters of a Drum Voice can be set in the PITCH display page 49 of Drum Voice Key Edit Filter This unit modifies the tone of the sound output from Pitch by cutting the output of a specific frequency portion of the sound Also by setting the FEG Filter Env...

Page 7: ...editing parameters unique to each Part and parameters common to all Parts in Performance mode page 55 Two User Banks are provided Each Bank contains 128 Performances for a total of 256 User Performances Tone Generator block in the Song mode Pattern mode In these modes multiple Parts are provided and different Voices and different melodies or phrases can be played back for each Part A MIDI tone gen...

Page 8: ...ffect can be set for the audio signal and the sound is output together with other Voices The Insertion Effect as well as the System Effects can be applied to the audio signal input via the A D INPUT L R jacks The A D Input block related parameters can be set in the following display The effect which is applied to the audio signal input from the A D INPUT L R jacks is set in the USB I O display pag...

Page 9: ...ute and solo settings change automatically according to the settings you ve recorded to the Scene Track Tempo Track Lets you record Tempo change settings During Song playback the Tempo changes automatically according to the settings you ve recorded to this Track This function allows Songs to be chained together for automatic sequential playback You can set the playback order in Song Play page 76 S...

Page 10: ... A Pattern consists of 16 Tracks to which the Phrase can be assigned MIDI data cannot be directly recorded to each Track in the Pattern mode Recording is done to an empty User Phrase The newly created Phrase is automatically assigned to the recording Track Sequencer block applied to both Songs and Patterns MIDI Tracks are created by recording your keyboard performance in the Song Record mode Patte...

Page 11: ...he REC TR display of Performance Record of the Song Pattern respectively Your keyboard performance and controller knob operations common to Parts 1 4 will be recorded to Tracks 1 4 separately NOTE For details on operation refer to the MOXF6 MOXF8 Owner s Manual Arpeggio Block This block lets you automatically trigger musical and rhythmic phrases using the current Voice by simply pressing a note or...

Page 12: ...here the arpeggio is assigned allowing a good deal of harmonic freedom and the possibility to solo using these arpeggios Arpeggio type with _XS at the end of the type name example Rock1_XS These Arpeggios use a newly developed chord recognition technology to determine what notes should be played back by the Arpeggio This XS type of arpeggio has the following benefits 1 The arpeggios respond only t...

Page 13: ...eggio type number 4 ARP Name Arpeggio Name Indicates the Arpeggio Name 5 Time Signature Indicates the time signature or meter of the Arpeggio type 6 Length Indicates the data length amount of measures of the Arpeggio type When the Loop parameter 1 is set to off the Arpeggio plays back for this length and stops 7 Original Tempo Indicates the appropriate tempo value of the Arpeggio type Note that th...

Page 14: ... can use knobs 5 8 to control Arpeggio playback Try this out and listen for the changes in the sound For details regarding the effect of the knobs 5 8 see Knob Functions of the Voice mode page 54 Accent Phrases are composed of sequence data included in some Arpeggio types sounding only when you play notes at a velocity higher stronger than that specified in the Accent Velocity Threshold parameter ...

Page 15: ...back of a programmed sequence according to the played notes These Arpeggio types have the several sequences each of which is suited for a certain chord type Even if you press only one note the Arpeggio is played back using the programmed sequence meaning that notes other than the ones you play may be sounded Pressing another note triggers a transposed sequence using the pressed note as the new roo...

Page 16: ...different rhythm patterns using the same instruments simply by changing the order in which you play the notes when the KeyMode parameter is set to thru or thrudirect NOTE The three playback types above are not distinguished by category name or type name You ll have to actually play the types and hear the difference NOTE Since these types are programmed for Drum Voices using them with Normal Voices...

Page 17: ...n also reverse the Pitch Bend function so that moving the wheel up lowers the pitch and moving it down raises the pitch Functions other than Pitch Bend can be assigned to the Pitch Bend wheel in the CTL SET display page 32 of Voice Edit Modulation wheel Even though the Modulation wheel is conventionally used to apply vibrato to the sound many of the preset Voices have other functions and effects a...

Page 18: ...nds for which you want to drastically change the character Each Voice features one set which has A and B units You can set different Effect types to the Insertion Effects A and B or apply one Vocoder effect to Insertion Effects A and B These settings can be set in the CONNECT display page 35 of the Voice Common Edit This synthesizer features eight sets of Insertion Effects one set has A and B unit...

Page 19: ...in different formats 4 Insertion Effect A B related parameters Settings Set in the CONNECT display page 35 and the INSA display INSB display page 36 of Voice Common Edit 5 Reverb and Chorus related parameters Settings Set in the CONNECT display page 35 and the CHORUS display REVERB display page 36 of Voice Common Edit 6 Master Effect related parameters Settings Set in the MFX display page 143 of t...

Page 20: ...d Reverb When Mode is set to VST or 2StereoRec the signal which is output from the Insertion Effect will be directly output to the USB TO HOST terminal or OUTPUT L MONO R jacks 1 Part EQ applied to each Part Settings Set in the EQ display page 118 of Mixing Part Edit 2 Selection of the Parts to which the Insertion Effect is applied Settings Set in the EFFECT display page 116 of Mixing Common Edit ...

Page 21: ...hed sounds of musical instruments such as a synthesizer sound through the filters For instructions on using the Vocoder effect see the Owner s Manual About Effect categories Effect types and Effect parameters For information regarding the effect categories of this instrument and the effect types contained in their categories see the Effect Type List in the Data List PDF document For information on...

Page 22: ...ance Arpeggio Mixing Template and Waveform data 4 Only Waveform data 2 1 1 Internal Memory Recall Buffer Compare Buffer DRAM Excluding Master and Utility settings Preset Data ROM Voice Preset Arpeggio Demo Edit Buffer DRAM Voice Edit Mixing Voice Edit Performance Edit Performance Record Song Record Song Mixing Edit Song Chain Pattern Record Pattern Patch Pattern Mixing Edit Pattern Chain Utility a...

Page 23: ...n using a User Voice containing a Waveform NOTE The optional FL512M FL1024M can handle only Waveform data Edit buffer User memory The edit buffer is the memory location for edited data of these types Voice Performance Master Song Mixing and Pattern Mixing Data edited in this location will be stored to the User Memory In Voice Performance Master Mixing mode the edit buffer is the memory location on...

Page 24: ...ntly editable parameters 5 Indicates the various displays categorized by function in tab format Pressing the F1 F6 Function button allows you to jump to the display for the corresponding function 6 Indicates the various displays categorized by the sub function in tab format when the tab you selected in 5 above has sub functions Pressing the SF1 SF6 Sub Function button allows you to jump to the dis...

Page 25: ...ice Number Indicates the currently selected Voice bank and Voice number 3 Favorite Category indicator When assigning the currently selected Voice to the Favorite category this indicator will appear 4 Category Indicates the Main category and Sub category of the currently selected Voice 5 TCH Transmit Channel Indicates the Keyboard MIDI transmit channel You can change the Keyboard MIDI transmit chan...

Page 26: ... offset value for the Amplitude EG and Filter EG of all Elements that make up the Voice AEG Amplitude EG ATK Attack Time Determines how quickly the sound reaches its maximum level after a key is pressed DCY Decay Time Determines how fast the volume falls from maximum attack level to the sustain level SUS Sustain Level Determines the sustain level at which the volume will continue while a note is h...

Page 27: ...alue is less than zero it will be set to 1 and if the resultant velocity is greater than 128 it will be set to 127 Settings 100 0 100 GateRateOfs Gate Time Rate Offset Determines the offset value for the Gate Time Rate of Arpeggio playback The Gate Time cannot be decreased beyond its normal minimum of 1 any values outside that range will automatically be limited to the minimum Settings 100 0 100 T...

Page 28: ...OXF6 MOXF8 receives Note On messages VelMode Velocity Mode Adjusts the velocity of the Arpeggio notes Settings original thru OutOctShift Output Octave Shift Shifts the pitch of the Arpeggio up or down in octaves Settings 10 0 10 NoteLimit Arpeggio Note Limit Determines the lowest and highest notes in the Arpeggio s note range Settings C 2 G8 VelocityLimit Arpeggio Velocity Limit Determines the low...

Page 29: ...nt Velocity Threshold Determines the minimum velocity that will trigger the Accent Phrase Settings off 1 127 AccntStrtQtz Accent Start Quantize Determines the start timing of the Accent Phrase when the Velocity specified in Accent Velocity Threshold above is received When this is set to off the Accent Phrase starts as soon as the Velocity is received When this is set to on the Accent Phrase starts...

Page 30: ...Ctgry Main Category SubCtgry Sub Category Determines the Main Category and Sub Category of the Voice The categories are keywords representing the general characteristics of the Voices Selecting the appropriate category makes it easy to find the desired Voice from the huge variety of Voices available There are 17 Main Categories which indicate types of instruments There are up to six Sub Categories...

Page 31: ...notes when Portamento Switch above is set to on and Mono Poly is set to mono Legato notes overlap each other the next being played before the previous is released Settings 0 7 SF4 OTHER A Func1 Assignable Function 1 Mode A Func2 Assignable Function 2 Mode Determines whether the ASSIGNABLE FUNCTION 1 and 2 buttons function as latch hold type or momentary type For details on settings see the Synthes...

Page 32: ...an be assigned to each Voice three pages Sets 1 2 Sets 3 4 and Sets 5 6 are available For details on Controller Set see page 53 ElmSw Element Switch Selects whether the controller will affect each individual Element or not Settings Elements 1 to 8 enabled 1 to 8 or disabled NOTE This parameter is disabled when the Dest Destination described below is set to a parameter unrelated to the Voice Elemen...

Page 33: ...ts 4th dotted quarter notes 2nd half notes whole 3 whole note triplets 2nd dotted half notes 4th x 4 quarter note quadruplets four quarter notes to the beat 4th x 5 quarter note quintuplets five quarter notes to the beat 4th x 6 quarter note sextuplets six quarter notes to the beat 4th x 7 quarter note septuplets seven quarter notes to the beat 4th x 8 quarter note octuplets eight quarter notes to...

Page 34: ...ata List PDF document NOTE Regarding Insertion Effect A Parameter 1 16 Insertion Effect B Parameter 1 16 and Insertion Effect L Parameter 1 32 described in the Control List the actual parameter names of the selected Effect type are shown on the display If one of these names is shown no function is assigned to that parameter Depth Set the LFO Wave Depth amplitude Settings 0 127 DPTRATIO Depth Ratio...

Page 35: ...etermines the Effect type for the Vocoder Settings For details on the editable Effect categories and types see the Data List PDF document Also for details on the description for each Effect type see the Synthesizer Parameter Manual PDF document 4 InsEF Connect Insertion Effect Connection Determines the effect routing for Insertion Effects A and B The setting changes are shown on the diagram in the...

Page 36: ...on Effect A SF3 INS B Insertion Effect B SF4 CHORUS SF5 REVERB From these displays you can set the Effect related parameters when the InsEF Connect Insertion Effect Connection in the CONNECT display is set to parallel insA B or insB A These displays consist of multiple pages and can be selected by pressing the Cursor buttons From these displays you can also set each parameter of the selected Effec...

Page 37: ...d Determines the threshold level of the noise gate for the microphone sound Settings 72dB 30dB GateSw Gate Switch Determines whether or not the microphone sound will be output at the level set in the HPFOutLvl parameter when you release the notes Normally you should set this to on Settings off on off The microphone sound always will be output on The microphone sound will be output only while a not...

Page 38: ... like characteristics more pronounced Settings 0 127 OutLvl Output Level Determines the output level of the Vocoder Settings 0 127 Dry Wet Dry Wet Balance Determines the balance between the dry sound no effect applied and the wet sound effect applied Settings D63 W D W D W63 BPF1 10Gain Band Pass Filter 1 10 Gain Determines the output gain of each Band Pass Filter 1 10 for the Inst Input keyboard ...

Page 39: ...gs off not synchronized on synchronized DelayTempo Determines the timing of KeyOnDelay when DelayTempoSync is set to on Settings 16th 8th 3 eighth note triplets 16th dotted sixteenth notes 8th 4th 3 quarter note triplets 8th dotted eighth notes 4th quarter notes 2nd 3 half note triplets 4th dotted quarter notes 2nd half notes whole 3 whole note triplets 2nd dotted half notes 4thx4 quarter note qua...

Page 40: ... PEG Time parameters Select the Segment and then set its Time parameter Settings EGTime 64 0 63 Settings Segment atk atk dcy dcy atk rls all atk attack EG Time parameter affects Attack time atk dcy attack decay EG Time Value affects Attack Decay1 time dcy decay EG Time parameter affects Decay Time atk rls attack release EG Time Value affects Attack Release time all EG Time affects all PEG Time par...

Page 41: ...itch for the Key Follow effect on Pitch EG Settings C 2 G8 NOTE You can also set the note directly from the keyboard by holding down the SF6 KBD button and pressing the desired key SF1 TYPE These allow you to make comprehensive settings for the Filter unit The available parameters differ depending on which Filter type is selected here Type Determines the Filter Type for the current Element Basical...

Page 42: ...ocity sensitivity of the FEG s Time parameters Select the Segment and then set its Time parameter Settings Time 64 0 63 Settings Segment atk atk dcy dcy atk rls all atk attack EG Time parameter affects Attack time atk dcy attack decay EG Time Value affects Attack Decay1 time dcy decay EG Time parameter affects Decay Time atk rls attack release EG Time Value affects Attack Release time all EG Time ...

Page 43: ...enter Key Determines the central note for the EGTimeSens parameter above Settings C 2 G8 NOTE You can also set the note directly from the keyboard by holding down the SF6 KBD button and pressing the desired key SF5 SCALE Filter Scaling Break Point 1 4 Determines the four Break Points by specifying the respective note numbers Settings C 2 G8 NOTE You can also set the Break Point directly from the k...

Page 44: ... Offset Curve Level Velocity Sensitivity Curve Determines the velocity sensitivity of the Amplitude EG Level The Offset parameter raises or lowers the level specified at the Level The Curve parameter determines how velocity affects the Amplitude EG Settings Level 64 0 63 Settings Offset 0 127 Settings Curve 0 4 SF3 AEG Amplitude EG This allows you to make all the time and level settings for the Am...

Page 45: ... to which the notes specifically their position or octave range affect the Amplitude EG times of the selected Element The Center Key next parameter is used as the basic amplitude for this parameter Settings 64 0 63 CenterKey EG Time Key Follow Sensitivity Center Key Determines the central note for the EGTimeSens parameter above Settings C 2 G8 NOTE You can also set the note directly from the keybo...

Page 46: ...ncy Settings 0 127 AMod Amplitude Modulation Depth Determines the amount depth by which the LFO waveform varies modulates the amplitude or volume of the sound Settings 0 127 FadeInTime Determines the amount of time for the LFO effect to fade in after the KeyOnDelay time has elapsed Settings 0 127 Type Determines the Equalizer Type Settings 2 Band P EQ Parametric EQ Boost6 boost 6dB Boost12 boost 1...

Page 47: ...e 30 Same as in Normal Voice Common Edit See page 31 In addition the following two parameters are also available InsChoSend Insertion Chorus Send Determines the Send level for the entire Drum voice all keys sent from Insertion Effect A B or Vocoder to the Chorus effect Settings 0 127 InsRevSend Insertion Reverb Send Determines the Send level for the entire Drum voice all keys sent from Insertion E...

Page 48: ... C6 ElementSw Element Switch Determines whether the currently selected key is on or off or in other words whether the wave for the key is active or inactive Settings off on WaveBank Determines the Waveform Bank assigned to the Element Settings pre user WaveCategory Waveform Category WaveNumber Waveform Number Determines the Waveform assigned to the Drum Key by selecting the Waveform Category and N...

Page 49: ...cvNoteOff Receive Note Off Select whether MIDI Note Off messages are received by each Drum Key Settings off on AltnateGroup Alternate Group Set the Alternate Group to which the key is assigned This setting helps to reproduce the sounds of a real drum kit in which some drum sounds cannot physically be played simultaneously such as open and closed hi hats Settings off 1 127 SF6 HOLD In the Key Edit ...

Page 50: ... the Low Pass Filter Cutoff frequency Positive settings will cause the Cutoff Frequency to rise the harder you play the keyboard A negative setting will have the opposite effect Settings 64 0 63 SF1 LVL PAN Level Pan This display not only lets you make basic Level and Pan settings for the sound of each individual Drum key it also gives you some detailed and unusual parameters for affecting Pan pos...

Page 51: ...ommon Edit F1 GENERAL F2 OUTPUT F3 EQ F4 CTL SET F6 EFFECT Key Edit F1 OSC F2 PITCH F3 FILTER F4 AMP F6 EQ Voice Job F1 INIT F2 RECALL F3 COPY F4 BULK Supplementary Information 51 SF3 AEG Amplitude EG AttackTime Settings 0 127 Decay1Time Settings 0 127 Decay1Level Settings 0 127 Decay2Time Settings 0 126 hold Same as in Normal Element Edit See page 46 F6 EQ Equalizer Decay 2 Time 0 126 Level Key o...

Page 52: ...heck mark on when a Drum voice is selected you can select a Drum key If you are editing a Voice and select a different Voice without storing your edited one all the edits you ve made will be erased If this happens you can use Edit Recall to restore the Voice with your latest edits intact From this display you can copy Common and Element Drum Key parameter settings from any Voice to the Voice you a...

Page 53: ...4 InsA B Type VCM Pedal Wah in the F6 EFFECT display of Voice Common Edit EL OUT KEY OUT INSA INSB assigned to VCM Pedal Wah Type in the F6 EFFECT display of Voice Common Edit Main Category abbreviation Sub Category abbreviation Acoustic Piano Pn All Acoustic Piano Layer Modern Vintage Arpeggio Keyboard Kb All Electric Piano FM Piano Clavi Synth Arpeggio Organ Or All Tone Wheel Combo Pipe Synth Ar...

Page 54: ...K page 26 Knob 2 DECAY VOICE F4 EG AEG DCY page 26 Knob 3 SUSTAIN VOICE F4 EG AEG SUS page 26 Knob 4 RELEASE VOICE F4 EG AEG REL page 26 When the TONE 3 lamp is turned on Knob 1 VOLUME VOICE EDIT COMMON F2 OUTPUT Volume page 31 Knob 2 PAN VOICE EDIT COMMON F2 OUTPUT Pan page 31 Knob 3 ASSIGN 1 VOICE EDIT COMMON F4 CTL SET function that is set in Dest when Source is set to AS1 AS2 page 32 Knob 4 AS...

Page 55: ...umber Indicates the Bank and Number of the selected Performance 3 Favorite Category indicator When setting the currently selected Performance to the Favorite category this indicator will appear 4 Category Indicates the Main category and Sub category of the currently selected Performance 5 TCH Transmit Channel Indicates the Keyboard MIDI transmit channel You can change the Keyboard MIDI transmit ch...

Page 56: ... Limit Low and press the desired key on the keyboard to set the note This sets the lowest note of the range over which the Voice of the selected Part sounds Simultaneously hold down SF5 LIMIT H Limit High and press the desired key on the keyboard to set the note This sets the highest note of the range over which the voice of the selected part sounds You can also create a lower and an upper range f...

Page 57: ...uto only when MIDI clock is transmitted continuously or external the Tempo parameter here indicates external and cannot be changed NOTE This parameter can be set also by holding the SHIFT button and pressing the ENTER button several times repeatedly at the desired tempo This function is referred to as Tap Tempo Switch Common Switch Determines whether Arpeggio is on or off for all Parts This settin...

Page 58: ...MMON display of the Arpeggio Edit VoiceWithARP Voice with Arpeggio Each Arpeggio type is assigned a specific Voice best suited to the type This parameter determines whether or not the appropriate Voice registered to each Arpeggio type is assigned to the edited Part When set to on the appropriate Voice is assigned to the edited Part in place of the currently assigned Voice When set to off the appro...

Page 59: ...ifferent sections Settings C 2 G8 NOTE When the SplitLo Up parameter of each Part is set to both this parameter will have no effect NOTE Sound is produced only when you play notes within the area that matches both the Split setting and Note Limit setting NOTE You can also set the note directly from the keyboard by holding down the SF6 KBD button and pressing the desired key SplitSwitch Determines ...

Page 60: ...ual Pan settings of each Part ChoSend Chorus Send Determines the Send level of the signal sent from Insertion Effect A B or the bypassed signal to the Chorus effect Settings 0 127 RevSend Reverb Send Determines the Send level of the signal sent from Insertion Effect A B or the bypassed signal to the Reverb effect Settings 0 127 NOTE For details about the effect connection in the Performance mode s...

Page 61: ... parameter is available only for the LOW and HIGH frequency bands Settings shelv Shelving type peak Peaking type FREQ Frequency Determines the center frequency Frequencies around this point are attenuated boosted by the Gain setting Settings LOW Shelving 32Hz 2 0kHz Peaking 63Hz 2 0kHz LOW MID MID HIGH MID 100Hz 10 0kHz HIGH 500Hz 16 0kHz GAIN Determines the level gain for the Frequency above or t...

Page 62: ... Send level of the Audio input part signal sent to the Reverb effect Higher values produce a more pronounced Reverb sound Settings 0 127 Dry Level Determines the level of the A D input part which has not been processed with the System Effect Chorus Reverb Settings 0 127 Mono Stereo Determines the signal configuration for the A D input part or how the signal or signals are routed stereo or mono Set...

Page 63: ...gs For details on the editable Effect categories and types see the Data List PDF document Also for details on the description for each Effect type see the Synthesizer Parameter Manual PDF document Preset This lets you call up pre programmed settings for each Effect type designed to be used for specific applications and situations You can change how the sound is affected by the selected pre program...

Page 64: ...settings of the selected Voice are copied from the Voice to the current Part when you change a Voice for the current Part individually Arpeggio settings Filter Cutoff Frequency Filter Resonance Amplitude EG Filter EG Pitch Bend Range Upper Lower Note Shift NOTE Regardless of the P WithVce setting the following settings are always copied when a Normal Voice is selected Mono Poly Switch Portamento P...

Page 65: ...Part will respond Each Part will only sound for notes played within its specified velocity range Settings 1 127 NOTE If you specify the maximum value first and the minimum value second for example 93 to 34 then the velocity range covered will be 1 to 34 and 93 to 127 SF4 PORTA Portamento Determines the Portamento parameters for each Part Portamento is used to create a smooth transition in pitch fr...

Page 66: ... The ASSIGN 1 2 knobs functions are set in the CTL SET display page 32 of Voice Common Edit Settings 64 0 63 SF1 VOL PAN Volume Pan Volume Determines the volume for each part allowing you to set the optimum level balance of all the Parts Settings 0 127 Pan Determines the stereo pan position for each Part Settings L63 far left C center R63 far right VoiceELPan Voice Element Pan Determines whether t...

Page 67: ... this display you can adjust the EQ settings for each Part This is a parametric EQ featuring three bands High Mid and Low You can attenuate or boost the level of each frequency band High Mid Low to change the Voice sound Note that two different display types listed below are provided and you can switch between them by pressing the SF6 Each display type features the same settings in a different for...

Page 68: ...meter is available for the LPF Settings 64 0 63 Resonance Determines the amount of filter resonance Settings 64 0 63 FEGDepth Determines the Filter Envelope Generator depth amount of Cutoff Frequency for each Part This setting is not available for the Drum Voice Parts Settings 64 0 63 NOTE For details on Filter structure see the Synthesizer Parameter Manual PDF document SF3 FEG Filter Envelope Gen...

Page 69: ... Display showing all parameters for one Part NOTE The Sus Sustain parameter is not available for the Drum Voice Parts NOTE If Control Change here is set to off Control Change related parameters are not available Settings See below CtrlChange Control Change Indicates all Control Change messages PB Pitch Bend MIDI messages generated by using the Pitch Bend Wheel MW Modulation Wheel MIDI messages gen...

Page 70: ...ent Performance without storing your edited one all the edits you ve made will be erased If this happens you can use Edit Recall to restore the Voice with your latest edits intact SF1 PART This convenient operation lets you copy Common Edit and Part Edit settings of a certain Performance to the currently edited Performance This is useful if you are creating a Performance and wish to use some param...

Page 71: ... again will exit from the Compare mode 1 Source Voice Determines the Bank and the Voice number to be copied Settings Bank PRE1 9 USR1 3 PDR UDR GM GMDR Voice Number 001 A01 128 H16 2 Determines which Effect units are copied This convenient operation lets you copy Effect and Master EQ settings of a certain Voice assigned to a certain Performance to the currently edited Performance You can select Ef...

Page 72: ...ttings song pattern Number Song Pattern Number Determines the Pattern or Song number as the destination for recording Section Determines the Section as the destination for recording when the Sequencer Mode is set to pattern Keep in mind that the data recorded to the selected destination Section will be overwritten and erased as soon as recording starts Section Length Specifies the length of the Se...

Page 73: ...data or not Solid lined squares indicate that the Track contains MIDI data while the dotted lined squares indicate that the Track contains no data KeyOnStart Key On Start Switch When set to on recording starts immediately when you press any note on the keyboard Settings off on CopyPerfParam Copy Performance Parameters Determines whether or not the Performance parameter settings are copied to the M...

Page 74: ... Jazz Jazz Funk Club Jazz World All Latin Reggae Dancehall Ethnic World Splits Layers All Piano Organ Synth Symphonic Strings Woodwind Brass Guitar Bass Chromatic Percussion Pad FX All Sequence Hard Soft Sound Effect No Assign When the TONE 1 lamp is turned on Knob 1 CUTOFF Common Edit PERFORM F4 EG FEG CUTOF page 56 Part Edit PERFORM EDIT Number 1 4 button F4 TONE SF2 FILTER Cutoff of the selecte...

Page 75: ...ORM EDIT Number 1 4 button F3 EQ LOW GAIN of the selected part page 67 Knob 6 MID F Common Edit PERFORM EDIT COMMON F1 GENERAL SF3 EQ OFS MID FREQ page 59 Part Edit PERFORM EDIT Number 1 4 button F3 EQ MID FREQ of the selected part page 67 Knob 7 MID Common Edit PERFORM EDIT COMMON F1 GENERAL SF3 EQ OFS MID GAIN page 59 Part Edit PERFORM EDIT Number 1 4 button F3 EQ MID GAIN of the selected part p...

Page 76: ... the Song is stopped Two locations can be assigned This display indicates the locations For detailed instructions see page 97 2 Sequencer Edit indicator When changing the MIDI data and value of the parameters related sequencer with the exception of the Mixing settings the Sequencer Edit indicator will appear on the top right corner of the display In Song Pattern mode the edit buffer for the sequen...

Page 77: ...o related parameters to these buttons You can also recall the settings by pressing these buttons For detailed instructions on registering Scenes see the Assigning various settings related to Song playback Song Scene on page 97 For detailed instructions on setting the Arpeggio related parameters see page 82 NOTE Pressing the SF1 SCN1 SF6 SCN6 during playback changes only the Song Scene NOTE After r...

Page 78: ... is sent to the tone generator block or the external MIDI instruments via the MIDI output channel of the currently selected Track SF2 OUT SW Output Switch You can also simultaneously set multiple Tracks Tracks 1 8 or Tracks 9 16 to the same value as the currently selected Track by changing the parameter while holding the SF4 1 8 button or SF5 9 16 button INT SW Internal Switch Determines whether p...

Page 79: ... point to the ending point measure beat that was specified before recording step Use this method to enter notes manually one at a time NOTE When punch is selected Punch in measure beat and Punch out measure beat appear in the display and should be set If you ve set the Locate 1 and 2 points Loc1 Loc2 the punch in out points can be set with a single button press Move the cursor to the punch in out ...

Page 80: ...ect a voice by using the bank group number buttons and the Category Search function Volume Determines the volume of the recording Track Settings 0 127 Pan Determines the stereo pan position of the recording Track Settings L63 far left C center R63 far right InsEF Insertion Effect Part Switch Determines whether the Insertion effects are applied to the recording Track or not Settings off on Tempo De...

Page 81: ... pointer right or left use the INC and DEC buttons or the DATA dial Value When the Event to be entered F1 SETUP Event is set to note this value specifies the velocity with which the note will be entered Settings When the Event is set to note 1 127 kbd rnd1 rnd4 1 127 kbd rnd1 rnd4 When the Event is set to p bend 8192 8191 When the Event is set to CC Control Change 001 119 000 127 When the Event is...

Page 82: ...ess F4 twice NOTE This display is available only when the Event to be entered is set to note Press this to actually delete the note events at the current cursor position Moves the pointer backward by one step and deletes all notes at that location NOTE Mistakenly entered notes can be erased by pressing F6 immediately after they are entered before changing the step time value Arpeggio Edit This dis...

Page 83: ... of the Voice mode These are the same as in the Arpeggio Edit display page 27 of the Voice mode Please note that the Tempo parameter is not in the MAIN display of the Song mode Instead the following parameter is available in the display The tempo setting for arpeggio is same as the tempo setting in the Song Play display VoiceWithARP Voice with Arpeggio Each Arpeggio type is assigned a specific Voi...

Page 84: ...so that only the note events appear in the CHANGE display Event List Settings Note PitchBend ProgramChange ControlChange Ch AfterTouch PolyAfterTouch RPN Registered Parameter Number NRPN Non Registered Parameter Number Exclusive F5 CLR ALL Clear All Press the F5 to remove all checkmarks at once F6 SET ALL Press the F6 to set checkmarks into all boxes You can switch between the display for 1 16 Tra...

Page 85: ...List PDF document Control Change These events control the sound and certain response characteristics of the voice and are usually generated recorded by moving a controller such as a modulation wheel knob slider or foot controller CTRL NO Control Number Determines the Control Change number Settings 000 127 NOTE For information on the functions assigned to the each Control Change number see the MIDI...

Page 86: ...fter using these messages to prevent operational errors NRPN Non Registered Parameter Number Changes parameter values for each tone generator part They can be used to edit sounds via MIDI allowing you to edit filter or EG settings or adjust the pitch or level for each instrument of a drum voice MSB LSB See Non Registered Parameter Number MSB LSB in the MIDI section of the Synthesizer Parameter Man...

Page 87: ...res beats clocks over which the Job is applied Quantize Resolution Determines to what beats the note data in the specified Track will be aligned Settings 32nd note 16th note triplet 16th note 8th note triplet 8th note 1 4 note triplet 1 4 note 16th note 16th note triplet 8th note 8th note triplet Strength This parameter sets the strength by which note events are pulled toward the nearest quantize ...

Page 88: ...ilable and appear as on the display Settings off 0 001 127 Rate Determines the percentage by which the target notes will be shifted from their original velocities Settings below 100 reduce the velocities and settings above 100 increase the velocities proportionately A setting of 100 produces no change When the Set All parameter is not set to off this parameter appears as and cannot be changed Sett...

Page 89: ... Change 11 05 Transpose Transpose lets you change the key or pitch of the notes in the specified range TR Track 001 1 000 999 4 479 Determines the Track 01 16 all and range of measures beats clocks over which the Job is applied Note Determines the range of note pitches over which the Job is applied You can also set the note directly from the keyboard by holding down the SF6 KBD button and pressing...

Page 90: ... not change the timing of the notes When used to pre process chords before using the Separate Chord Job below Chord Sort can be used to simulate the stroke or strumming sound of guitars and similar instruments TR Track 001 1 000 999 4 479 Determines the Track 01 16 all and range of measures beats clocks over which the Job is applied Type Determines how the chord note data is sorted Settings up dow...

Page 91: ... end of the sequence Settings Advance Delay 02 Copy Event This Job copies all data from a specified source range to a specified destination location Execute this Job after setting Source Track 01 16 TMP SCN all Source range measure beat clock Destination Track 01 16 TMP SCN all Destination range measure beat clock Top measure of destination Count number of times data is to be copied NumberOfTimes ...

Page 92: ...Data This Job creates continuous pitch bend or control change data over the specified range TR Track 001 1 000 999 4 479 Determines the Track 01 16 TMP all and range of measures beats clocks over which the Job is applied EventType Determines the event type to be created Settings PB Pitch Bend CC Control Change CAT Channel Aftertouch EXC System Exclusive TMP Tempo You can also specify the CC No Con...

Page 93: ...he minimum any result higher than the maximum is set to the maximum TR Track 001 1 000 999 4 479 Determines the Track 01 16 TMP all and range of measures beats clocks over which the Job is applied EventType Determines the event type to be modified Settings PB Pitch Bend CC Control Change CAT Channel Aftertouch PAT Polyphonic Aftertouch TMP Tempo You can also specify the CC No Control Change number...

Page 94: ...6 16 16 1 8 16 8 1 4 8 4 Insertion point Measure number Determines the insert point measure number at which the newly created blank measures will be inserted Settings 001 999 Number of measures to be inserted Determines the number of empty measures to be created and inserted Settings 01 99 NOTE When empty measures are inserted measure and meter data following the insert point are moved forward acc...

Page 95: ...ixing Part parameters 02 Exchange Track This Job exchanges or swaps the specified type of data between two specified Tracks in the current Song Data Type to be exchanged Determines the type s of data to be exchanged Select the desired type by check marking the appropriate box Settings Seq Event all events in the Track Grid Groove for the selected Track Mix Part Param all Mixing Part parameters 03 ...

Page 96: ...This Job copies data in the specified measures of a Track for creating Arpeggio data For details see page 126 08 Copy Phrase This Job copies the Phrase created in the Pattern mode to a specified track of the current Song NOTICE This Job overwrites any data already existing in the destination track with the exception of the Mixing setup Pressing this calls up the selected Job display 01 Copy Song T...

Page 97: ...locations 1 and 2 select the desired measure number then press the LL RR Rewind Forward while holding the REC SET LOCATE The setting here will be shown at the top of the F1 PLAY display in the Song mode You can assign five different snapshots of important Song related parameters such as transpose tempo Track mute status and the basic Song Mixing setup to the SF1 SF6 buttons as Song Scenes One of t...

Page 98: ...displays which show the SCN indication at the SF1 SF6 buttons Song Chain Playback allows you to put together a play list of preset Songs in any desired order and have them automatically play back in sequence You can set the order of Song playback then start the Chain Playback from the Song Chain display 1 Calls up the Song Chain display page 78 Press the F6 CHAIN in the Song Play display 2 Press t...

Page 99: ...Song NOTICE Please be careful to note that changing the Track Loop from off to on will delete the data of the area that is not looped 1 Press the F1 PLAY button to call up the Song Play display Set the last measure of looped playback as desired here 2 Press the F3 TRACK button and then press the SF3 TR LOOP button to call up the Track Loop display and move the cursor to the desired Track 3 Set Tra...

Page 100: ...INC and DEC buttons 5 After setting press the ENTER button to execute the Job Completed will appear when the Job is done NOTICE In some Jobs the operation overwrites any data previously existing in the destination memory Important data should always be saved to a USB flash memory device connected to the USB TO DEVICE terminal 6 Press the EXIT button twice to go back to the Song Play display NOTICE...

Page 101: ...al by which you enter the Pattern mode and it is here where you select and play a Pattern You can also create your own Patterns by assembling Phrases which are short rhythmic passages and building blocks and create Pattern Chains in which Patterns can be combined together in any desired order Same as in the Song Play mode See page 76 Note that the function of registering Scenes is not available in...

Page 102: ...rack becomes empty Settings off 001 256 NOTE The MOXF6 MOXF8 features no Preset Phrase data 2 Number of Measures Indicates the name of the selected Phrase 3 Section Shows the Section being currently edited To change the Section press the PATTERN SECTION button and then use the Number 1 16 buttons Pressing the PATTERN SECTION assigns the Sections A P to numbers 1 16 in sequence Then pressing the ap...

Page 103: ...ettings Normal 1 16 Roll 1 16 Break 1 16 Fill 1 48 Normal 1 16 The original data is sliced and rearranged only 16 variations are available Roll 1 16 In addition to rearrangement of the divided data some portions of the data may be played with a roll effect 16 variations are available Break 1 16 In addition to division and rearrangement some portions of the data may be deleted to create breaks 16 v...

Page 104: ... the F5 INSERT and F6 DELETE buttons to insert delete the event Tempo Track Edit You can edit the tempo change in beats Use the F5 INSERT and F6 DELETE buttons to insert delete the event F2 COPY This display lets you copy all Pattern chain events from a specified range of measures source to a destination location After specifying the source range in measures the top measure of the destination loca...

Page 105: ...recording drum parts allowing you to add different instruments on each pass When set to off recording stops after one pass through the Phrase Settings off on Quantize This is same as Quantize in the SETUP display of Song Record page 79 Event This is same as Event in the SETUP display of Song Record page 79 Tempo Determines the Pattern tempo Settings 005 0 300 NOTE Unlike in Songs Scene Track and T...

Page 106: ... for recording NOTE In the CLICK display page 144 you can make various settings for the metronome click such as the note resolution volume and lead in count for recording During Pattern Recording In Realtime recording the editable parameters during recording are in the F1 SETUP display F2 VOICE display and F3 ARP ED display of the Pattern recording standby mode In Step recording the displays shown...

Page 107: ...diting session or Job restoring the data to its previous state This allows you to recover from accidental data loss Redo is available only after using Undo and lets you restore the changes you made before undoing them NOTICE Undo Redo does not work with Mixing Voice operations The Note data Jobs in the Pattern mode are basically same as in the Song Job mode However unlike in the Song Job Pattern E...

Page 108: ... Any previous data in the copy destination will be overwritten 02 Exchange Phrase This Job exchanges or swaps the contents of two specified Phrases A and B 03 Mix Phrase This Job mixes all data from two selected user Phrases A and B and places the result in Phrase B 04 Append Phrase This Job appends one Phrase A to the end of another B to create one longer Phrase B 05 Split Phrase This Job splits ...

Page 109: ...cifying the source Phrase and destination Song Track top measure press the ENTER button to execute this Job NOTICE This Job overwrites any data already existing in the destination Track 08 Clear Phrase This Job deletes all data from the selected Phrase 09 Phrase Name This Job lets you assign a name of up to eight characters to the selected Phrase For detailed instructions on naming see the Basic O...

Page 110: ...hrases in which to store the separated note data If there aren t enough empty Phrases an error message appears If this happens use the Clear Phrase Job page 109 to delete some User Phrases then try the Job again 06 Put Track To Arp Put Track to Arpeggio This Job copies data in the specified measures of a Section Track for creating Arpeggio data For details see page 126 01 Copy Pattern This Job cop...

Page 111: ... splits a selected Pattern all 16 Tracks data into two Patterns After the Split Pattern operation the part of the Pattern before the specified Split Point will remain and the part following the Split Point will be moved to the destination Pattern NOTICE This Job overwrites any data already existing in the destination Pattern Split Point Determines the Split Point by setting a measure number Keep O...

Page 112: ...ext Section name appear in the Section column at the top of the display After the current Section reaches the timing specified in PtnQuantize page 144 in the F2 SEQ display of the Utility mode the next Section starts If you record rhythm patterns such as intro melody A fill in main theme and ending to each of the Sections you can play an entire Song by selecting the appropriate Sections during pla...

Page 113: ...1 UNDO REDO F2 NOTE F3 EVENT F4 PHRASE F5 TRACK F6 PATTERN Supplementary Information 113 Loop Recording Pattern Pattern repeats the rhythm pattern of several measures 1 to 256 measures in a loop and its recording is also done using loops This method is used when recording a Pattern Phrase using the Overdub method When recording a rhythm of Bass Drum Snare Drum Hi Hat cymbal in order NOTE Loop Reco...

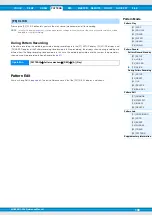
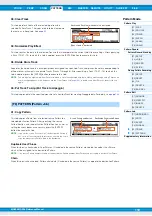
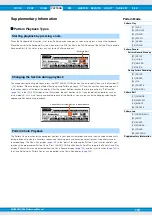
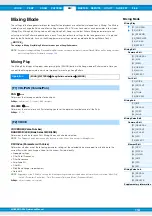
Page 114: ...s in Mixing Play and Mixing Edit can be stored as a template to internal Flash ROM as well as being stored as part of a Song Pattern For details see page 126 Mixing Play The Mixing Play display will appear when pressing the MIXING button in the Song mode or Pattern mode Here you can edit the Mixing parameters which are important for creating a Song Pattern PAN Determines the stereo pan position fo...

Page 115: ... instruction on storing the Mixing settings as a Mixing Template see page 126 SF2 PERFORM Performance This convenient operation lets you copy certain settings of the each Part in a performance to the Mixing program currently being edited Press the ENTER button to execute the Copy operation NOTE This display is similar to the SF3 PERFORM display in Mixing Job page 121 However this differs from the ...

Page 116: ...ion 1 A Func2 Assignable Function 2 Determines whether the ASSIGNABLE FUNCTION 1 and 2 buttons function as latch hold type or momentary type in the selected Song Pattern Settings momentary latch From this display you can set the Master Effect related parameters The parameters are the same as in Performance Common Edit page 60 From this display you can set parameters related to the Master Equalizer...

Page 117: ...o the current Part when you change a Voice for the current Part individually Arpeggio settings Filter Cutoff Frequency Filter Resonance Amplitude EG Filter EG Pitch Bend Range Upper Lower Note Shift NOTE When a Normal Voice is assigned to the Part the following settings are always copied to the Part regardless of the P WithVce setting On the other hand when a Drum Voice is assigned to the part the...

Page 118: ...e same as in Performance Part Edit See page 66 Determines the Voice for each Part This display shows only four Parts at a time Part 1 4 Part 5 8 Part 9 12 or Part 13 16 To switch the editable Parts press the Cursor buttons The editable Parts can be also switched by pressing the corresponding buttons to other Parts of numbers 1 16 after pressing the TRACK button SF1 VOL PAN Volume Pan The parameter...

Page 119: ...esponds to various MIDI data such as Control Change and Program Change messages When the relevant parameter is set to on the corresponding Part responds to the appropriate MIDI data Note that two different display types listed below are provided and you can switch between them by pressing the SF5 button The two display types are linked and feature the same settings only in different formats Use th...

Page 120: ...n Common parameter settings for the selected Mixing Part 1 16 A D A D input part If you are editing a Mixing program and select a different program without storing your edited one all the edits you ve made will be erased If this happens you can use Edit Recall to restore the Mixing program with your latest edits intact SF1 PART From this display you can copy Part parameter settings from any Mixing...

Page 121: ...red settings of the Reverb Effect Chorus Effect Master Effect Master EQ Insertion Effect and A D input part to execute this job This would come in handy when a certain Performance has settings that you want to use in your Mixing program This is similar to F4 TEMPLATE SF2 PERFORM display page 115 in the Mixing Play but differs in that the move source data will be deleted In this display you can sel...

Page 122: ...ains each parameter in three types Common Edit Element Edit and Mixing Voice Job NOTE For more information about Mixing Voices see page 7 Common Edit Same as in Normal Voice Common Edit page 30 The Mixing Voice Edit parameters are basically the same as those in the Voice Edit mode However some parameters having the same name as those in Song Mixing Pattern Mixing Part Edit are not available in Mix...

Page 123: ...elected display press the ENTER button to execute the Job If you are editing a Mixing Voice and select a different Mixing Voice Mixing program Song or Pattern without storing your edited one all the edits you ve made will be erased Edits are also erased if the current Part to which the edited Mixing Voice is assigned receives a program change from an external MIDI instrument If this happens you ca...

Page 124: ... When the TONE 2 lamp is turned on When the TONE 3 lamp is turned on When the EQ lamp is turned on Knob 1 CUTOFF SONG or PATTERN Song Pattern selection MIXING EDIT Part selection F4 TONE SF2 FILTER Cutoff page 118 Knob 2 RESONANCE SONG or PATTERN Song Pattern selection MIXING EDIT Part selection F4 TONE SF2 FILTER Resonance Knob 3 FEG DEPTH SONG or PATTERN Song Pattern selection MIXING EDIT Part s...

Page 125: ... SEND part selection CHO SEND Knob 7 REV PRESET SONG PATTERN Song Pattern selection MIXING EDIT COMMON F6 EFFECT SF4 CHORUS Preset Knob 8 REV SEND SONG PATTERN Song Pattern selection MIXING F3 EF SEND part selection REV SEND Knob 5 GATE TIME SONG PATTERN Song Pattern selection ARP EDIT F5 PLAY FX part selection GateTimeRate in the first page page 83 Knob 6 OCT RANGE SONG PATTERN Song Pattern selec...

Page 126: ...rn you wish to create tweak the settings as desired then start recording You can also store the Mixing settings you ve created in theMOXF6 MOXF8 as an original Mixing Template 1 To enter Pattern Play simply press the SONG PATTERN button 2 Press the MIXING button then press the F6 TEMPLATE button and then press the SF1 MIX button to call up the display for setting a Template 3 Select the desired Te...

Page 127: ...W Mixing Job F1 INIT F2 RECALL F3 COPY F4 BULK Mixing Voice Edit Common Edit F1 GENERAL F2 OUTPUT F4 CTL SET F5 LFO F6 EFFECT Element Edit F1 OSC F2 PITCH F3 FILTER F4 AMP F5 LFO F6 EQ Mixing Voice Job F2 RECALL F3 COPY F5 DELETE Supplementary Information 127 3 Press the F2 TEMPLATE button 4 Set the Template number and name 5 Press the ENTER button After the confirmation prompt appears press the E...

Page 128: ... Category Voice When the memorized mode is Voice or Performance this indicates the Main Category and Sub Category of the Voice Performance When the memorized mode is Song or Pattern this indicates the Voice assigned to the currently selected Track 3 Master Name Indicates the name of the current Master 4 Mode Indicates the mode memorized to the current Master One of the modes VOICE PERF PATTERN SON...

Page 129: ...ode is set to Voice Select a Voice bank and number When the Mode is set to Performance Select a Performance bank and number When the Mode is set to Song Select a Song number When the Mode is set to Pattern Select a Pattern number ZoneSwitch Determines whether the Zone function is used on or not off See page 130 for details about the Zone function Settings off on NOTE When the Mode is set to Voice ...

Page 130: ... you can create a name for the Master For detailed instructions on naming see the Basic Operation of the Owner s Manual Zone Edit From this display you can set how each Zone transmits MIDI messages when you play the keyboard TransCh Transmit Channel Determines the MIDI Transmit Channel for each Zone Settings 1 16 IntSw Internal Switch Determines whether or not MIDI data for each Zone is transmitte...

Page 131: ...r not to transmit Control Number 64 Sustain messages to the internal and external tone generator This parameter is not available for the Drum Voice Parts FS Foot Switch Determines whether or not to transmit MIDI messages generated by pressing the Footswitch connected to the FOOT SWITCH ASSIGNABLE jack to the internal and external tone generator Knob Determines whether or not to transmit MIDI messa...

Page 132: ...aster from scratch Type of parameter to be initialized All Common Zone This function lets you send all your edited parameter settings for the currently selected Master to a computer or another MIDI device for data archiving Press the ENTER button to execute the Bulk Dump NOTE In order to execute Bulk Dump you will need to set the correct MIDI Device Number with the following operation UTILITY F6 M...

Page 133: ...e Control Template number NOTE Use the MOXF6 MOXF8 Remote Editor for editing the Control Template The MOXF6 MOXF8 Remote Editor can be downloaded from the following website address http download yamaha com For instructions see the PDF manual included with the MOXF6 MOXF8 Remote Editor NOTE When the DAW software which is set in the Utility mode is set to Cubase switching the VSTi on the Cubase chan...

Page 134: ...wn the SHIFT button and press Knob Function 1 button to set the functions of Knobs 1 4 to 1 NOTE Use the MOXF6 MOXF8 Remote Editor to edit the Control Template Switching the functions of Knobs 5 8 Knobs 5 8 are available only when DAW Select is set to Cubase in the Utility mode Press Knob Function 2 button to switch the functions assigned to the Knobs 5 8 in descending order Q F G Knobs 5 8 also c...

Page 135: ...Cubase the following fixed functions are assigned to the F1 F6 buttons The SF1 SF6 buttons can be assigned freely to any desired function When DAW Select is set to Cubase you can use six memories to which functions assigned to the SF1 SF6 buttons are registered You can register the functions for the SF1 SF6 buttons to each memory To switch among Memory settings 1 6 use the A F buttons on the MOXF6...

Page 136: ...Setup window contains the SF Assign window SF Assign Quick window and Option window Pressing the tabs switches among the three windows SF Assign window This window assigned the functions to selected one of the Sub Function buttons You can select one of the Sub Function buttons by clicking the SF1 SF6 button on the window 1 SF Assign tab SF Assign Quick tab Option tab Click one of the tabs to switc...

Page 137: ... stored as a file Reset Memory 1 2 3 4 5 6 Clicking these buttons restores the default settings of the selected Memory to the SF1 SF6 buttons NOTICE Restoring the default data by clicking the Reset Memory button overwrites the registered functions for the SF1 SF6 buttons to the selected Memory SF Assign Quick window This window assigns functions to the SF1 SF6 buttons The setting menu is the same ...

Page 138: ... CATEGORY SEARCH button works as the JOG button and the FAVORITE button works as the LOCK button The parameters which are available for control by AI KNOB will differ according to the on off status of the JOG button and LOCK button as follows ProgramChangeMode setting Functions remote Pressing the INC button selects the next program while pressing the DEC button selects the previous program PC All...

Page 139: ...VOICE MOXF6 MOXF8 Reference Manual Remote Mode Remote display Remote Control Assignments 139 Utility settings Press the UTILITY button to call up the display for the Utility settings dedicated to the Remote mode See page 141 for details about the each parameter ...

Page 140: ... 0 102 3 SystemFxOn OffBtn Chorus System Effect On Off Button Chorus Determines whether or not the System Effect Chorus is actually applied when the EFFECT ON OFF SYSTEM button is turned on Settings off on SystemFxOn OffBtn Reverb System Effect On Off Button Reverb Determines whether or not the System Effect Reverb is actually applied when the EFFECT ON OFF SYSTEM button is turned on Settings off ...

Page 141: ...termines the parameters related to the Performance Creator which uses the LAYER SPLIT DRUM ASSIGN buttons Layer Bank Layer Voice Bank Layer Number Layer Voice Number Determines the Voice assigned first when using the Layer function of the Performance Creator Select the desired Voice by setting the Bank and Number The Name is determined automatically Split Bank Split Voice Bank Split Number Split V...

Page 142: ...Controller Reset Determines the status of the controllers Modulation Wheel Aftertouch Foot Controller Breath Controller Knobs etc when switching between Voices When this is set to hold the controllers are kept at the current setting When this is set to reset the controllers are reset to the default states below Settings hold reset If you select reset the controllers will be reset to the following ...

Page 143: ...ing you make large changes to the actual value even with slight turning of the Knob Settings table1 table5 LCD Mode Switches the backlight of the LCD Settings normal reverse LCD Contrast Adjusts the LCD contrast Settings 1 16 These special Voice related settings are available only when entering the Utility mode from the Voice mode letting you set parameters related to all the Voices SF1 MFX Master...

Page 144: ...rator using click playback affects the overall polyphony of the instrument SF2 FILTER MIDI Filter From this display you can set which MIDI events will be recognized transmitted via MIDI The settings made here apply only to Song Pattern playback data they do not affect the MIDI events generated by your keyboard playing or panel operations in the Voice and Performance modes MIDI events to which the ...

Page 145: ...OTE As for controllers that are not actually available on the instrument itself they can be controlled by transmitting the corresponding MIDI control number from an external MIDI controller BC Breath Controller Control Number Determines the Control Change number generated when you use a Breath Controller on an external device connected to the MOXF6 MOXF8 Settings off 1 95 RB Ribbon Controller Cont...

Page 146: ...ture for producing the special half damper effect as on a real acoustic piano set this parameter to FC3 Half on If you don t need the half damper feature or want to disable it while still using an FC3 set this parameter to FC3 Half off When the FC4 or FC5 is used Select FC4 5 The FC4 and FC5 are not equipped with the half damper feature Settings FC3 Half on FC3 Half off FC4 5 NOTE Note that this s...

Page 147: ...s is set to on the audio signal which is output via the USB 3 4 channels is also output to the OUTPUT L MONO R jacks and PHONES jack Settings off on SF1 OUT CH Output Channel Pressing this button calls up the display which determines whether the maximum number of output channels for USB is 4 channels 2 stereo channels or 2 channels 1 stereo channel If transfer of the audio signal between the MOXF6...

Page 148: ...whether or not Bulk Dump data can be received Settings protect not received on received SF3 SYNC Synchronization From this display you can set various parameters related to MIDI clock and synchronization MIDI Sync Determines whether Song Pattern Arpeggio playback will be synchronized to the instrument s internal clock or an external MIDI clock Settings internal external auto MTC internal Synchroni...

Page 149: ... and or transmitted via MIDI Settings off in out in out off Not transmitted recognized in Recognized but not transmitted out Transmitted but not recognized in out Transmitted recognized MTC StartOffset Determines the specific time code point from which sequence playback starts when MTC is received This feature can be used to accurately align playback of this synthesizer with an external MTC compat...

Page 150: ...data Furthermore it is wise to regularly create backup copies of important Performance data and system settings to a USB flash memory device computer or the like NOTE For instructions on executing Factory Set see the Owner s Manual 1 PowerOn Auto Power On Auto Factory Set When this parameter is set to on turning the power on will restore the User memory to the factory default settings and load the...

Page 151: ... F2 AUDIO display Settings Config1 Config6 3 MIDI Selects the MIDI setting for each Quick Setup Each MIDI setting Config1 Config6 can be edited in the F3 MIDI display Settings Config1 Config6 The default settings for Quick Setups 1 6 are as follows Quick Setup 1 DAW Rec Audio Config2 Use this setting when recording the signals from the tone generator and the A D INPUT L R jacks separately to DAW so...

Page 152: ...or the selected Config These settings are same as in the F5 USB I O display page 146 in the Utility mode To switch among Config 1 6 use the SF1 SF6 buttons Determines the parameters related to the connections to an external MIDI device The function of each editable parameter is same as the following parameters To switch among Config 1 6 use the SF1 SF6 buttons LocalCtrl Local Control Utility mode ...

Page 153: ...alent to 1024KB and 1GB is equivalent to 1024MB Storage Refers to a memory storage unit such as a hard disk to which the file is saved This instrument can handle and mount various USB flash memory devices connected to the USB TO DEVICE terminal Directory Dir This is an organizational feature on a data storage device such as hard disk allowing you to group data files together according to type or a...

Page 154: ...ile Store means that the data created on the MOXF6 MOXF8 is stored to internal memory Load means that the file on the USB flash memory is loaded to internal memory SF1 CURRENT Indicates the currently recognized flash memory device USB Device Status Free Indicates the amount of free capacity for the currently recognized USB flash memory device Status Total Indicates the amount of total memory for t...

Page 155: ... together AllVoice X6V All the User Voice data in this synthesizer s internal User Memory Flash ROM is treated as a single file and can be saved to USB flash memory However the Mixing Voice cannot be saved Also the Waveforms assigned to any of the Voices are saved together AllArp All Arpeggio X6G All the User Arpeggio data in this synthesizer s internal User Memory Flash ROM is treated as a single...

Page 156: ... in the box located at the right of the display and select the destination Voice for loading at the left of the display 1BankPerform X6A The Performances in the selected Bank of the file saved as an All can be saved Please note that the file icons F of X6A are changed to G as virtual directories when this file type is selected When selecting this file and then pressing the ENTER button the Perform...

Page 157: ...ry as an All or AllPattern type can be individually selected and loaded to the instrument Please note that the file icons F of X6A and X6P are changed to G as virtual directories when this file type is selected When selecting this file and then pressing the ENTER button the Pattern list of the file and the load destination are indicated Select the source Pattern for loading in the box located at t...

Page 158: ...lete files directories from the selected USB flash memory device Select the desired file or folder as shown above then press the SF1 EXEC button NOTE When you wish to delete a directory delete all the files contained in the directory beforehand Please keep in mind that only folders that contain no files or other nested directories can be deleted SF1 FORMAT Use this function to format an optional F...

Page 159: ...elected Waveform by playing the keyboard SF3 OPTIMIZE Use this function to optimize the Flash Expansion Memory Module Optimization consolidates areas of used and unused available memory to create the largest possible area of contiguous available memory and speed up memory access Press the ENTER button to call up the confirmation dialog then press the ENTER button again to execute the Optimize oper...

Page 160: ...ve performance since it lets you easily use SMF data as accompaniment while you play the keyboard 1 Connect the USB flash memory including the SMF file device to this instrument 2 Enter the Song mode or Pattern mode then select the desired Song or Pattern 3 Press the FILE button to enter the File mode 4 Press the F3 LOAD button to call up the Load display 5 Move the cursor to TYPE then select the ...

Page 161: ... the Format display 4 Set the Volume Label Move the cursor to the Volume Label and input a Volume Label up to 11 characters by using the DATA dial and cursor buttons Pressing the SF6 button calls up a character list for easy entry 5 Press the ENTER button The display prompts you for confirmation Press the EXIT button to cancel the Format operation 6 Press the ENTER to button execute the Format ope...

Page 162: ...e giving you even greater enjoyment and musical versatility For details how to connect this instrument to the iPad iPhone iPod touch refer to the i MX1 i UX1 Owner s Manual Also for information on compatible applications and details on minimum requirements for the applications refer to the following web site http www yamaha com kbdapps NOTE When you use the instrument along with the application on...

Page 163: ...y determine the tone generator mode select MIDI channels voices and effects change parameter values and of course play the voices specified for the various Parts For detailed information of the MIDI messages that can be handled by the MOXF6 MOXF8 see the Data List PDF document For details on MIDI see the Synthesizer Parameter Manual PDF document This section explains only information specific to t...

Reviews: