11
L
R
dB
17
20
14
12
– 30
10
8
6
4
0
2
4
6
8 +
Ÿ
NORM
HIGH
METAL
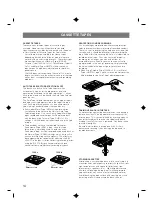
Setting the recording level (in step 3)
Play the loudest passage of the source to be recorded
and watch the meter readings. Adjust the REC LEVEL
control so that the highest peak may not exceed the
optimum levels of each tape type. Normally, it is best to
adjust the BALANCE control such that the LEFT and
RIGHT meter readings are even.
÷
The
Ÿ
mark indicates the Dolby noise reduction system
standard level.
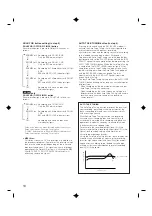
Bias adjustment
The BIAS ADJUST control is for fine adjustment of the
recording bias. Normally, it is not necessary to adjust this
control since the recording bias can be automatically
adjusted by the built-in Auto Tape Selector and the AUTO
TAPE TUNING button for different tape types.
However, if you feel that your recording needs further bias
adjustment (to compensate for absent or distorted high
frequencies), adjust this control to your liking.
Output Level (dB)
10
0
-10
-20
-30
-40
1
2
3
Frequency (Hz)
1
Insufficient bias (High frequencies are distorted.)
2
Optimum bias
3
Excessive bias (High frequencies are absent.)
When high frequencies are
distorted, increase the
recording bias by turning
the BIAS ADJUST control
clockwise.
When high frequencies are
absent, decrease the recording
bias by turning the BIAS
ADJUST control
counterclockwise.
0
+
BIAS ADJUST
+
0
BIAS ADJUST
–
–
Synchronized recording function
When operating this unit in combinaton with the YAMAHA
CD Player which has SYNCHRO button on its remote
control transmitter, CD Synchronized recording function
can be utilized. This function is operated with the remote
control transmitter of the CD Player. (Regarding the
operation, refer to the manual of the CD Player.)
SYNCHRO indicator of this unit lights when the SYNCHRO
button of the remote controller is pressed.


