background image

SPECIFICATIONS

8-4

8

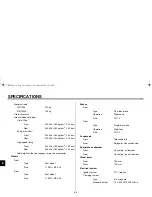
Battery

Model

GT14B-4

Voltage, capacity

12 V, 12 Ah

Headlight type

Halogen bulb

Bulb voltage, wattage 

×

 quantity

Headlight

12 V, 60/55 W 

×

 2

Tail/brake light

12 V, 5/21 W 

×

 2

Turn signal light

12 V, 21 W 

×

 4

Auxiliary light

12 V, 5 W 

×

 2

Meter lighting

14 V, 1.12 W 

×

 4

Neutral indicator light

14 V, 1.12 W 

×

 1

High beam indicator light

14 V, 1.12 W 

×

 1

Turn signal indicator light

14 V, 1.4 W 

×

 2

Engine trouble warning light

14 V, 1.12 W 

×

 1

Oil level warning light

14 V, 1.12 W 

×

 1

ABS warning light 
(For FJR1300A only)

14 V, 1.12 W 

×

 1

Immobilizer system indicator 
light

L.E.D.

Fuses

Main fuse

50 A

Electronic fuel injection fuse

15 A

Headlight fuse

25 A

Signaling system fuse

15 A

Radiator fan fuse

15 A

Ignition fuse

10 A

Odometer, clock and 
immobilizer system fuse 
(backup fuse)

10 A

Parking lighting fuse

10 A

Hazard fuse

7.5 A

Windshield motor fuse

2 A

Anti-lock Brake System 
fuse (For FJR1300A only)

7.5 A

E_5jw_Spec.fm  Page 4  Monday, November 11, 2002  10:01 AM

Summary of Contents for FJR1300

Page 1: ...5JW 28199 E2 FJR1300 FJR1300A OWNER S MANUAL ...

Page 2: ...Shiro fm Page 1 Thursday June 7 2001 11 38 AM ...

Page 3: ... R TTE Directive 1999 5 EC EN300 330 2 v1 1 1 2001 6 EN60950 2000 Two or Three Wheel Motor Vehicles Directive 97 24 EC Chapter 8 EMC Place of issue Shizuoka Japan Date of issue Aug 1st 2002 Kind of equipment IMMOBILIZER Address 1450 6 Mori Mori Machi Shuchi gun Shizuoka 437 0292 Japan Company MORIC CO LTD Kazuji Kawai representative name and signature U5JWE2 book Page 1 Wednesday November 6 2002 3...

Page 4: ...U5JWE2 book Page 2 Wednesday November 6 2002 3 32 PM ...

Page 5: ...to enjoy all advantages of your FJR1300 FJR1300A The owner s manual does not only instruct you in how to operate inspect and maintain your motorcycle but also in how to safeguard yourself and others from trouble and injury In addition the many tips given in this manual will help keep your motorcycle in the best possible condition If you have any further questions do not hesitate to contact your Ya...

Page 6: ... taken to avoid damage to the motorcycle NOTE A NOTE provides key information to make procedures easier or clearer NOTE _ This manual should be considered a permanent part of this motorcycle and should remain with it even if the motorcycle is subsequently sold Yamaha continually seeks advancements in product design and quality Therefore while this manual contains the most current product informati...

Page 7: ...IMPORTANT MANUAL INFORMATION EW000002 WARNING _ PLEASE READ THIS MANUAL CAREFULLY AND COMPLETELY BEFORE OPERATING THIS MOTORCYCLE _ U5JWE2 book Page 2 Wednesday November 6 2002 3 32 PM ...

Page 8: ... MANUAL 2002 by Yamaha Motor Co Ltd 1st edition November 2002 All rights reserved Any reprinting or unauthorized use without the written permission of Yamaha Motor Co Ltd is expressly prohibited Printed in Japan U5JWE2 book Page 3 Wednesday November 6 2002 3 32 PM ...

Page 9: ...NT AND CONTROL FUNCTIONS 3 4 PRE OPERATION CHECKS 4 5 OPERATION AND IMPORTANT RIDING POINTS 5 6 PERIODIC MAINTENANCE AND MINOR REPAIR 6 7 MOTORCYCLE CARE AND STORAGE 7 8 SPECIFICATIONS 8 9 CONSUMER INFORMATION 9 INDEX EAU00009 U5JWE2 book Page 1 Wednesday November 6 2002 3 32 PM ...

Page 10: ...U5JWE2 book Page 2 Wednesday November 6 2002 3 32 PM ...

Page 11: ...GIVE SAFETY THE RIGHT OF WAY 1 GIVE SAFETY THE RIGHT OF WAY 1 1 U5JWE2 book Page 1 Wednesday November 6 2002 3 32 PM ...

Page 12: ...even small amounts of alcohol there is a tendency to take dangerous risks Protective clothing is as essential for the motorcycle rider as seat belts are for car drivers and passengers Always wear a complete motorcycle suit whether made of leather or tear resistant synthetic materials with protectors sturdy boots motorcycle gloves and a properly fitting helmet Optimum protective wear however should...

Page 13: ...DESCRIPTION 2 Left view 2 1 Right view 2 2 Controls and instruments 2 3 U5JWE2 book Page 1 Wednesday November 6 2002 3 32 PM ...

Page 14: ...er seat page 3 17 8 Passenger seat page 3 17 9 Carrier 10 Final gear oil filler bolt page 6 12 11 Final gear oil drain bolt page 6 12 12 Shock absorber assembly rebound damping force adjusting knob page 3 22 13 Shock absorber assembly spring preload adjusting lever page 3 22 14 Air filter element page 6 15 15 Shift pedal page 3 11 16 Engine oil filter cartridge page 6 9 17 Engine oil level check w...

Page 15: ...r page 6 13 20 Battery page 6 31 21 Windshield 22 Main fuse and electronic fuel injection fuse page 6 32 6 33 23 Front fork compression damping force adjusting screw page 3 21 24 Brake pedal page 3 12 25 Rider footrest U5JWE2 book Page 2 Wednesday November 6 2002 3 32 PM ...

Page 16: ...s page 3 9 3 Tachometer page 3 6 4 Speedometer page 3 6 5 Multi function display page 3 7 6 Right handlebar switches page 3 10 7 Brake lever page 3 12 8 Throttle grip page 6 17 9 Main switch steering lock page 3 2 10 Hazard switch page 3 10 U5JWE2 book Page 3 Wednesday November 6 2002 3 32 PM ...

Page 17: ... Shift pedal 3 11 Brake lever 3 12 Brake pedal 3 12 ABS For FJR1300A only 3 13 Fuel tank cap 3 14 Fuel 3 15 Fuel tank breather hose 3 16 Catalytic converter 3 16 Seats 3 17 Storage compartment 3 18 Accessory box 3 19 Adjusting the front fork 3 19 Adjusting the shock absorber assembly 3 21 Locks for the optional side cases and travel trunk 3 23 Sidestand 3 23 Ignition circuit cut off system 3 24 U5...

Page 18: ...ve them re registered Do not use the key with the red bow for driving It should only be used for re registering the stan dard keys Always use a standard key for driving ECA00151 CAUTION _ DO NOT LOSE THE CODE RE REGISTERING KEY CONTACT YOUR DEALER IMMEDIATELY IF IT IS LOST If the code re reg istering key is lost registering new codes in the standard keys is impossible The standard keys can still b...

Page 19: ...84 Main switch steering lock The main switch steering lock controls the ignition and lighting systems and is used to lock the steering NOTE _ Be sure to use the standard key black bow for regular use of the vehicle To minimize the risk of losing the code re registering key red bow keep it in a safe place and only use it for code re registering _ EAU26810 ON All electrical circuits are supplied wit...

Page 20: ...hile still pushing it 3 Remove the key To unlock the steering Push the key into the main switch and then turn it to OFF while still pushing it EW000016 WARNING _ Never turn the key to OFF or LOCK while the motorcycle is moving otherwise the electrical systems will be switched off which may result in loss of control or an accident Make sure that the motor cycle is stopped before turning the key to ...

Page 21: ... for a few seconds then go off have a Yamaha dealer check the electrical cir cuit When the key is turned to OFF and 30 seconds have passed the indicator light will start flashing indicating the im mobilizer system is enabled After 24 hours have passed the indicator light will stop flashing however the im mobilizer system is still enabled NOTE _ This model is also equipped with a self diagnosis dev...

Page 22: ...on as possible _ The electrical circuit of the warning light can be checked by turning the key to ON If the warning light does not come on or remains on have a Yamaha dealer check the electrical circuit EAU04877 Oil level warning light This warning light comes on when the engine oil level is low The electrical circuit of the warning light can be checked by turning the key to ON If the warning ligh...

Page 23: ...ealer check the elec trical circuit EAU04031 Speedometer The speedometer shows the riding speed EAU04969 Tachometer The electric tachometer allows the rider to monitor the engine speed and keep it within the ideal power range When the key is turned to ON the tachometer needle will move to 11 000 r min and back to zero r min in order to test the electrical circuit EC000003 CAUTION _ Do not operate ...

Page 24: ... the distance traveled from that point In that case pushing the SELECT button switches the dis play between the various tripmeter and odometer modes in the following order TRIP F TRIP top TRIP bottom ODO TRIP F To reset a tripmeter select it by push ing the SELECT button and then push the RESET button for at least one second If you do not reset the fuel reserve tripmeter manually it will reset its...

Page 25: ...switch and do not keep more than one immobilizer key on the same key ring Immobilizer system keys may cause signal interfer ence which may prevent the engine from starting _ 2 If the engine starts turn it off and try starting the engine with the standard keys 3 If one or both of the standard keys do not start the engine take the vehicle the code re registering key and both standard keys to a Yamah...

Page 26: ... in direction a To move the windshield down push the switch in di rection b NOTE _ When the engine is turned off the windshield will automatically return to the lowest position _ EAU03889 Turn signal switch To signal a right hand turn push this switch to To signal a left hand turn push this switch to When released the switch returns to the cen ter position To cancel the turn signal lights push the...

Page 27: ... hazard light for an ex tended length of time otherwise the battery may discharge _ EAU03890 Engine stop switch Set this switch to before starting the engine Set this switch to to stop the engine in case of an emergen cy such as when the motorcycle over turns or when the throttle cable is stuck EAU00143 Start switch Push this switch to crank the engine with the starter EC000005 CAUTION _ See page ...

Page 28: ...he handlebar grip Make sure that the appropriate setting on the adjusting dial is aligned with the arrow mark on the clutch lever The clutch lever is equipped with a clutch switch which is part of the igni tion circuit cut off system See page 3 24 for an explanation of the ig nition circuit cut off system EAU00157 Shift pedal The shift pedal is located on the left side of the engine and is used in...

Page 29: ...dlebar grip turn the adjusting dial while holding the lever pushed away from the handlebar grip Make sure that the appropriate setting on the mark is aligned with the arrow mark on the brake lever EAU00162 Brake pedal The brake pedal is on the right side of the motorcycle To apply the rear brake press down on the brake pedal 1 Brake lever 2 mark 3 Brake lever position adjusting dial a Distance bet...

Page 30: ...on oc curs EWA10090 WARNING _ The ABS performs best on long braking distances On certain rough or gravel roads the braking distance may be longer with than without the ABS Therefore always keep a sufficient distance to the vehi cle ahead to match the riding speed _ NOTE _ When the ABS is activated the brakes are operated in the usual way A pulsating action may be felt at the brake lever or brake p...

Page 31: ...uel tank cap into posi tion with the key inserted in the lock 2 Turn the key counterclockwise to the original position remove it and then close the lock cover NOTE _ The fuel tank cap cannot be closed un less the key is in the lock In addition the key cannot be removed if the cap is not properly closed and locked _ EWA00025 WARNING _ Make sure that the fuel tank cap is properly closed before ridin...

Page 32: ...A00104 CAUTION _ Use only unleaded gasoline The use of leaded gasoline will cause se vere damage to internal engine parts such as the valves and piston rings as well as to the exhaust sys tem _ Your Yamaha engine has been de signed to use regular unleaded gaso line with a research octane number of 91 or higher If knocking or pinging occurs use a gasoline of a different brand or premium unleaded fu...

Page 33: ...n the exhaust cham ber EW000128 WARNING _ The exhaust system is hot after op eration Make sure that the exhaust system has cooled down before do ing any maintenance work _ EC000114 CAUTION _ The following precautions must be observed to prevent a fire hazard or other damages Use only unleaded gasoline The use of leaded gasoline will cause unrepairable damage to the catalytic converter Never park t...

Page 34: ... down to lock it in place 2 Remove the key Passenger seat To remove the passenger seat 1 Remove the rider seat 2 Pull the passenger seat up To install the passenger seat 1 Slide the receptacle on the rear of the passenger seat over the seat holder as shown and then push the front of the seat down 2 Install the rider seat NOTE _ Make sure that the seats are properly secured before riding _ 1 Rider ...

Page 35: ...y fasten it with the straps When the U LOCK is not in the storage compartment be sure to secure the straps to prevent losing them When storing the owner s manual or other documents in the storage com partment be sure to wrap them in a plastic bag so that they will not get wet When washing the motorcycle be careful not to let any water enter the storage compartment 1 U LOCK U5JWE2 book Page 18 Wedn...

Page 36: ...ine is running or is hot _ EWA11420 WARNING _ Do not exceed the load limit of 0 3 kg for the accessory box Do not exceed the maximum load of FJR1300 201 kg FJR1300A 194 kg for the vehi cle _ EAU03949 Adjusting the front fork This front fork is equipped with spring preload adjusting bolts rebound damp ing force adjusting knobs and compres sion damping force adjusting screws EW000035 WARNING _ Alway...

Page 37: ...rease the rebound damping force and thereby harden the rebound damping turn the adjusting knob on each fork leg in direction a To de crease the rebound damping force and thereby soften the rebound damping turn the adjusting knob on each fork leg in direction b CI 09E 1 Spring preload adjusting bolt 1 Current setting 2 Front fork cap bolt Setting Minimum soft 6 Standard 4 Maximum hard 1 1 Rebound d...

Page 38: ... differences in production the actual number of clicks always represents the entire adjusting range To obtain a precise adjustment it would be advisable to check the num ber of clicks of each damping force ad justing mechanism and to modify the specifications as necessary _ EAU03950 Adjusting the shock absorber assembly This shock absorber assembly is equipped with a spring preload adjust ing leve...

Page 39: ... be fore handling the shock absorber The manufacturer cannot be held re sponsible for property damage or personal injury that may result from improper handling Do not tamper with or attempt to open the gas cylinder Do not subject the shock ab sorber to an open flame or other high heat sources otherwise it may explode due to excessive gas pressure Do not deform or damage the gas cylinder in any way...

Page 40: ...t of the ignition circuit cut off system which cuts the ignition in certain situations See further down for an explanation of the ignition circuit cut off system _ EW000044 WARNING _ The motorcycle must not be ridden with the sidestand down or if the sidestand cannot be properly moved up or does not stay up oth erwise the sidestand could contact the ground and distract the opera tor resulting in a...

Page 41: ...ents starting when the trans mission is in gear and the clutch lever is pulled but the sidestand is still down It cuts the running engine when the transmission is in gear and the sidestand is moved down Periodically check the operation of the ignition circuit cut off system according to the following procedure EW000046 WARNING _ The vehicle must be placed on the centerstand during this in spection...

Page 42: ... clutch lever pulled 8 Shift the transmission into gear 9 Move the sidestand down Does the engine stall After the engine has stalled 10 Move the sidestand up 11 Keep the clutch lever pulled 12 Push the start switch Does the engine start The sidestand switch may be defective The motorcycle should not be ridden until checked by a Yamaha dealer The clutch switch may be defective The motorcycle should...

Page 43: ...PRE OPERATION CHECKS 4 Pre operation check list 4 1 U5JWE2 book Page 1 Wednesday November 6 2002 3 32 PM ...

Page 44: ... leakage 6 9 Final gear oil Check vehicle for oil leakage 6 12 Coolant Check coolant level in reservoir If necessary add recommended coolant to specified level Check cooling system for leakage 6 13 6 14 Front brake Check operation If soft or spongy have Yamaha dealer bleed hydraulic system Check fluid level in reservoir If necessary add recommended brake fluid to specified level Check hydraulic sy...

Page 45: ...ration is smooth Lubricate pedal pivoting points if necessary 6 26 Brake and clutch levers Make sure that operation is smooth Lubricate lever pivoting points if necessary 6 27 Centerstand sidestand Make sure that operation is smooth Lubricate pivots if necessary 6 27 6 28 Chassis fasteners Make sure that all nuts bolts and screws are properly tightened Tighten if necessary Instruments lights signa...

Page 46: ...ion can be accomplished in a very short time and the added safety it assures is more than worth the time involved _ EWA00033 WARNING _ If any item in the Pre operation check list is not working properly have it inspected and repaired before operating the motorcycle _ U5JWE2 book Page 3 Wednesday November 6 2002 3 32 PM ...

Page 47: ...RIDING POINTS 5 Starting the engine 5 1 Shifting 5 2 Recommended shift points for Switzerland only 5 3 Tips for reducing fuel consumption 5 3 Engine break in 5 3 Parking 5 4 U5JWE2 book Page 1 Wednesday November 6 2002 3 32 PM ...

Page 48: ...nsmission is in the neutral position The transmission is in gear with the clutch lever pulled and the sidestand up EWA10290 WARNING _ Before starting the engine check the function of the igni tion circuit cut off system ac cording to the procedure described on page 3 25 Never ride with the sidestand down _ 1 Turn the key to ON and make sure that the engine stop switch is set to ECA11780 CAUTION _ ...

Page 49: ...lls etc The gear positions are shown in the illustration NOTE _ To shift the transmission into the neu tral position press the shift pedal down repeatedly until it reaches the end of its travel and then slightly raise it _ EC000048 CAUTION _ Even with the transmission in the neutral position do not coast for long periods of time with the engine off and do not tow the motorcycle for long dis tances...

Page 50: ...ne speeds with no load on the engine Turn the engine off instead of let ting it idle for an extended length of time e g in traffic jams at traf fic lights or at railroad crossings EAU01128 Engine break in There is never a more important period in the life of your engine than the period between 0 and 1 600 km For this rea son you should read the following ma terial carefully Since the engine is bra...

Page 51: ...eter red zone If any engine trouble should oc cur during the engine break in period immediately have a Yamaha dealer check the vehicle _ EAU00461 Parking When parking stop the engine and then remove the key from the main switch EW000058 WARNING _ Since the engine and exhaust system can become very hot park in a place where pedestri ans or children are not likely to touch them Do not park on a slop...

Page 52: ...U5JWE2 book Page 5 Wednesday November 6 2002 3 32 PM ...

Page 53: ...rake pads 6 22 Checking the brake and clutch fluid levels 6 23 Changing the brake and clutch fluids 6 25 Checking and lubricating the cables 6 25 Checking and lubricating the throttle grip and cable 6 25 Checking and lubricating the brake and shift pedals 6 26 Checking and lubricating the brake and clutch levers 6 27 Checking and lubricating the centerstand and sidestand 6 27 Lubricating the swing...

Page 54: ...e maintenance work have a Yamaha dealer do it for you _ EAU03711 Owner s tool kit The owner s tool kit is located under the rider seat See page 3 17 for rider seat removal and installation proce dures The service information included in this manual and the tools provided in the owner s tool kit are intended to assist you in the performance of preventive maintenance and minor repairs How ever addit...

Page 55: ...30 40 1 Fuel line Check fuel hoses for cracks or damage 2 Spark plugs Check condition Clean and regap Replace 3 Valves Check valve clearance Adjust Every 40 000 km 4 Air filter element Clean Replace 5 Clutch Check operation fluid level and vehicle for fluid leakage See NOTE on page 6 4 6 Front brake Check operation fluid level and vehicle for fluid leakage See NOTE on page 6 4 Replace brake pads W...

Page 56: ...000 km 14 Chassis fasteners Make sure that all nuts bolts and screws are properly tightened 15 Sidestand centerstand Check operation Lubricate 16 Sidestand switch Check operation 17 Front fork Check operation and for oil leakage 18 Shock absorber assembly Check operation and shock absorber for oil leakage 19 Rear suspension relay arm and connecting arm pivoting points Check operation 20 Electronic...

Page 57: ... _ 22 Engine oil filter cartridge Replace 23 Cooling system Check coolant level and vehicle for coolant leakage Change Every 3 years 24 Final gear oil Check oil level and vehicle for oil leakage Change 25 Front and rear brake switches Check operation 26 Moving parts and cables Lubricate 27 Throttle grip housing and cable Check operation and free play Adjust the throttle cable free play if necessar...

Page 58: ...anels shown above need to be removed to perform some of the main tenance jobs described in this chapter Refer to this section each time a panel needs to be removed and installed 1 Panel A 2 Panel B 3 Panel C 4 Panel D 1 Panel E 1 Panel F U5JWE2 book Page 5 Wednesday November 6 2002 3 32 PM ...

Page 59: ...emove panel A if removing panel B or panel D if removing panel C 2 Remove the quick fastener by pushing the center pin 3 Remove the screws and then take the panel off To install the panel 1 Place the panel in the original po sition and then install the quick fastener and the screws 2 Install panel A to complete the in stallation of panel B or panel D to complete the installation of panel C 1 Screw...

Page 60: ...cally preferably by a Yamaha dealer Since heat and deposits will cause any spark plug to slowly erode they should be removed and checked in accordance with the periodic mainte nance and lubrication chart In addition the condition of the spark plugs can re veal the condition of the engine The porcelain insulator around the cen ter electrode of each spark plug should be a medium to light tan the ide...

Page 61: ...ff any grime from the spark plug threads NOTE _ If a torque wrench is not available when installing a spark plug a good estimate of the correct torque is 1 4 1 2 turn past finger tight However the spark plug should be tightened to the speci fied torque as soon as possible _ Specified spark plug CR8E NGK or U24ESR N DENSO a Spark plug gap Spark plug gap 0 7 0 8 mm Tightening torque Spark plug 12 5 ...

Page 62: ...l level through the check window located at the bottom left side of the crank case NOTE _ The engine oil should be between the minimum and maximum level marks _ 4 If the engine oil is below the mini mum level mark add sufficient oil of the recommended type to raise it to the correct level To change the engine oil with or without oil filter cartridge replacement 1 Start the engine warm it up for se...

Page 63: ... ring is properly seated _ 6 Install the new oil filter cartridge and then tighten it to the specified torque with a torque wrench 7 Install the engine oil drain bolt and then tighten it to the specified torque NOTE _ Check the washer for damage and re place it if necessary _ 1 Oil filter cartridge 2 Oil filter wrench 1 O ring 1 Oil filter cartridge 2 Torque wrench Tightening torque Oil filter car...

Page 64: ...r several minutes while checking it for oil leakage If oil is leaking immediately turn the engine off and check for the cause NOTE _ After the engine is started the engine oil level warning light should go off if the oil level is sufficient _ EC000067 CAUTION _ If the oil level warning light flickers or remains on immediately turn the engine off and have a Yamaha deal er check the vehicle _ 10 Tur...

Page 65: ...en checking the oil level A slight tilt to the side can result in a false read ing _ 2 Remove the oil filler bolt and then check the oil level in the final gear case NOTE _ The oil level should be at the brim of the filler hole _ 3 If the oil is below the brim of the fill er hole add sufficient oil of the rec ommended type to raise it to the correct level To change the final gear oil 1 Place an oi...

Page 66: ...e motorcycle on the cen terstand NOTE _ The coolant level must be checked on a cold engine since the level varies with engine temperature Make sure that the motorcycle is positioned straight up when checking the coolant level A slight tilt to the side can result in a false reading _ 2 Check the coolant level in the coolant reservoir NOTE _ The coolant should be between the minimum and maximum leve...

Page 67: ...n as possible other wise the engine may not be sufficiently cooled and the cool ing system will not be protected against frost and corrosion If water has been added to the coolant have a Yamaha dealer check the antifreeze content of the coolant as soon as possible otherwise the effectiveness of the coolant will be reduced _ EW000067 WARNING _ Never attempt to remove the radia tor cap when the engi...

Page 68: ...ently if you are riding in unusually wet or dusty areas 1 Remove panel E See page 6 7 for panel removal and installation procedures 2 Remove the intake air shroud by removing the quick fastener screws 3 Remove the air filter case cover by removing the screws 4 Pull the air filter element out 1 Intake air shroud 2 Quick fastener screw 4 1 Air filter case cover 2 Screw 4 1 Air filter element U5JWE2 ...

Page 69: ... cylinders may become excessively worn _ 7 Install the air filter case cover by installing the screws 8 Install the intake air shroud by in stalling the quick fastener screws 9 Install the panel EAU04033 Checking the engine idling speed The engine idling speed must be checked as follows and if necessary adjusted by a Yamaha dealer at the in tervals specified in the periodic mainte nance and lubric...

Page 70: ...ied in the periodic maintenance and lubrication chart EAU00658 Tires To maximize the performance durabil ity and safe operation of your motor cycle note the following points regarding the specified tires Tire air pressure The tire air pressure should be checked and if necessary adjusted before each ride EW000082 WARNING _ The tire air pressure must be checked and adjusted on cold tires i e when th...

Page 71: ...g loosely packed items which can shift during a ride Securely pack the heaviest items close to the center of the motorcycle and distribute the weight evenly on both sides Adjust the suspension and tire air pressure with regard to the load Check the tire condition and air pressure before each ride _ Tire air pressure measured on cold tires Load Front Rear Up to 90 kg 250 kPa 2 50 kgf cm2 2 50 bar 2...

Page 72: ...ility and can lead to loss of control The replacement of all wheel and brake related parts includ ing the tires should be left to a Yamaha dealer who has the necessary professional knowl edge and experience _ Tire information This motorcycle is equipped with cast wheels and tubeless tires with valves EW000080 WARNING _ The front and rear tires should be of the same make and de sign otherwise the h...

Page 73: ...nditions _ EAU03773 Cast wheels To maximize the performance durabil ity and safe operation of your motor cycle note the following points regarding the specified wheels The wheel rims should be checked for cracks bends or warpage be fore each ride If any damage is found have a Yamaha dealer re place the wheel Do not attempt even the smallest repair to the wheel A deformed or cracked wheel must be r...

Page 74: ...d the system before operating the motorcycle EAU00712 Adjusting the brake pedal position The top of the brake pedal should be positioned approximately 42 mm below the top of the footrest as shown Peri odically check the brake pedal position and if necessary have a Yamaha dealer adjust it EW000109 WARNING _ A soft or spongy feeling in the brake pedal can indicate the presence of air in the hydrauli...

Page 75: ...n b EAU00721 Checking the front and rear brake pads The front and rear brake pads must be checked for wear at the intervals spec ified in the periodic maintenance and lubrication chart EAU00725 Front brake pads Each front brake pad is provided with a wear indicator groove which allows you to check the brake pad wear with out having to disassemble the brake To check the brake pad wear check the wea...

Page 76: ...sibly causing them to become ineffec tive Before riding check that the brake fluid is above the minimum level mark and replenish if necessary A low brake flu id level may indicate worn brake pads and or brake system leakage If the brake fluid level is low be sure to check the brake pads for wear and the brake system for leakage NOTE _ The rear brake fluid reservoir is located behind panel F See pa...

Page 77: ...oes down too far Be sure to return the diaphragm to its original shape before installing it into the brake or clutch fluid reservoir Be careful that water does not en ter the brake or clutch fluid reser voir when refilling Water will significantly lower the boiling point of the fluid and may result in vapor lock and dirt may clog the ABS hydraulic unit valves Brake fluid may deteriorate paint ed s...

Page 78: ... of all control cables and the condition of the cables should be checked before each ride and the ca bles and cable ends should be lubricat ed if necessary If a cable is damaged or does not move smoothly have a Yamaha dealer check or replace it EW000112 WARNING _ Damage to the outer sheath may in terfere with proper cable operation and will cause the inner cable to rust Replace a damaged cable as ...

Page 79: ...he brake and shift pedals The operation of the brake and shift pedals should be checked before each ride and the pedal pivots should be lu bricated if necessary Recommended lubricant Lithium soap based grease all purpose grease U5JWE2 book Page 26 Wednesday November 6 2002 3 32 PM ...

Page 80: ...and lubricating the centerstand and sidestand The operation of the centerstand and sidestand should be checked before each ride and the pivots and metal to metal contact surfaces should be lubri cated if necessary EW000114 WARNING _ If the centerstand or sidestand does not move up and down smoothly have a Yamaha dealer check or re pair it _ Recommended lubricant Lithium soap based grease all purpo...

Page 81: ...arm pivots must be lubricat ed at the intervals specified in the peri odic maintenance and lubrication chart Recommended lubricant Lithium soap based grease all purpose grease 1 Pivoting point 2 Recommended lubricant Lithium soap based grease U5JWE2 book Page 28 Wednesday November 6 2002 3 32 PM ...

Page 82: ...2 While applying the front brake push down hard on the handle bars several times to check if the front fork compresses and re bounds smoothly EC000098 CAUTION _ If any damage is found or the front fork does not operate smoothly have a Yamaha dealer check or re pair it _ EAU00794 Checking the steering Worn or loose steering bearings may cause danger Therefore the operation of the steering must be c...

Page 83: ...a dealer check or repair the steer ing EAU01144 Checking the wheel bearings The front and rear wheel bearings must be checked at the intervals specified in the periodic maintenance and lubrica tion chart If there is play in the wheel hub or if the wheel does not turn smoothly have a Yamaha dealer check the wheel bearings U5JWE2 book Page 30 Wednesday November 6 2002 3 32 PM ...

Page 84: ...lothing and al ways shield your eyes when working near batteries In case of contact administer the fol lowing FIRST AID EXTERNAL Flush with plenty of water INTERNAL Drink large quan tities of water or milk and im mediately call a physician EYES Flush with water for 15 minutes and seek prompt medical attention Batteries produce explosive hy drogen gas Therefore keep sparks flames cigarettes etc awa...

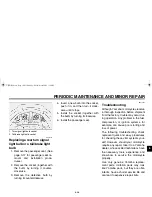
Page 85: ...c fuel in jection fuse and the main fuse are located under panel D The main fuse is located beside the battery See pag es 6 6 and 6 7 for panel removal and installation procedures If a fuse is blown replace it as follows 1 Turn the key to OFF and turn off the electrical circuit in question 2 Remove the blown fuse and then install a new fuse of the specified amperage 1 Electronic fuel injection fus...

Page 86: ...out replace it as follows 1 Remove panel B if replacing the left headlight bulb or panel C if replacing the right headlight bulb See page 6 6 for panel removal and installation procedures 2 Disconnect the headlight coupler and then remove the headlight bulb cover 1 Main fuse Specified fuses Main fuse 50 A Headlight fuse 25 A Signaling system fuse 15 A Ignition fuse 10 A Windshield motor fuse 2 A R...

Page 87: ...follow ing parts Headlight bulb Do not touch the glass part of the headlight bulb to keep it free from oil otherwise the transpar ency of the glass the luminosi ty of the bulb and the bulb life will be adversely affected Thor oughly clean off any dirt and fin gerprints on the headlight bulb using a cloth moistened with al cohol or thinner Headlight lens Do not affix any type of tinted film or stic...

Page 88: ...lacing the left auxiliary light bulb or panel C if replacing the right auxiliary light bulb See page 6 6 for panel re moval and installation proce dures 2 Remove the auxiliary light socket together with the coupler by turn ing the socket counterclockwise 3 Remove the defective bulb by pull ing it out 4 Insert a new bulb into the socket 5 Install the auxiliary light socket to gether with the couple...

Page 89: ... a thorough inspection before shipment from the factory trouble may occur dur ing operation Any problem in the fuel compression or ignition systems for example can cause poor starting and loss of power The following troubleshooting charts represent quick and easy procedures for checking these vital systems your self However should your motorcycle require any repair take it to a Yamaha dealer whose...

Page 90: ...ompression Check the ignition Have a Yamaha dealer check the vehicle Remove the spark plugs and check the electrodes 3 Ignition Wipe off with a dry cloth and correct the spark plug gaps or replace the spark plugs Have a Yamaha dealer check the vehicle The engine does not start Have a Yamaha dealer check the vehicle The engine does not start Check the battery Operate the electric starter 4 Battery ...

Page 91: ...s ing sound has stopped press down on the cap while turning it counterclockwise and then remove the cap _ NOTE _ If coolant is not available tap water can be temporarily used instead provided that it is changed to the recommended coolant as soon as possible _ Wait until the engine has cooled Check the coolant level in the reservoir and radiator The coolant level is OK The coolant level is low Chec...

Page 92: ...U5JWE2 book Page 39 Wednesday November 6 2002 3 32 PM ...

Page 93: ...MOTORCYCLE CARE AND STORAGE 7 Care 7 1 Storage 7 4 U5JWE2 book Page 1 Wednesday November 6 2002 3 32 PM ...

Page 94: ...l as all electrical couplers and connectors including the spark plug caps are tightly in stalled 3 Remove extremely stubborn dirt like oil burnt onto the crankcase with a degreasing agent and a brush but never apply such prod ucts onto seals gaskets and wheel axles Always rinse the dirt and degreaser off with water Cleaning ECA00010 CAUTION _ Avoid using strong acidic wheel cleaners especially on ...

Page 95: ...d is scratched use a quali ty plastic polishing compound after washing _ After normal use Remove dirt with warm water a mild detergent and a soft clean sponge and then rinse thoroughly with clean water Use a toothbrush or bottlebrush for hard to reach areas Stubborn dirt and insects will come off more easily if the area is covered with a wet cloth for a few minutes before cleaning After riding in ...

Page 96: ...surfaces 7 Let the motorcycle dry completely before storing or covering it EWA00031 WARNING _ Make sure that there is no oil or wax on the brakes or tires If necessary clean the brake discs and brake linings with a regular brake disc cleaner or ac etone and wash the tires with warm water and a mild deter gent Before riding at higher speeds test the motorcycle s braking performance and cor nering b...

Page 97: ...ilable to prevent the fuel tank from rusting and the fuel from deteriorating 3 Perform the following steps to pro tect the cylinders piston rings etc from corrosion a Remove the spark plug caps and spark plugs b Pour a teaspoonful of engine oil into each spark plug bore c Install the spark plug caps onto the spark plugs and then place the spark plugs on the cylinder head so that the electrodes are...

Page 98: ...ry month in order to prevent the tires from becoming degraded in one spot 6 Cover the muffler outlets with plas tic bags to prevent moisture from entering them 7 Remove the battery and fully charge it Store it in a cool dry place and charge it once a month Do not store the battery in an ex cessively cold or warm place less than 0 C or more than 30 C For more information on storing the battery see ...

Page 99: ...SPECIFICATIONS 8 Specifications 8 1 Conversion table 8 5 U5JWE2 book Page 1 Wednesday November 6 2002 3 32 PM ...

Page 100: ...on ratio 10 8 1 Starting system Electric starter Lubrication system Wet sump Engine oil Type Recommended engine oil classification API Service SE SF SG or higher Quantity Without oil filter cartridge replacement 3 8 L With oil filter cartridge replacement 4 L Total amount dry engine 4 9 L 20 10 0 10 20 30 40 50 C SAE 15W 40 SAE 20W 40 SAE 10W 40 CAUTION In order to prevent clutch slippage since th...

Page 101: ...et multiple disc Transmission Primary reduction system Helical gear Primary reduction ratio 1 563 Secondary reduction system Shaft drive Secondary reduction ratio 2 773 Transmission type Constant mesh 5 speed Operation Left foot Gear ratio 1st 2 529 2nd 1 773 3rd 1 348 4th 1 077 5th 0 929 Chassis Frame type Diamond Caster angle 26 Trail 109 mm Tires Front Type Tubeless tire Size 120 70 ZR17 M C 58...

Page 102: ...cargo and accessories Wheels Front Type Cast wheel Size 17 M C MT 3 50 Rear Type Cast wheel Size 17 M C MT 5 50 Brakes Front Type Dual disc brake Operation Right hand Fluid DOT 4 Rear Type Single disc brake Operation Right foot Fluid DOT 4 Suspension Front Telescopic fork Rear Swingarm link suspension Spring shock absorber Front Coil spring oil damper Rear Coil spring gas oil damper Wheel travel F...

Page 103: ...light 14 V 1 4 W 2 Engine trouble warning light 14 V 1 12 W 1 Oil level warning light 14 V 1 12 W 1 ABS warning light For FJR1300A only 14 V 1 12 W 1 Immobilizer system indicator light L E D Fuses Main fuse 50 A Electronic fuel injection fuse 15 A Headlight fuse 25 A Signaling system fuse 15 A Radiator fan fuse 15 A Ignition fuse 10 A Odometer clock and immobilizer system fuse backup fuse 10 A Par...

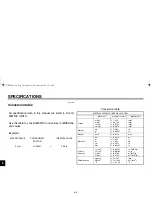
Page 104: ...RIAL SYSTEM Metric unit Conversion factor Imperial unit Torque m kgf m kgf cm kgf cm kgf 7 233 86 794 0 0723 0 8679 ft lbf in lbf ft lbf in lbf Weight kg g 2 205 0 03527 lb oz Speed km h 0 6214 mi h Distance km m m cm mm 0 6214 3 281 1 094 0 3937 0 03937 mi ft yd in in Volume Capacity cc cm3 cc cm3 L liter L liter 0 03527 0 06102 0 8799 0 2199 oz IMP liq cu in qt IMP liq gal IMP liq Miscellaneous ...

Page 105: ...CONSUMER INFORMATION 9 Identification numbers 9 1 Key identification number 9 1 Vehicle identification number 9 1 Model label 9 2 U5JWE2 book Page 1 Wednesday November 6 2002 3 32 PM ...

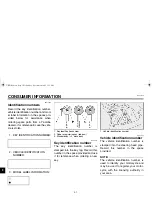
Page 106: ...mber The key identification number is stamped into the key tag Record this number in the space provided and use it for reference when ordering a new key EAU01043 Vehicle identification number The vehicle identification number is stamped into the steering head pipe Record this number in the space provided NOTE _ The vehicle identification number is used to identify your motorcycle and may be used t...

Page 107: ...nder the rider seat See page 3 17 for rider seat removal and installation pro cedures Record the information on this label in the space provided This in formation will be needed when ordering spare parts from a Yamaha dealer 1 Model label U5JWE2 book Page 2 Wednesday November 6 2002 3 32 PM ...

Page 108: ...ecking 6 16 Engine oil and oil filter cartridge 6 9 Engine stop switch 3 10 Engine trouble warning light 3 5 F Final gear oil 6 12 Front fork adjusting 3 19 Front fork checking 6 29 Fuel 3 15 Fuel consumption tips for reducing 5 3 Fuel tank breather hose 3 16 Fuel tank cap 3 14 Fuses replacing 6 32 H Handlebar switches 3 9 Hazard switch 3 10 Headlight bulb replacing 6 33 High beam indicator light ...

Page 109: ...mpartment 3 18 Swingarm pivots lubricating 6 28 T Tachometer 3 6 Throttle cable free play adjusting 6 17 Throttle grip and cable checking and lubricating 6 25 Tires 6 17 Tool kit 6 1 Troubleshooting 6 36 Troubleshooting charts 6 37 Turn signal indicator lights 3 4 Turn signal light or tail brake light bulb replacing 6 36 Turn signal switch 3 9 V Valve clearance adjusting 6 17 Vehicle identificatio...

Page 110: ...Shiro fm Page 1 Thursday June 7 2001 11 38 AM ...

Page 111: ...Shiro fm Page 1 Thursday June 7 2001 11 38 AM ...

Page 112: ...PRINTED ON RECYCLED PAPER YAMAHA MOTOR CO LTD PRINTED IN JAPAN 2002 11 0 8 2 CR E ...

Reviews: