22
RX-V3800/DSP-AX3800
RX-V3800/
DSP-AX3800
● 操作方法
・
MAINおよびVIDEOへの書き込み
1.
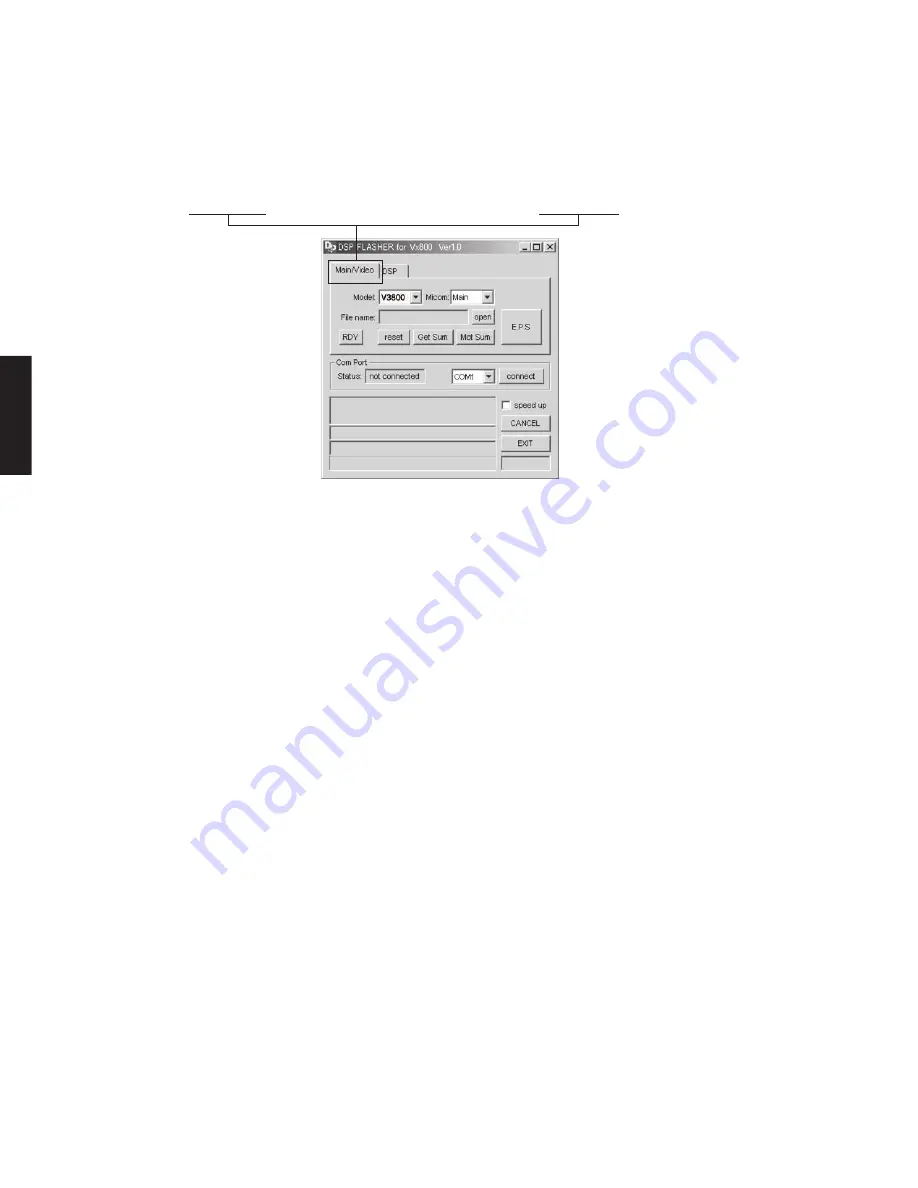
DSP̲FLASHER̲Vx800̲v1.0.exe を起動し
ます。(Fig. 4)
2. 「Main/Video」を選択します。(Fig. 4)
Fig. 4
3.
レシーバのモデル名、マイコン、ポート、ファ
イルを選択します。(Fig. 5)
Model
: V3800 を選択します。
Micom
:MAINへの書き込みには、 MAIN
を選択します。
VIDEOへの書き込みには、 VIDEO
を選択します。
Com Port :PC側で設定されているRS232C
ポート
(COMx)
を選択し
[connect]
ボタンを押します。
すると「Com Port Status」に<
connected>が表示されます。
※ 「Com Port Status」に<connected>が表
示されない場合、RS232Cポート
(COMx)
が正しく選択されているかPC側の設定を
もう一度確認してください。
File
:ファームウェアを選択します。
MAINへの書き込み
: V38Mxxxx.mot を選択します。
VIDEOへの書き込み
: V38Vxxxx.mot を選択します。
●
Operation procedure
•
Writing to MAIN and VIDEO
1.
Start up “DSP_FLASHER_Vx800_v1.0.exe” of
the PC. (Fig. 4)
2.
Select “Main/Video”. (Fig. 4)
3.
Select the model name of the receiver, the
Micom, Com Port and file. (Fig. 5)
Model
: Select “V3800”.
Micon
: Select “MAIN” for writing to MAIN .
Select “VIDEO” for writing to VIDEO.
Com Port : Select the RS232C port (COMx)
set on the PC side and press the
[connect] button, and <con-
nected> will appear as “Com Port
status”.
*
If <connected> does not appear as “Com
Port status”, check the setting on the PC
side again if the RS232C port (COMx) is
selected properly.
File
: Select the firmware.
Writing to MAIN
: Select “V38 Mxxxx.mot”.
Writing to VIDEO
: Select “V38 Mxxxx.mot”.
Summary of Contents for dsp-ax3800
Page 3: ......
Page 4: ......
Page 5: ......
Page 6: ......
Page 7: ......
Page 119: ...A B C D E F G H I J 1 2 3 4 5 6 7 RX V3800 DSP AX3800 119 Side B FL 2 P C B ...
Page 186: ...RX V3800 DSP AX3800 187 ...
Page 187: ...RX V3800 DSP AX3800 188 ...
Page 188: ...189 RX V3800 DSP AX3800 RX V3800 DSP AX3800 ...
Page 189: ...RX V3800 DSP AX3800 ...


