background image

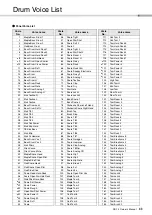
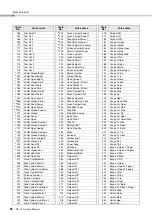
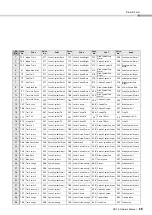
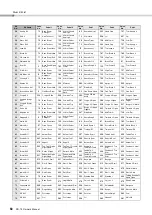
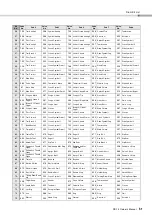
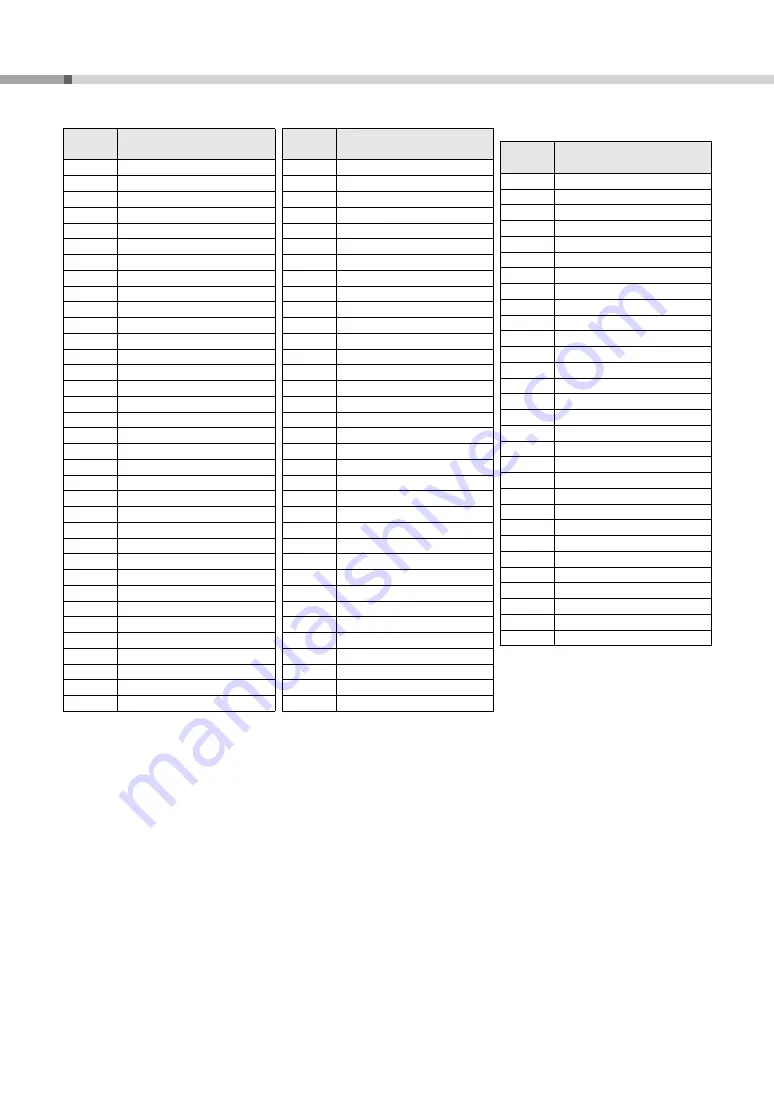
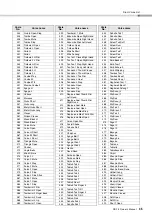
Drum Voice List

DD-75  Owner’s Manual

46

Phrase List/

501

Dhol 1 Slap

502

Dhol 2 Open

503

Dhol 2 Slap

504

Dhol 2 Rim

505

Dholak 1 Open

506

Dholak 1 Mute

507

Dholak 1 Slap

508

Dholak 2 Open

509

Dholak 2 Slide

510

Dholak 2 Rim 1

511

Dholak 2 Rim 2

512

Dholki H Open

513

Dholki H Mute

514

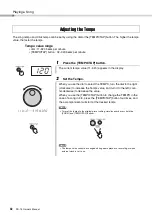
Dholki L Open

515

Dholki H Slap

516

Dholki L Slide

517

Mridangam na

518

Mridangam din

519

Mridangam ki

520

Mridangam ta

521

Mridangam Chapu

522

Mridangam L Closed

523

Mridangam L Open

524

Dandia Short

525

Dandia Long

526

Bangu

527

Paigu M

528

Dagu Heavy

529

Zhongcha Open

530

Zhongcha Mute

531

Luo Big

532

Luo H

533

Zhongluo Open

534

Xiaoluo Open

535

Xiaocha Mute

Vocie 

No.

Voice name

536

Muyu M

537

Djembe L

538

Djembe Mute

539

Djembe Slap

540

Pot Drum Open

541

Pot Drum Closed

542

Talking Drum Open

543

Talking Drum Bend Up

544

Talking Drum Slap

545

Talking Drum Left Hand Open

546

Oodaiko

547

Oodaiko Rim

548

Yaguradaiko

549

Yaguradaiko Rim

550

Atarigane

551

Shimedaiko

552

Tsudumi

553

Ainote

554

Scratch H

555

Scratch L

556

Yo!

557

Go!

558

Get up!

559

Whoow!

560

Huuaah!

561

Uh!+Hit

562

Footsteps

563

Frog

564

Rooster

565

Dog

566

Cat

567

Owl

568

Horse Neigh

569

Cow

570

Lion

Vocie 

No.

Voice name

Voice 

No.

Voice Name

571

Rock 1

572

Rock 2

573

Rock 3

574

Rock 4

575

Rock’n Roll

576

16 beat

577

Hard Shuffles

578

Blues Shuffle

579

Contemporary 1

580

Contemporary 2

581

Soul

582

ClubMix

583

House

584

Jazz Funk

585

Ballad

586

R & B

587

Motown

588

Urban Funk

589

Jazz

590

Samba 1

591

Samba 2

592

Samba 3

593

Arabic 1

594

Arabic 2

595

Indian 1

596

Indian 2

597

African

598

Conga

599

Bongo

600

Timbal

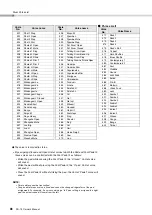
 The voice is recorded in stereo.

By assigning Closed and Open Hi-Hat voices to both the Pad and Foot Pedal 2, 
those voices can be controlled with the Foot Pedal 2 as follows:

• Strike the pad while pressing the Foot Pedal 2, the “Closed” Hi- Hat voice 

will sound.

• Strike the pad without pressing the Foot Pedal 2, the “Open” Hi- Hat voice 

will sound.

• Press the Foot Pedal 2 without striking the pad, the Hi-Hat “Pedal” voice will 

sound.

NOTE:

• Phrase data cannot be transmitted.
• The pan data for each voice is fixed and cannot be changed, regardless of the pad 

assignments. For example, if a voice containing a “left” pan setting is assigned to a right 
pad, the actual sound will come from the left.

Summary of Contents for DD-75

Page 1: ...EN Owner s Manual Before using the instrument be sure to read PRECAUTIONS on page 5 6 Digital Percussion ...

Page 2: ...ction or effect works when the unit is operating as designed are not covered by the manufacturer s warranty and are therefore the owners responsibility Please study this manual carefully and consult your dealer before requesting service ENVIRONMENTAL ISSUES Yamaha strives to produce products that are both user safe and environmentally friendly We sincerely believe that our products and the product...

Page 3: ...ocate either this product or the device that is being affected by the interference Utilize power outlets that are on different branch circuit breaker or fuse circuits or install AC line filter s In the case of radio or TV interference relocate reorient the antenna If the antenna lead in is 300 ohm ribbon lead change the lead in to co axial type cable If these corrective measures do not produce sat...

Page 4: ...otect the power cord from being walked on or pinched particularly at plugs convenience receptacles and the point where they exit from the apparatus 11 Only use attachments accessories specified by the manufacturer 12 Use only with the cart stand tri pod bracket or table specified by the manufacturer or sold with the apparatus When a cart is used use caution when moving the cart apparatus combinati...

Page 5: ...conditions or place on it any containers such as vases bottles or glasses containing liquids which might spill into any openings If any liquid such as water seeps into the instrument turn off the power immediately and unplug the power cord from the AC outlet Then have the instrument inspected by qualified Yamaha service personnel Never insert or remove an electric plug with wet hands Do not put bu...

Page 6: ...he power cord from the wall AC outlet Make sure to discard used batteries according to local regulations NOTICE To avoid the possibility of malfunction damage to the product damage to data or damage to other property follow the notices below Handling Do not use the instrument in the vicinity of a TV radio stereo equipment mobile phone or other electric devices Otherwise the instrument TV or radio ...

Page 7: ...d Connection Manual Explains how to connect the instrument to smart devices such as iPhone iPad etc Computer related Operations Includes instructions on connecting this instrument to a computer and operations related to transferring song data MIDI Reference Contains MIDI related information To obtain these manuals access the Yamaha Downloads and then the model name for searching the desired files ...

Page 8: ...wn original drum kits 105 Songs The instrument features 22 Songs including the Demos and 83 Patterns that cover a wide variety of music genres You can play along with the full playback or mute tracks and play the missing parts AUX IN Jack This jack is for connection to an external audio source letting you play the instrument with music and accompaniment Compatible Formats and Functions GM System L...

Page 9: ... Individual Pads and Pedals and Saving to a Custom Kit C01 C10 20 Setting the Reverb type 21 Setting the Pad Sensitivity 22 Setting the Click ON OFF 25 Click Settings 25 Playing a Song 28 Selecting and Playing a Song 28 Tap Start 29 Pad Start 30 Setting the Auto Kit Select ON OFF 31 Adjusting the Tempo 32 Play along with a Song 33 Setting the Track ON OFF 33 Break 33 Using A B Repeat 34 Recording ...

Page 10: ... button 19 u CLICK button 25 i SONG button 28 o TEMPO TAP button 29 0 PART MUTE DRUM 1 3 BACKING buttons 33 1 FUNCTION button 40 2 DEMO button 16 3 Standby On switch 13 4 REC button 35 5 BREAK button 33 6 A B REPEAT button 34 7 START STOP button 28 8 Display 13 9 Drum pads 8 17 Front Panel Front Panel Indicates the song number when power is turned on ...

Page 11: ... other than playing the instrument Also to avoid damage or injury refrain from waving them recklessly or throwing them Since speakers are built into this instru ment you should be careful to never leave any watches credit cards or any kind of magnetic storage media on the panel doing so may result in data loss or damage to the items Also avoid using this instru ment near a television or computer m...

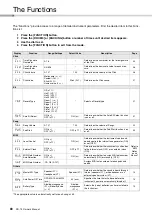
Page 12: ...daptor with a removable plug make sure to keep the plug attached to the AC adaptor Using the plug alone can cause electric shock or fire Never touch the metallic section when attaching the plug To avoid electric shock short circuit or damage also be careful that there is no dust between the AC adaptor and plug When setting up the product make sure that the AC outlet you are using is easily accessi...

Page 13: ...er the pedal cords this may cause the instrument to fall and result in damage or injury Avoid using the pedals directly on a soft floor since they may scratch the surface of the floor Make sure that the pedal plugs are properly connected to the PEDAL jacks before turning on the power Do not press the pedals while turning the power on Doing this changes the recognized polarity of the pedal resultin...

Page 14: ...e and turn it counter clockwise to set to SP Speaker 3 Press the FUNCTION button to exit from the Function mode Connecting Headphones or External Speaker Connect a pair of headphones to the PHONES OUTPUT jack This jack also functions as an external output By connecting to a computer recorder or other audio device you can output the audio signal of this instrument to that external device The speake...

Page 15: ...inden tations on the bottom of the instrument Make sure all the nuts are securely tightened To install the snare drum stand Put the arm covers into the indentations on the bottom of the instrument and tighten rotary nut A until the arms are secured Make sure all the nuts are securely tightened Be sure to handle the snare drum stand with care Follow the important precautions below If not the snare ...

Page 16: ...With the Auto Kit Select feature turned on the best suited Drum Kit for the song will automatically be selected See the Setting the Auto Kit Select ON OFF on page 31 Use the dial to select a demo song number Demo song numbers will increase as the dial is turned to the right clockwise and decrease as the dial is turned to the left counter clockwise To stop playback press the DEMO button again or pr...

Page 17: ...ithout pressing the pedal produces an open hi hat sound Pressing Pedal 2 produces a hi hit pedal sound Press Pedal 2 to control the Hihat This is in the case of Drum Kit 1 for other kits this may control a different sound When using Pedal 2 touch response does not function NOTE Pedal 1 features touch response the volume responds to how hard you press the pedal If your pressing of the pedal is too ...

Page 18: ...rmance 1 Make sure that Hand Percussion is set to on the lamp is lit 2 Set the Hand Percussion Lock to ON 3 To turn off Hand Percussion Lock press and hold the HAND PERC button until the LoC is no longer shown on the display Setting the Hand Percussion ON OFF When you press the HAND PERC button the button s lamp lights and the pad sensitivity is automatically adjusted for optimum playing by hand A...

Page 19: ... and Playing a Drum Kit When you press the KIT button the currently selected Drum Kit number appears on the display Turn the dial to select a Drum Kit number Drum Kit numbers will increase as the dial is turned to the right clockwise and decrease as the dial is turned to the left counter clockwise Drum Kit number 1 is normally selected when the power is turned on Drum Kits C01 C10 are Custom Kits ...

Page 20: ...oices to Individual Pads and Pedals and Saving to a Custom Kit C01 C10 When you press the KIT ASSIGN button the button s lamp lights and C01 appears on the display Strike any pad one time or press a pedal and the voice number of currently assigned Drum Kit is shown in the display You can select the voice by repeatedly striking the pad or repeatedly pressing the pedal while listening to the voice o...

Page 21: ...omatically selected whenever you select a Kit but you can change to any of the available Reverb types if desired 1 Enter the Reverb type setting function 2 Change the reverb type by turning the dial 3 Press the FUNCTION button to exit from the Function mode Press the KIT ASSIGN button to save to a Custom Kit the lamp turns off Setting the Reverb type Press the FUNCTION button once then press the D...

Page 22: ...lue of pad 2 cannot be adjusted The sensitivity increase according as the number When you set to F the sensitivity is stable and is not affected by strength of your drumming The default setting is 2 1 Press the SENSITIVITY button 2 Turn the dial and select a sensitivity value 3 Press the KIT button to exit from the Sensitivity set ting mode Setting the Pad Sensitivity When you press the SENSITIVIT...

Page 23: ...o save the setting 5 Press the KIT button to exit from the Sensitivity set ting mode Turn the dial to select the destination to save from S01 to S10 To display the currently assigned sensitivity value for the pad or pedal 1 Make sure that the Pad number or Pedal number for which you wish to change the sensitivity value is shown on the display Value range is from F Fix and 1 to 4 To cancel the sett...

Page 24: ...pad too strongly nearby sensors may also respond to the hit and trigger unwanted sounds This instrument is set to ignore weak signals from the pads in order to prevent inadvertent unwanted sounds However this may result in problems when intention ally striking two pads simultaneously If one pad is struck strongly and the other weakly the pad struck weakly may not sound even though you want it to T...

Page 25: ...the time signature 3 Press the FUNCTION button to exit from the Function mode Setting the Click ON OFF Press the CLICK button The click sounds in rhythm at the current tempo To turn the click off press the button once again Click Settings Press the FUNCTION button once then press the DRUM 3 or BACKING button a number of times until the CLn indication appears After a while the current numerator val...

Page 26: ...Enter the click volume setting function 2 Set the click volume by using the dial 3 Press the FUNCTION button to exit from the Function mode Press the FUNCTION button once then press the DRUM 3 or BACKING button a number of times until the CLd indication appears After a while the current denominator value appears next to the CLd indication Set the denominator value to one of the values 2 4 8 16 by ...

Page 27: ... voice 3 Press the FUNCTION button to exit from the function mode Press the FUNCTION button once then press the DRUM 3 or BACKING button a number of time until the CLC indication appears After a while the current click voice appears next to the CLC indica tion Press the CLICK button to listen to the click voice Item Click Voice trn Metronome CbL Cowbell StC Stick default HUn Human voice one two th...

Page 28: ...t clockwise and decrease as the dial is turned to the left counter clockwise Song number 001 is automatically selected whenever the power is turned ON With the Auto Kit Select feature turned on selecting a song will also automatically select the best suited Drum Kit for that song See Setting the Auto Kit Select ON OFF on page 31 When you press the START STOP button a one or two measure lead in pla...

Page 29: ...ton a number of times until the SGL item appears The current Song vol ume value appears when it is released To raise the value turn the dial to the right clockwise and to lower it turn the dial to the left counter clockwise Volume range is from 0 to 127 Exit from the Function mode by pressing the FUNCTION button About the Beat Indicator During song playback the three beat lamps in the display will...

Page 30: ...rike the pad will change according to the follow ing time signatures 5 4 5 times 4 4 4 times 3 4 3 times 6 8 2 times Press the START STOP button and the song accompaniment will stop If External Clock is ON Tap Start is not effective External Clock On Off can be set from the FUNCTION button page 40 Pad Start Press the FUNCTION button once then press the DRUM 3 or BACKING button a number of times un...

Page 31: ...Select function 2 Turn Auto Kit Select On Off 3 Press the FUNCTION button to exit from the Function mode Setting the Auto Kit Select ON OFF Press the FUNCTION button once then press the DRUM 3 or BACKING button a number of times until the AtS item appears After a while the current On Off status will appear next to the AtS indication Turn the dial clockwise to set to ON and turn it counter clockwis...

Page 32: ...display When you use the dial to select the TEMPO turn the dial to the right clockwise to increase the Tempo value and turn it to the left coun ter clockwise to decrease the value When you use the TEMPO TAP button to change the TEMPO in the case of a song in 4 4 press the TEMPO TAP button four times and the accompaniment will start at the desired tempo To reset the tempo to the original preset set...

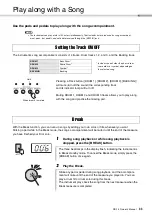
Page 33: ... or fills whenever you want Striking a pad while in the Break mode the song s accompaniment will be muted until the end of the measure you have finished your fill or solo 1 During song playback or while song playback is stopped press the BREAK button 2 Play the Break Setting the Track ON OFF DRUM 1 Bass Drum DRUM 2 Snare Drum DRUM 3 Cymbal BACKING Backing Break The three beat lamps in the display ...

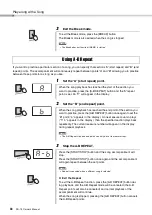
Page 34: ...ng playback has reached the end point of the section you want to practice press the A B REPEAT button once again to set the B point b appears in the display A one measure count in plays A b appears in the display then the specified section plays back repeatedly The current measure number will appear in the display during repeat playback The A B Repeat start and end points can only be set in measur...

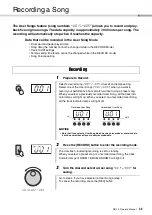
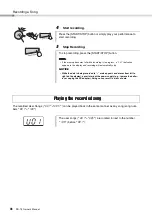
Page 35: ... for saving Recording Select a desired song 001 105 drum kit and tempo setting Select one of the User Songs U01 U05 when you want to record your performance from scratch without using a preset song When you select a previously recorded User Song all the track indi cator lamps will light up When you select an unrecorded User Song all the track indicator lamps will light off Note that if you select ...

Page 36: ...s the START STOP button If the memory becomes full while recording is in progress a FUL indication appears in the display and recording will automatically stop While the data is being recorded a mark appears and moves from left to right on the display never interrupt the power supply e g remove the batter ies or unplug the AC adaptor Doing so can result in a loss of data Playing the recorded song ...

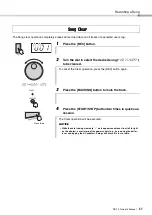
Page 37: ...ACKING button to mute the track 4 Press the START STOP button two times in quick suc cession Song Clear To cancel the Clear operation press the REC button again The Clear operation will be executed While the data is being cleared a mark appears and moves from left to right on the display never interrupt the power supply e g by removing the batter ies or unplugging the AC adaptor Doing so can resul...

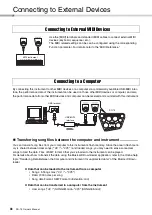
Page 38: ... transmit song files from your computer to this instrument s flash memory Since the area in flash mem ory is shared between User songs U01 U05 and loaded songs you may need to erase some User songs to load the data Files of SMF format 0 that you ve loaded to the instrument can be played For details about how to transmit the data using the Musicsoft Downloader application refer to the Online help t...

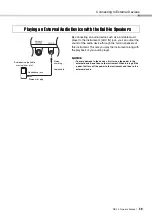
Page 39: ...s you play the instrument along with the playback of your audio player Playing an External Audio Device with the Built in Speakers To avoid damage to the devices first turn on the power to the external device and then to the instrument When turning off the power first turn off the power to the instrument and then to the external device Audio device portable music player etc Stereo mini plug Stereo...

Page 40: ...rmines whether the Auto Kit Select function is on or off 31 Song SGL Song Volume 0 127 100 Determines the volume of Songs 29 PdS Pad Start ON on OFF oFF OFF oFF Determines whether the Pad Start function is on or off 30 MIDI LCL Local Control ON on OFF oFF ON on Determines whether the instrument s pads and pedals controls the internal tone generator ON or not OFF Refer to MIDI Refer ence Manual ECL...

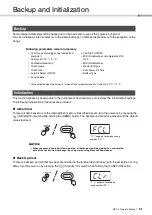
Page 41: ... button The backed up data will be erased and the default values restored Back Up Clear To clear all backed up data that has been memorized to the internal flash memory with the exception of song data turn the power on by pressing the Standby On switch while holding the FUNCTION button Backup Initialization When you execute the Initial Clear operation all backup data will be cleared You can save t...

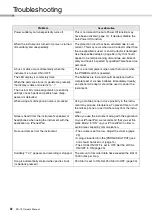
Page 42: ...nt When the pads are struck or pedals are pressed the display is dark and returns to 1 The Custom Kit voice assignments or sensitivity settings of each pads and pedals have disap peared or defaulted When using a mobile phone noise is produced Using a mobile phone in close proximity to the instru ment may produce interference To prevent this turn off the mobile phone or use it further away from the...

Page 43: ...y 73 Rim Gate 74 Snare Jazz L 75 Snare Jazz M 76 Band Snare 1 77 Band Snare 2 78 Orchestra Snare Left Hand 79 Orchestra Snare Right Hand 80 Brush Tap 81 Brush Slap 82 Snare T8 1 83 Snare T8 2 84 Snare T8 3 85 Snare T8 4 86 Snare T8 5 87 Snare T8 6 88 Snare T8 7 89 Snare Garage L 90 Snare Hammer 91 Snare Clap Analog 92 Snare T8 Rim 93 Snare Analog CR 94 Snare Hip 1 95 Snare Hip 2 96 Snare Hip Gate ...

Page 44: ... Hand Cymbal 1 238 Hand Cymbal 1 Short 239 Hand Cymbal 2 240 Hand Cymbal 2 Short 241 Crash Cymbal T8 242 Crash Cymbal Vox 1 243 Ride Cymbal Vox 244 Ride Cymbal Cup Vox 245 Crash Cymbal Vox 2 246 Side Stick Power 247 Side Stick 248 Side Stick Analog 249 Hand Clap 250 Hand Clap 2 251 Clap T9 252 Khaligi Clap 1 253 Hand Clap Vox 254 Sticks 255 Castanet 256 Tambourine 2 257 Tambourine 258 Finger Snap ...

Page 45: ... Tip 409 Pandeiro Slap 410 Repique Anel Thumb Rim Left Hand 411 Repique Anel Thumb Rim Right Hand 412 Repique Anel Mute 413 Repique Anel Open 414 Repique de Mao Slap 415 Repique de Mao Thmb Rim 416 Repique de Mao Open 417 Caixa Open Rim 418 Caxixi Shake 419 Cabasa Roll 420 Caixa 421 Chajchas 422 Agogo Bell 1 423 Agogo Bell 2 424 Agogo Click 1 425 Agogo Click 2 426 Ganza 427 Reco Reco 428 Darbuka O...

Page 46: ... 558 Get up 559 Whoow 560 Huuaah 561 Uh Hit 562 Footsteps 563 Frog 564 Rooster 565 Dog 566 Cat 567 Owl 568 Horse Neigh 569 Cow 570 Lion Vocie No Voice name Voice No Voice Name 571 Rock 1 572 Rock 2 573 Rock 3 574 Rock 4 575 Rock n Roll 576 16 beat 577 Hard Shuffles 578 Blues Shuffle 579 Contemporary 1 580 Contemporary 2 581 Soul 582 ClubMix 583 House 584 Jazz Funk 585 Ballad 586 R B 587 Motown 588...

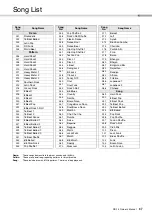
Page 47: ...7 5 4 Jazz 048 7 8 Jazz 049 Funky NYC 050 Soul 051 Soul Funk 052 Rock n Roll 053 6 8 Blues 054 Country 055 Samba 056 Bossa Nova 057 Conga Bossa Nova 058 Soul Bossa Nova 059 Mambo 060 Cha Cha Cha 061 Rumba 062 Salsa 063 Beguine 064 Reggae 065 Waltz 066 Jazz Waltz 067 March 068 6 8 March 069 Saeidy 070 Maksoum Song No Song Name 071 Baladi 072 Laff 073 Ayoub 074 Brazilian Samba 075 Chorinho 076 Parti...

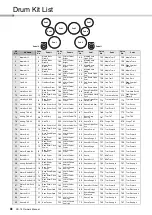
Page 48: ...100 Snare Open Rim Vox 176 Tom Vox 3 177 Tom Vox 2 18 Stereo Kit 1 10 Bass Drum Close Power 189 Hi Hat Pedal Power 49 Snare Power 119 Tom Power 6 121 Tom Power 4 19 Stereo Kit 2 9 Bass Drum Open Power 189 Hi Hat Pedal Power 52 Snare Power 2 120 Tom Power 5 122 Tom Power 3 20 Stereo Kit 3 8 Bass Drum Ambient 189 Hi Hat Pedal Power 53 Snare Rough 2 119 Tom Power 6 121 Tom Power 4 21 Stereo Kit 4 8 B...

Page 49: ...m Vox 1 242 Crash Cymbal Vox 1 204 Hi Hat Closed Vox 244 Ride Cymbal Cup Vox 245 Crash Cymbal Vox 2 18 123 Tom Power 2 222 Crash Cymbal Power 1 188 Hi Hat Closed Power 228 Splash Cymbal Power 225 Ride Cymbal Power 2 19 124 Tom Power 1 222 Crash Cymbal Power 1 191 Hi Hat Closed Power 2 228 Splash Cymbal Power 225 Ride Cymbal Power 2 20 123 Tom Power 2 222 Crash Cymbal Power 1 191 Hi Hat Closed Powe...

Page 50: ...um Hard 193 Hi Hat Pedal 247 Side Stick 126 Mid Tom H 128 Low Tom 56 Reggae Kit 8 Bass Drum Ambient 189 Hi Hat Pedal Power 50 Snare Rough 339 Timbale L Open 338 Timbale H Open 57 Waltz Kit 23 Bass Drum Jazz 193 Hi Hat Pedal 80 Brush Tap 81 Brush Slap 162 Tom Brush 5 58 March Kit 37 Gran Cassa 193 Hi Hat Pedal 76 Band Snare 1 362 Wood Block H 363 Wood Block L 59 Timpani Kit 37 Gran Cassa 193 Hi Hat...

Page 51: ...nga L Open 360 Claves 315 Bongo H Open 1 Finger 373 Wind Chime 281 Conga H Open 55 130 Floor Tom L 229 Crash Cymbal 1 192 Hi Hat Closed 231 Ride Cymbal 1 360 Claves 56 122 Tom Power 3 222 Crash Cymbal Power 1 188 Hi Hat Closed Power 230 Crash Cymbal 2 231 Ride Cymbal 1 57 165 Tom Brush 2 229 Crash Cymbal 1 192 Hi Hat Closed 233 Ride Cymbal Cup 232 Ride Cymbal 2 58 77 Band Snare 2 229 Crash Cymbal ...

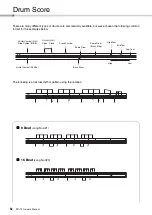
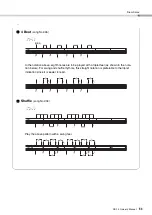
Page 52: ...n the following common format for the examples below The following is an actual rhythm pattern using the notation 8 Beat song No 021 16 Beat song No 023 Hi Hat Cymbal H H Ride Cymbal RIDE Hi Hat H H Open Close Crash Cymbal Hi Hat Cymbal PEDAL Snare Drum Bass Drum Snare Drum Brush Slap High Tom Mid Tom Low Tom High Low ...

Page 53: ...bove eighth notes are to be played with a triplet feel as shown in the nota tion below For swing and shuffle rhythms this straight notation is preferable to the triplet indication since it is easier to read Shuffle song No 034 Play the above pattern with a swing feel RIDE ...

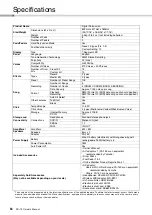
Page 54: ...DRUM 3 BACKING Data Capacity Approx 7 000 notes per song Format Playback SMF Format 0 MIDI data only audio not supported Recording SMF Format 0 MIDI data only audio not supported Other Features Auto Kit Select Yes Tap Start Yes Break Yes Click Tempo Range 11 320 Click Voice 4 types Metronome Cowbell Stick Human Voice Storage and Connectivity Storage Internal Memory Approx 370KB Connections DC IN 1...

Page 55: ...Kit List 48 Drum Score 52 Drum Voice List 43 E External Audio Device 39 F Function 40 H Hand Percussion 18 Headphone 14 I Initialization 41 iPhone iPad Connection Manual 7 M Master EQ Type 14 Master Volume 14 MIDI Device 38 MIDI Reference 7 38 Musicsoft Downloader 38 O Online Member Product Registration 7 P Pad 17 Pad Start 30 Pedal 13 17 R Recording 35 Reverb type 21 S Sensitivity 22 Song Clear 3...

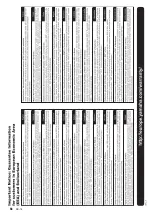
Page 56: ...e waste handling For more information about collection and recycling of old products and batteries please contact your local municipality your waste disposal service or the point of sale where you purchased the items For business users in the European Union If you wish to discard electrical and electronic equipment please contact your dealer or supplier for further information Information on Dispo...

Page 57: ...ments will cause this warranty to be void This warranty covers only the Original Owner and is not transferable In Order to Obtain Warranty Service Warranty service will only be provided for defective products within the Warranted Area Contact your local authorized Yamaha dealer who will advise you of the procedures to be followed If this is not successful contact Yamaha at the address telephone nu...

Page 58: ...DD 75 58 ...
Page 59: ... 96185111 NORWAY Yamaha Music Europe GmbH Germany Norwegian Branch Grini Næringspark 1 1332 Østerås Norway Tel 47 6716 7800 ICELAND Hljodfaerahusid Ehf Sidumula 20 IS 108 Reykjavik Iceland Tel 354 525 5050 CROATIA Euro Unit D O O Slakovec 73 40305 Nedelisce Tel 38540829400 RUSSIA Yamaha Music Russia LLC Room 37 entrance 7 bld 7 Kievskaya street Moscow 121059 Russia Tel 7 495 626 5005 OTHER EUROPEA...

Page 60: ...ZW55120 Manual Development Group 2017 Yamaha Corporation Published 1 2017 POZC A0 Printed in Indonesia Yamaha Global Site https www yamaha com Yamaha Downloads http download yamaha com ...

Reviews: