background image

MIDI UTILITY MODE SETTINGS

MIDI Utility mode

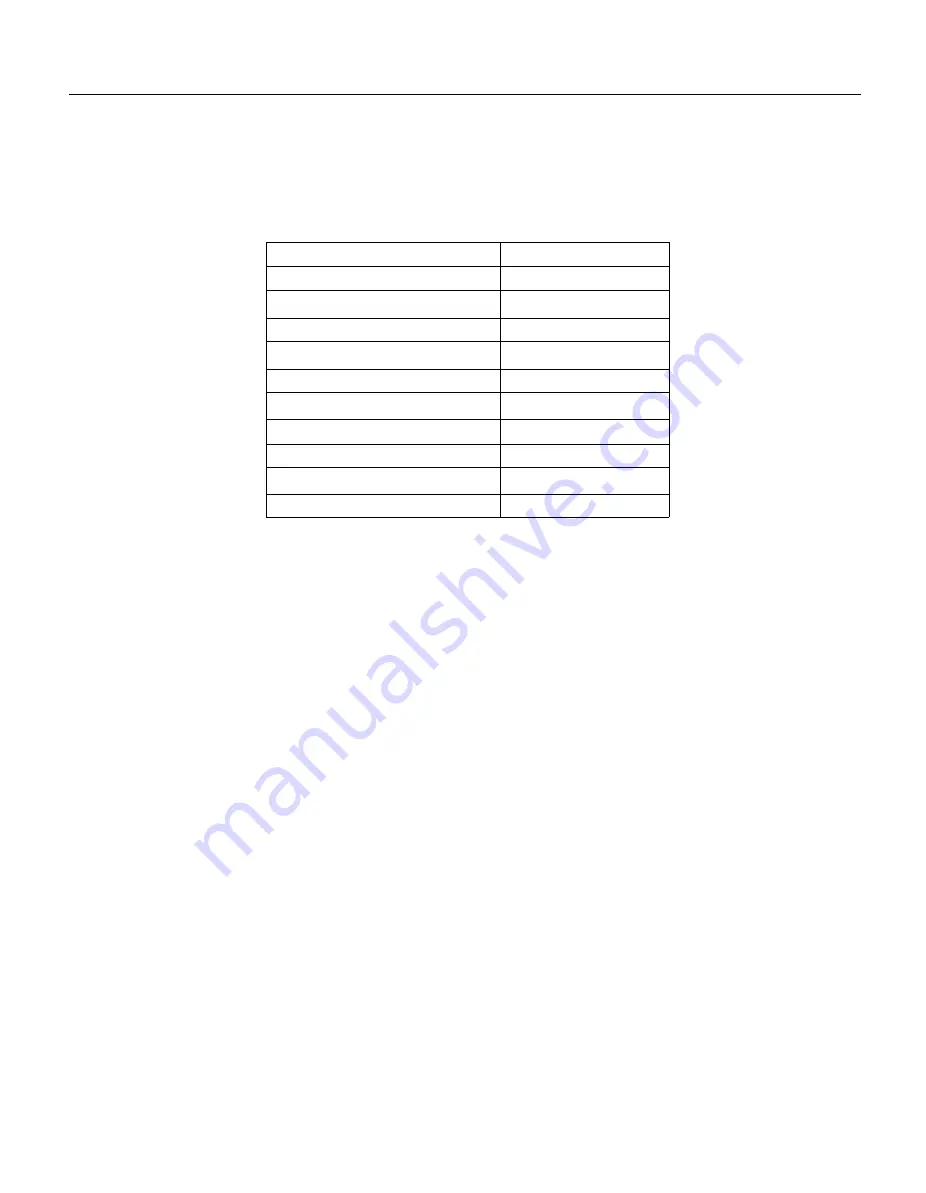
In addition to its Single, Dual, Split, and Demo Play modes, the P-100 has a MIDI Utility mode which allows you to
make a number of settings related to MIDI control functions. Below is a listing of the settings available in this mode:

SETTING DESCRIPTION BUTTONS

Transmit and receive channels MIDI + CHANNEL

Local control on/off MIDI + LOCAL

MIDI merge function on/off

Bulk protect on/off

Pitch bend range

Modulation wheel on/off

CS slider assignment

MIDI + MERGE

MIDI + PROTECT

MIDI + PB

MIDI + MW

MIDI + CS

Foot controller assignment MIDI + FC

Program change transmit table MIDI + PC TRNS

Program change receive table  MIDI + PC RECV

You can enter MIDI Utility mode by pressing the appropriate [VOICE/UTILITY] buttons while holding down the

[MIDI] button.

When you do so, the LEDs above both the [MIDI] button and the [VOICE/UTILITY] button you pressed will begin
blinking, and the current setting for the parameter you selected will appear in the display. You can use either the

[DATA ENTRY] slider or the [-1] and [+l] buttons to change this setting.

When you’ve finished making your settings, press the [MIDI] button once again to exit MIDI Utility mode. Most of
the functions described previously (i.e., the voice selection, tuning

   and transpose functions, etc.) will not work while

the P-100 is in MIDI Utility mode; therefore. you will have to leave this mode in order to use these functions.

31

Summary of Contents for Clavinova PF P-100

Page 1: ...OWNER S MANUAL P 100 ...

Page 2: ...ision 6600 Orangethorpe Ave Buena Park CA 90620 This applies only to products distributed by YAMAHA CORPORATION OF AMERICA Dette apparat overholder det gaeldende EF direktiv vedrørrende radiostørj Cet appareil est conforme aux prescriptions de la direc tive communautaire 87 308 CEE Diese Geräte entsprechen der EG Richtlinie 82 499 EWG und oder 87 308 EWG This product complies with the radio freque...

Page 3: ...s without notice or obligation to update existing units ENVIRONMENTAL ISSUES Yamaha strives to produce products that are both user safe and environmentally friendly We sincerely believe that our products and the production methods used to produce them meet these goals In keeping with both the letter and the spirit of the law we want you to be aware of the following Battery Notice This product MAY ...

Page 4: ...stalled in locations that do not signifi cantly contribute to their operating temperature Placement of this product close to heat sources such as radiators heat registers and other devices that pro duct heat should be avoided 8 This product was NOT designed for use in wet damp locations and should not be used near water or exposed to rain Examples of wet damp locations are near a swimming pool spa...

Page 5: ...rb chorus symphonic and tremolo effects as well as an easy to control three band equalizer that lets you tailor the P 100 s sound to suit your taste l l Touch sensitive keyboard The P 100 s full sized 88 note piano keyboard incorporates Yamaha s Action Effect keyboard technology which gives it the feel and response of a real piano keyboard You can even adjust the keyboard s sensitivity to suit you...

Page 6: ...lit modes 23 MIDI KEYBOARD CONTROL FUNCTIONS 25 What is MIDI 25 The P 100 s MIDI configuration 27 Enabling MIDI transmission 29 Selecting a MIDI velocity curve 29 Using the MIDI transpose function 30 MIDI UTILITY MODE SETTINGS 31 MIDI Utility mode 31 Transmit and receive channels 32 Local control 34 MIDI merge 35 Bulk protect 36 Pitch bend range 37 Modulation wheel 38 Assignable controllers 39 Pro...

Page 7: ...Clavinova PF P 100 Operation Guide ...

Page 8: ...Clavinova PF P 100 Operation Guide ...

Page 9: ...PLAYING THE DEMO SONGS PLAYING THE P 100 DUAL MODE SPLIT MODE ADJUSTING THE KEYBOARD MIDI KEYBOARD CONTROL FUNCTIONS MIDI UTILITY MODE SETTINGS SPECIAL OPERATIONS ...

Page 10: ...ility please consult your local Yamaha dealer If you plan to use your P 100 in an area with a different voltage be sure to use an appropriate converter l l Electromagnetic interference Avoid using your P 100 near televisions radios or other equipment generating electromagnetic fields Proximity to such equipment can cause the P 100 to malfunction and may generate interference noise in the other app...

Page 11: ...ings related to Split mode operation Also in Dual or Split modes it can be used in combination with the DATA ENTRY slider to adjust the balance between the main and sub voices The TRANSPOSE button turns the transpose function on and off and lets you make settings related to this function In Dual mode it can be used to adjust the detune amount MIDI TUNE button This button enables the P 100 s transm...

Page 12: ... returning automatically to the center posi tion when you release it It also transmits pitch bend messages to other instruments when MIDI transmission is enabled Both voices are bent in Dual mode In Split mode only the main voice is affected A Utility mode function lets you change the pitch bend range to any value within a range of one octave MODULATION wheel This wheel applies a vibrato effect to...

Page 13: ...sustain sostenuto and soft pedals A single FC4 pedal is included with your P 100 If you wish to purchase additional foot pedals be sure to use only Yamaha models FC4 or FC5 4 FOOT CONTROLLER jack This jack allows you to connect a foot controller Yamaha FC7 available separately for use as an auxiliary controller The foot controller can be as signed to a variety of MIDI functions in the same manner ...

Page 14: ...he FOOT CONTROLLER jack on the rear panel 4 Connect external amplifiers If you wish to amplify the P 100 through an exter nal audio system connect the amplifiers to the LINE OUT jacks on the rear panel Use the L MONO jack for mono output or both jacks for stereo output 5 Connect other external audio equipment To amplify a device which outputs line level audio signals such as a drum machine tone ge...

Page 15: ...ree times the word all will appear in the display and the P 100 will play all two demo songs in an endless loop If you don t press the l button within three seconds the P 100 will automatically exit the Demo Play mode 4 Adjust the volume Move the VOLUME slider up while a demo song is playing to raise the volume to a suitable level 5 Exit Demo Play mode If you select one of the two demo songs to li...

Page 16: ...CRIPTION Acoustic grand piano Bright rock piano Traditional electric piano DX electric piano A blend of harp and strings Vibraphone Orchestral strings SAMPLE TYPE POLYPHONY Stereo Mono 16 32 Mono 32 Mono 32 Mono 32 Layered 16 Layered 16 Mono 32 8 ORGAN Jazz organ Mono 32 9 BASS 1 Acoustic wood bass Mono 32 10 BASS 2 Electric bass Mono 32 To play the P 100 in Single mode you need only press the VOI...

Page 17: ...ll appear briefly This display indicates that PIANO 1 has been switched to mono mode This voice will remain in mono mode even if you select a different voice and come back to it although the P32 display will not reappear To switch it back to stereo mode press and hold the PIANO l button again The display below will appear briefly The voice is also switched to stereo mode automatically each time yo...

Page 18: ...ill light when the OFF setting is selected The P 100 also lets you set the depth or level of the reverb effect for each voice The depth value appears in the display each time you select a different reverb type To change the depth setting move the DATA ENTRY slider while holding down the REVERB button You can set the reverb depth to a level between 0 and 7 Setting the depth to 0 will effectively tu...

Page 19: ...fect setting simply press the MODULATION button repeatedly The LED next to the name of each modulation effect type will light in turn to indicate your selection None of the LEDs will light when the OFF setting is selected The P 100 also lets you set the depth of the modulation effect The depth value appears in the display each time you select a different effect type To do so move the DATA ENTRY sl...

Page 20: ... stereo sets It allows you to adjust the P 100 s output in three frequency ranges LOW MIDDLE and HIGH Slide the slider for each range up to increase the level of output or down to decrease output in that range The graph below should give you an idea how you can use the equalizer to modify the sound output by the P 100 11 ...

Page 21: ...change transmit table on pages 40 and 41 When you select two voices to play in Dual mode the voice you select first is known as the main voice whereas the second voice is called the sub voice This distinction is not important for playing since both voices are produced simultaneously However you will want to keep it in mind when adjusting the voice balance and detune settings using the methods desc...

Page 22: ...piano without overwhelming it You can accomplish this by adjusting the voice balance To change the voice balance move the DATA ENTRY slider while holding down the BALANCE button You can set the balance to a value from 16 to 15 Raising the balance value will make the main voice louder lowering it will make the sub voice louder When you have set the balance at the desired level release the BALANCE b...

Page 23: ...es maxi mum detune When you have selected the desired detune setting release the DETUNE button The P 100 will display the new setting for about a second then exit the function automatically What happens when you detune voices When you detune two voices in Dual mode the main voice is raised above the keyboard s standard pitch by a certain amount whereas the sub voice is lowered by an equal amount T...

Page 24: ...and the current split point key will appear briefly in the display The P 100 will now play two voices using the current sub voice and split point settings To turn Split mode off press the SPLIT button again The LED above the SPLIT button will go out and the P 100 will return to Single or Dual mode playing the voice you have selected as the main voice The fact that the procedure for selecting voice...

Page 25: ...e holding down the SPLIT button The MIDI program change number assigned to the VOICE UTILITY button you press will appear briefly in the LED display followed by the number of the currently selected main voice You can select a Split mode sub voice while the P 100 is in Single or Dual modes if you wish If you do so the P 100 will remain in Split mode after you make your selection This lets you chang...

Page 26: ...witch from Split mode to the Single mode for the solo then back to Split mode again by simply pressing the SPLIT button To change the split point press the key on the keyboard where you want to locate the split point while holding down the SPLIT button To set the split point at F4 for example you would press the F4 key while holding down the SPLIT button The new split point setting will then appea...

Page 27: ...y 18 The key that you press to select the split point will always be included in the main keyboard area Thus if you select F4 as the split point and then set the main keyboard below this point the main voice will play all notes up to and including F4 and the sub voice will play any notes from F 4 on If you set the main keyboard above this point however the sub voice will play any notes up to E4 an...

Page 28: ...upward or downward within a range of about 100 cents You can set the tuning to a value from 64 to 63 Each step raises or lowers the tuning by about 0 78 cents The default value is 0 which corresponds to 440 Hz at A3 When you locate an appropriate tuning value release the TUNE button The P 100 will display the new value for about a second then exit the function automatically 19 ...

Page 29: ...arder you hit a key the louder the resulting sound will be The SOFT curve produces loud volume with a relatively soft touch The HARD curve on the other hand requires that you hit the keys fairly hard to produce loud notes Finally the FIXED velocity curve produces the same volume no matter how hard you hit the keys This last option is useful when playing the organ voice To select a different veloci...

Page 30: ...g Transpose amount settings It is worth noting at this point that the P 100 actually has five transpose amount settings The first described on the following page sets the transpose amount for the entire keyboard in Single mode and for the main voice in Dual and Split modes The second and third settings described on page 23 control the transpose amounts for the sub voice in Dual and Split modes The...

Page 31: ... to 24 C5 If you press a key below C1 or above C5 the P 100 will set the transpose value to 24 or 24 When you have set the transpose amount to the desired value release the TRANSPOSE button The P 100 will display the new value for about a second then show the number of the currently selected voice If you set the transpose amount before actually turning the transpose function on the P 100 will assu...

Page 32: ... for the sub voice anywhere within a range of four octaves from 24 C1 to 24 C5 As with the main voice transpose amount if you try to set the transpose amount by pressing a key below C1 or above C5 on the keyboard the P 100 will react as though you pressed C1 or C5 When you have set the sub voice transpose amount to the desired value release the TRANSPOSE and SPLIT buttons The P 100 will display th...

Page 33: ...ass line with your left However there are in fact many interesting ways to use this feature In Dual mode for example you could use it to play two note harmonies lowering the sub voice so that it plays a fifth or an octave below the main voice In Split mode too you could transpose the sub voice up or down two octaves and play it in the same pitch range as the main voice This would allow you to play...

Page 34: ...ly We ll take a detailed look at how these hardware elements work together in the next section Messages All of the data which is transmitted between MIDI devices takes the form of MIDI messages of one sort or another The messages most closely associated with the actual performance of music are called channel voice messages These include note on and note off messages which tell a tone generator whi...

Page 35: ...ived at the MIDI IN terminal This allows the device to be connected in the middle of a daisy chain of instruments so that the third instrument in the chain will receive the data trans mitted by the first instrument rather than that trans mitted by the second 26 Some MIDI instruments such as the P 100 have a MIDI merge feature which essentially combines the functions of the MIDI OUT and MIDI THRU t...

Page 36: ...mode the P 100 uses only one of its two timbres The keyboard sends MIDI channel voice messages to the tone generator to control the main voice timbre It also outputs the same messages from the MIDI OUT terminal on the channel you select as the transmit channel Tch Channel voice messages which are input at the MIDI IN terminal using the channel designated as the receive channel Rch will also be sen...

Page 37: ... use the P 100 s keyboard in this mode to control two of an external tone generator s timbres Data received at the MIDI IN terminal is handled in the same manner channel voice messages on the receive channel Rch are sent to the main voice whereas messages on the next channel up Rch l are sent to the sub voice In any of the P 100 s three modes you can turn off the connection between the P 100 s key...

Page 38: ...ate velocity curve for data transmitted from the MIDI OUT terminal This allows the P 100 to interpret the velocities of the notes you play differently for an external tone generator than it does for its internal voices You might want to try this feature for example to play the internal STRINGS voice together with a brass sound produced by an external tone generator By using the SOFT velocity curve...

Page 39: ...24 C5 In either case a dot will appear in the lower right comer of the display to indicate that you have selected one of the MIDI transpose function settings When you set the transpose amount remember that the P 100 will react to keys below Cl or above C5 as though you had pressed Cl or C5 Once you have set the desired transpose amount release the MIDI and TRANSPOSE buttons The P 100 will display ...

Page 40: ... table MIDI PC TRNS Program change receive table MIDI PC RECV You can enter MIDI Utility mode by pressing the appropriate VOICE UTILITY buttons while holding down the MIDI button When you do so the LEDs above both the MIDI button and the VOICE UTILITY button you pressed will begin blinking and the current setting for the parameter you selected will appear in the display You can use either the DATA...

Page 41: ...ransmit channel setting will appear in the display 2 Select a setting to change 32 Press the CHANNEL button once or twice more to select the setting you wish to change The transmit channel is indicated in the display by the letter t the receive channel by the letter r and the program change receive channel by the letter p If you press the CHANNEL button a fourth time the display will cycle back to...

Page 42: ...rogram change receive channel settings happen to coincide If you set the program change receive channel to off the P 100 will accept program change messages transmitted on the receive channel When you use this setting however the P 100 will ignore any program change receive table settings The program change receive table is described on pages 42 and 43 Instead program change messages 1 through 10 ...

Page 43: ...nger respond to notes you play However the keyboard will still transmit messages via the MIDI OUT terminal and the tone generator will respond to messages received at the MIDI IN terminal 1 Enter MIDI Utility mode Press the LOCAL button while holding down the MIDI button The current local control setting will appear in the display 2 Set the desired value Use the DATA ENTRY slider or the l and 1 bu...

Page 44: ...s data to be controlled by both the P 100 and other devices connected to the P 100 s MIDI IN terminal 1 Enter MIDI Utility mode Press the MERGE button while holding down the MIDI button The current MIDI merge setting will appear in the display 2 Set the desired value Use the DATA ENTRY slider or the l and l buttons to switch the setting on or off 3 Exit MIDI Utility mode Press the MIDI button to e...

Page 45: ... change messages but protect against bulk messages Finally when turned off the P 100 will allow its memory to be overwritten by incoming bulk dumps and system exclusive messages 1 Enter MIDI Utility mode Press the PROTECT button while holding down the MIDI button The current bulk protect setting will appear in the display 2 Set the desired value Use the DATA ENTRY slider or the l and l buttons to ...

Page 46: ... down the MIDI button The current pitch bend range setting will appear in the display 2 Set the desired value Use the DATA ENTRY slider or the l and l buttons to select the desired value You can set a value from 0 to 12 for the pitch bend range The number you select is the number of semitones by which the PITCH wheel will raise or lower the pitch of a note when it is rolled all the way up or all t...

Page 47: ... and PIANO 2 voices as the vibrato effect is turned off at all times for these voices Please keep in mind that the vibrato effect controlled by the MODULATION wheel has nothing to do with the modulation effects which you can select using the MODULATION button The procedures for selecting a modulation effect and setting its depth are described on page 10 1 Enter MIDI Utility mode Press the MW butto...

Page 48: ...ou to increase your P 100 s performance flexibility 1 Enter MIDI Utility mode Press the CS button while holding down the MIDI button The current CS slider function assignment will appear in the display To assign a function to the foot controller press the FC button instead of the CS button 2 Select the desired setting Use the DATA ENTRY slider or the l and 1 buttons to select the function you wish...

Page 49: ...signments in this table using the procedure described below 1 Enter MIDI Utility mode Press the PC TRNS button while holding down the MIDI button The LED above the button for the currently selected voice the main voice in Dual or Split mode will light steadily and the current transmit table setting for this button will appear in the display 2 Select a VOICE UTILITY button Press the VOICE UTILITY b...

Page 50: ... sub voice the P 100 will check the program change transmit table to determine whether a program change number has been assigned to that button If so and if MIDI transmission is enabled it will transmit the program change number in question from the MIDI out terminal When the program change message is transmitted the program change number which was sent will appear in the LED display briefly each ...

Page 51: ...VOICE UTILITY button LEDs will light 2 Select a program change number Use the DATA ENTRY slider or the 1 and l buttons to select the desired program change number or jump to step 3 if you wish to change the setting for the current program change number You can select any program change number from 1 to 128 If you wish you can make your selection using a MIDI message instead of the DATA ENTRY slide...

Page 52: ... If so the main voice will automatically switch to the voice indicated by the program change receive table If the P 100 is in Dual mode this will cause it to shift to Single mode If the program change function has been turned off for that number the message will simply be ignored Keep in mind that the assignments you make in the program change receive table are only valid as long as a channel has ...

Page 53: ... page 35 Also make a note of the P 100 s current transmit channel setting as you will need this information when you attempt to load the data back into the P 100 Simultaneously press the REVERB and MODULATION buttons while holding down the MIDI button The P 100 will automatically send three bulk dumps containing 1 all of the P 100 s current settings except for the program change transmit and recei...

Page 54: ...he condition it was in when you purchased it Be sure that you don t need the current settings or save them using a bulk dump operation if possible before you perform this operation Once you initialize the memory you will not be able to recall the previous settings P 100 factory settings The The table below lists the p 100 s factory settings OFF is selected as the modulation type for asterisked voi...

Page 55: ...hen you switch it to Multi mode you may want to play two of the voices using the P 100 in Split mode Assign the receive channel for one of the tone generator s voices to the P 100 s transmit channel Tch and that for another of its voices to the next higher channel Tch l Thereafter the tone generator will respond to notes you play in the main keyboard area using the first voice and notes you play i...

Page 56: ...member to turn the P 100 s MIDI merge function off however or the P 100 will echo synthesizer s data back to it causing notes to double up unnecessarily Once you have made these settings you will be able to control the synthesizer s tone generator from the P 100 as described above You will also be able to play the P 100 using the synthesizer s keyboard should that be more convenient If the keyboar...

Page 57: ...ls along to the TG77 The SY99 will thus be able to control both the P 100 s two voices and any of the TG77 s 16 timbres You could achieve the same result by connecting the TG77 to the P 100 s MIDI THRU terminal instead of the MIDI OUT But then you would not be able to control the TG77 using the P 100 s keyboard That is the charm of MIDI merge function it allows you to control a single device with ...

Page 58: ...stration above shows how you would connect the P 100 to Yamaha s MDF2 a compact portable data filer suitable for use with the P 100 With this arrangement you would use the P 100 s bulk dump procedure to send its settings to the MDF2 which would record this data in MDR mode You could then transmit the data back to the P 100 at any time as long as the bulk protect function is turned off Since the MD...

Page 59: ...I data than it can process at one time Take steps to reduce the amount of data the P 100 is receiving MIDI data error The P 100 had trouble receiving MIDI data Check your cable connections and try the operation again MIDI checksum error The P 100 had trouble receiving a MIDI bulk dump Check your cable connections and try the operation again Bulk protected The P 100 could not receive an incoming bu...

Page 60: ... to 24 semitones Panel switches POWER SPLIT BALANCE TRANSPOSE DETUNE MIDI TUNE VOICE UTILITY x 10 REVERB l MODULATION l SPEAKER Sliders VOLUME CS DATA ENTRY EQUALIZER x 3 LOW MIDDLE HIGH Wheels PITCH MODULATION Panel display red three digit numeric LED Switch lamps red LED x 19 SPLIT TRANSPOSE MIDI VOICE UTILITY x 10 REVERB x 3 MODULATION x 3 Phone jacks PHONES stereo LINE IN R L MONO LINE OUT R L...

Page 61: ...ua tion 27 28 split point 17 MIDI system applica tions 46 48 tuning 19 velocity curve 20 LED display 2 LINE IN jacks 4 L LINE OUT jacks 4 Local control 34 M Master device 46 tuning 19 Memory battery backup 1 initialization 45 Merge MIDI 25 35 Messages 25 MIDI 25 bulk protect 36 channel settings 32 33 CS slider 39 Data Format 54 data recorder 49 enabling transmission of channel messages 29 foot con...

Page 62: ...oice balance in Dual mode 13 balance in Split mode 16 detune in Dual mode 14 list 7 selection in Dual mode 12 selection in Single mode 7 selection in Split mode 16 VOICE UTILITY buttons 2 Volume assignable controllers 39 voice balance in Dual mode 13 voice balance in Split mode 16 VOLUME slider 2 T Table program change receive 42 43 program change transmit 40 41 Terminals MIDI 4 26 TG77 46 48 Timb...

Page 63: ...hange transmit table when a main voice is selected in any mode Program change messages arc transmitted on the sub voice transmit channel Tch l according to the program change transmit table settings when the Split mode sub voice is selected No program change message is transmitted when the Dual mode sub voice is selected 2 1 6 CHANNEL MODE No channel mode messages are transmitted 1 2 Transmission ...

Page 64: ... results when the MIDI merge function is used since both the P 100 s tone generator and any devices receiving the merged data can be controlled by the controllers of either the P 100 or the merged device As a rule the last received control messages will always take priority Also notes being sounded by the P 100 may be turned off by received All Notes Off messages Although the P 100 is not capable ...

Page 65: ... are recognized regardless of the device number specification Note o b offset binary Note Parameters with a data range of off on are off when V2 equals 0 on otherwise Note The Effect Select and Depth parameters each consist of two 4 bit nibbles The lower 3 bits of the MS nibble indicate tch reverb setting while the lower 3 bits of the LS nibble indicate the modulation setting Note Asterisked items...

Page 66: ...parameter number V2 parameter value Note The indicated parameter is considered to be off when any value greater than 9 is received for V2 TABLE l 4 MIDI PARAMETER CHANGE TABLE SWITCH REMOTE F0 43 1n 2A 0D 00 00 N2 00 V2 F7 Notes n device number i e transmit receive table N2 parameter number V2 parameter value TABLE 2 3 MIDI BULK DUMP FORMAT SYSTEM SETUP DUMP REQUEST TABLE 2 l MIDI BULK DUMP FORMAT...

Page 67: ...ot volume 1 o Volume Control 64 o Sustain 1 o Sustain 66 o Sostenute 1 o Sostenute Change 67 o Soft 1 o Soft 1 120 o Assignable 1 x 121 x o Reset All Cont Prog o 0 127 1 o 0 127 assignable Change True 0 9 System Exclusive o o voice etc System Song Pos x x Song Sel x x Common Tune x x System Clock x x Real Time Commands x x Aux Local ON OFF x x x o 123 A11 Notes OFF ActiveSense o o sages Reset x x ...

Page 68: ...A Wettergrens gata 1 Box 30053 400 43 Göteborg Sweden Tel 031 496090 DENMARK Yamaha Scandinavia Filial Denmark Finsensvej 86 DK 2000 Frederiksberg Denmark Tel 31 87 30 88 FINLAND Fazer Music Inc Länsituulentie 1A SF 02100 Espoo Finland Tel 90 435 011 NORWAY Narud Yamaha AS Østerndalen 29 1345 Østeras Tel 02 24 47 90 ICELAND Páll H Pálsson P O Box 85 Reykjavik Iceland Tel 01 19440 EAST EUROPEAN COU...

Page 69: ......

Reviews: