


CVP-609/605 Reference Manual
97
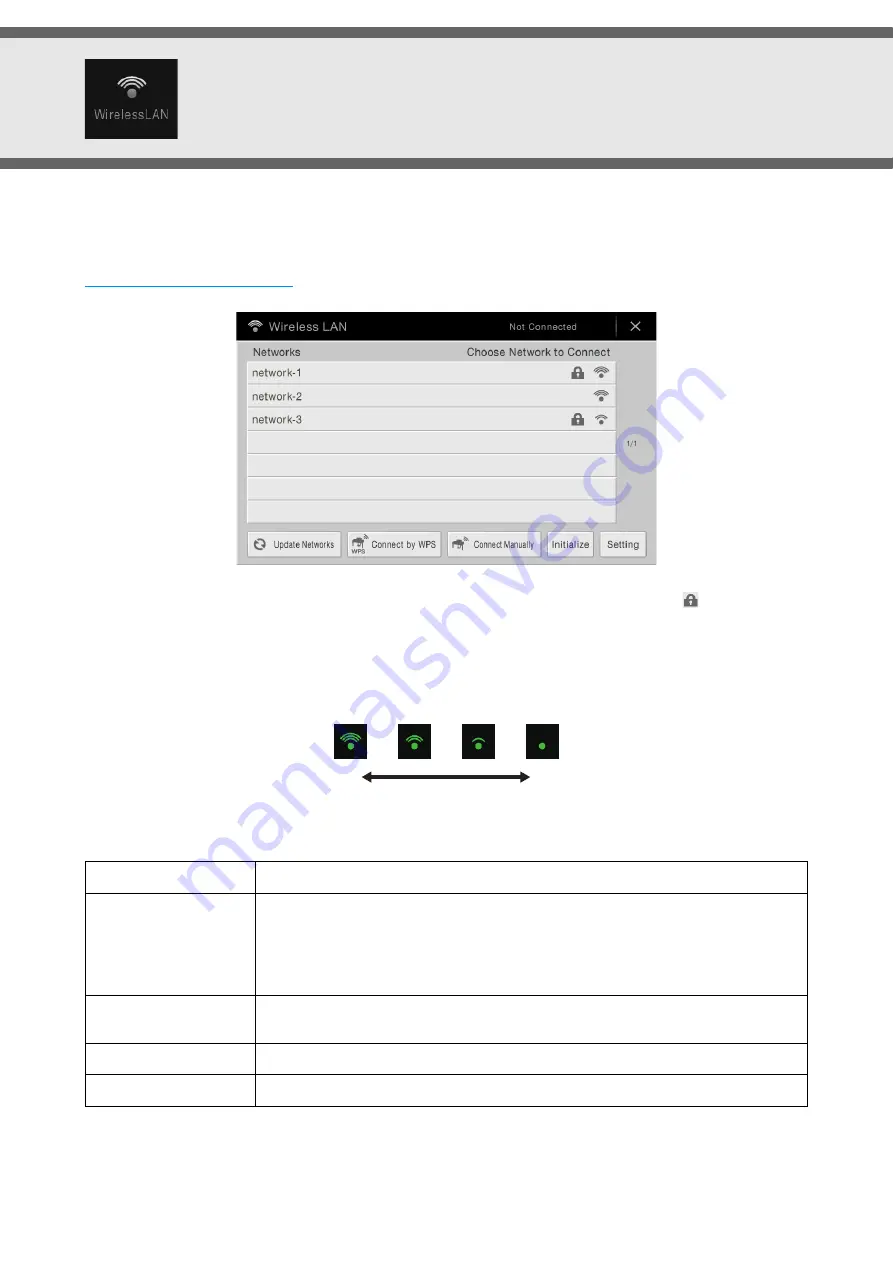
Wireless LAN Settings
This icon is shown only when the USB Wireless LAN adaptor (which may not be included depending on your area) is
connected to the [USB TO DEVICE] terminal. Make sure connection before executing the operations.
For details on connections, refer to the “iPhone/iPad Connection Manual” on the website.
For information about the compatible smart devices and application tools, access the following page:
http://www.yamaha.com/kbdapps/
From the Networks listed on the display, select the desired one. For the network with the lock icon (
), you need to
enter the password and touch [Connect], and for the network without the lock icon, you can connect the network only by
selecting it.
When connection is done successfully, “Connected” is shown at the top of the display, and the icon shown below appears
according to the signal strength.
If you do not find the desired network on the display or you want to execute the detailed settings, execute the following
operations as necessary.
Update Networks
Updates the Network List on the display.
Connect by WPS
Connects this instrument to the network via WPS. After touching [Start WPS] in the
window appeared by touching here, press the WPS button of the desired wireless LAN
access point within two minutes.
NOTE
Make sure that your access point supports WPS. About the confirmation and changes in the
access point settings, refer to the manual of the access point.
Connect Manually
Connects this instrument to the network with closed or non-disclosure. Enter the SSID,
security method, and password as necessary, then touch [Connect].
Initialize
Initializes the connection setup to the default factory status.
Setting
Lets you set detailed parameters such as the static IP address. After setting, touch [OK].
Strong
Weak


