33
En
Engl
ish
ADD
IT
IONAL INFORMATION
5
ADDITIONAL INFORMATION
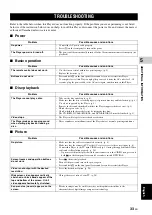
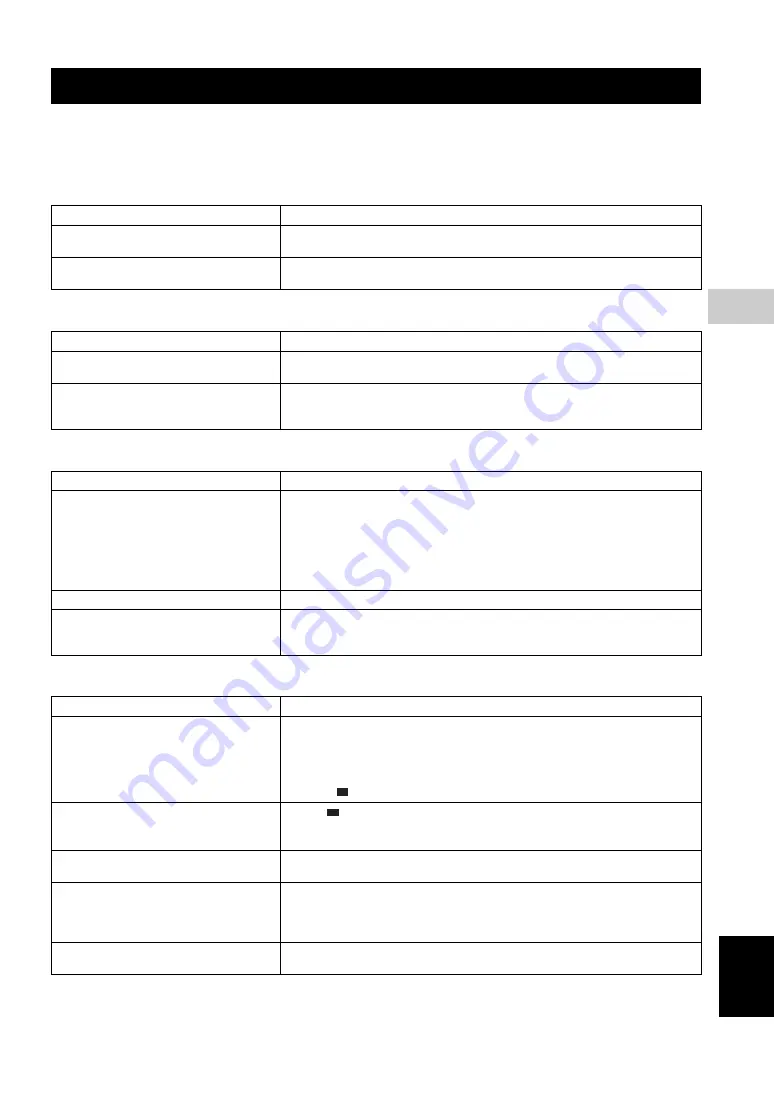
Refer to the table below when this Player does not function properly. If the problem you are experiencing is not listed
below or if the instruction below does not help, turn off this Player, disconnect the power cable, and contact the nearest
authorized Yamaha dealer or service center.
■
Power
■
Basic operation
■
Disc playback
■
Picture
TROUBLESHOOTING
Problem
Possible causes and solutions
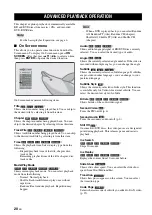
No power.
– Connect the AC power cable properly.
– Press (
p
) on the front panel to turn on the power.
The Player power is turned off.
– The power will be automatically turned off after 10 continuous minutes of inactivity (no
playback).
Problem
Possible causes and solutions
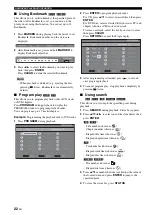
The remote control does not work.
– Use the remote control within its operating range. (p. 5)
– Replace the batteries. (p. 5)
Buttons do not work.
– Press and hold
p
on the front panel for around 5 seconds to restart this Player.
– To completely reset this Player, unplug the power cable from the AC outlet for 5 - 10
seconds, plug the power cable to the AC outlet again, and then turn on this Player.
Problem
Possible causes and solutions
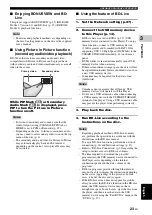
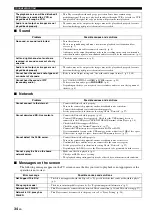
The Player cannot play a disc.
– Take out the disc and clean it. (p. 4)
– Make sure that the disc is loaded properly (aligned in disc tray and label-side up). (p. 4)
– Use a disc supported by the Player. (p. 3)
– Remove the disc and then check whether the Player supports the disc or not. (p. 3)
– Check the region code. (p. 3)
– Check whether the disc is defective by trying another disc.
– The CD-R/RW, DVD+R/RW/R DL, and DVD-R/RW/R DL must be finalized. (p. 3)
Video stops.
– The Player will stop if it senses shock or vibration.
The Player makes a snapping sound
when starting playback or loading a
disc.
– These sounds are not malfunctions of the Player but are normal operating conditions.
Problem
Possible causes and solutions
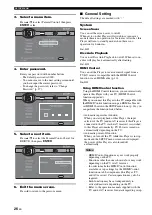
No picture.
– Make sure that the cables are connected correctly. (p. 8)
– Make sure that the connected TV or the AV receiver is set to the correct input. (p. 8)
– Connect this Player to the TV with VIDEO jack (p. 11) using the supplied Audio/Video
cable and set Resolution properly. (p. 28)
– If picture is still not displayed with the unit connected to the VIDEO jack, press and
hold
on the front panel for around 5 seconds to switch NTSC/PAL.
Screen freezes and operation buttons
do not work.
– Press
, then restart playback.
– Turn off the power and turn on the power again.
– Press and hold
p
on the front panel for around 5 seconds to restart this Player.
Video is not output with the desired
resolution.
– Set to the desired resolution. (p. 28)
Widescreen video appears vertically
stretched, or black bands appear at the
top and bottom of the screen. Or 4:3
video appears horizontally stretched.
– Change the aspect ratio of your TV. (p. 28)
Square noise (mosaic) appears on the
screen.
– Blocks in images may be visible in scenes with rapid movement due to the
characteristics of digital image compression technology.


