background image

www.radioaficion.com


FT-897 Alignment  


Vertex Standard  Co., Ltd.  

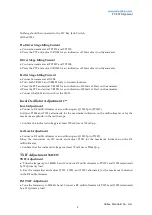
Power Amplifier Adjustment  

HF/50MHz Idling Current Adjustment 

a.


Connect an ammeter at TP3021 and TP3022. 

b.


Turn both VR3002 fully to counterclockwise. 

c.


Press the PTT and adjust VR3002 for an indication of 300mA ±10mA on the ammeter. 


V/UHF Idling Current Adjustment 

a.


Connect an ammeter at TP3021 and TP3022. 

b.


Turn both VR3001 fully to counterclockwise. 

c.


Press the PTT and adjust VR3001 for an indication of 300mA ±10mA on the ammeter. e. 

Connect the J1004 and switch on the S1001. 


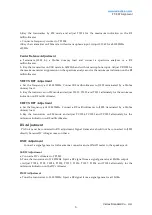
CM Coupler Balance Adjustment 

a.


Terminate the antenna jack with a 50Q dummy load. Set the mode on CW, connect a DC  

voltmeter to TP3002. 
b.


Tune the transceiver in 28MHz band and key the transceiver. 

c.


Adjust TC3002 for the minimum indication on the DC voltmeter. 

d.


Tune the transceiver in 145.995MHz band and key the transceiver. 

e.


Adjust VR3003 for the minimum indication on the DC voltmeter. 

f.


Tune the transceiver in 439.995MHz band and key the transceiver. 

g.


Adjust TC3001 for the maximum indication on the RF Power meter. 


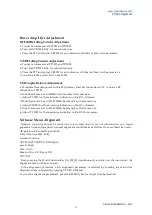
Software Menu Alignment  

Antenna  connector  should  be  connected  to  a  dummy  load  in  case  of  transmission  or  a  signal 

generator in case of reception. General alignment conditions are as follows in case otherwise noted. 
AF-gain knob: Center RF-gain knob: 
Fully clockwise SQL: Fully 
counterclockwise 
ATT/IPO/CTCSS/DCS: Off Output 
power: High  
AGC: Auto 
Break-in: On, CW Keyer: Off 
VOX: Off 

Keep pressing the Multi Function Key [A],[B],[C] simultaneously and turn on the transceiver, the 

alignment menu will be activated. 

In  the  alignment  procedure,  each  alignment  parameter   is  selected  by  rotating  the  main  dial. 

Alignment item is selected by rotating VFO/M-CH knob. 
To store the alignment parameters, press the [MENU] key for longer than half second.  

Summary of Contents for FT-897

Page 1: ...firm For 13 895MHz Adjust T2001 5 5V 0 5V 76 000MHz Confirm At least 0 8V 32 995MHz Adjust T2002 5 5V 0 5V 13 900MHz Confirm At least 0 8V 55 995MHz Adjust T2003 5 5V 0 1V 88 000MHz Confirm At least 0...

Page 2: ...Adjustment 2nd Local Adjustment a Connect a RF millivoltmeter or an oscilloscope to Q1038 5pin TP1067 b Adjust T1024 and T1026 alternately for the maximum indication on the millivoltmeter or for the...

Page 3: ...nd adjust T1013 T1012 and T1011 alternately for the minimum indication on RF millivoltmeter UHF TX BPF Adjustment a Set the frequency at 439 995MHz Connect a RF millivoltmeter to J1002 terminated by a...

Page 4: ...995MHz Inject a RF signal from a signal generator at 20dBu output c Adjust TC1001 for the minimum indication on the DC voltmeter W FM Reception Adjustment a Connect a SINAD meter to the speaker jack...

Page 5: ...ltmeter d Tune the transceiver in 145 995MHz band and key the transceiver e Adjust VR3003 for the minimum indication on the DC voltmeter f Tune the transceiver in 439 995MHz band and key the transceiv...

Page 6: ...ial c Tune the transceiver to 21MHz band on CW mode Inject a RF signal from the signal generator at 86dBu output d Set the parameter SSB FS at the value of lighting all the dots of the S meter on the...

Page 7: ...item VHF IC Tune the transceiver to 144MHz band and key the transceiver Adjust the parameter for 60W transmission power d Set the mode on CW Select the menu item UHF IC Tune the transceiver to 430MHz...

Page 8: ...the transmitter Select the menu item VHFTXG and adjust the parameter for 25W 5W transmission power e Tune the transceiver to 430MHz band and key the transmitter Select the menu item UHFTXG and adjust...

Page 9: ...r and adjust the parameter for maximum deviation of 2 25KHz 0 1KHz on the FM linear detector d Change the menu item to M MTR Key the transceiver and set the parameter at the value of lighting 5 dots o...

Reviews: