background image

6

Step5 —Hopper Assembly

4.2. FUEL AND OIL
*PLEASE REFER TO ENGINE MANUAL CAREFULLY*

5. STARTING

*Do follow the instructions as below*
Bolts for blade and counter blade are tightened by torque wrench at torque of (60Nm for blade and 40Nm for
counter blade).
Check the hopper before starting, to make sure there is nothing in it. If there is something, please clean it up by
stick or reach tools.
Put your clothes, hands, limb away from hopper, rotor or any rotating parts.
Stay away from conveyor side before starting
Stand on your feet in balance.
It is obligatory to wear safety gloves, earmuff and safety goggles.
Please do not use this machine where the exhaust fumes might collect.
This machine should be used by one, preferably the same person only.
This machine is designed to be used in an open air.

6. STARTING AND OPERATION

The hardness of the wood depends on the wood type, the time between pruning and chipping and how dry the
branches are. This machine performs best if the branches are chipped right after pruned.

Summary of Contents for MC40

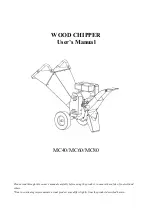
Page 1: ...0 MC60 MC80 Please read through this owner s manual carefully before using the product to ensure the safety of yourself and others Due to continuing improvements actual product may differ slightly fro...

Page 2: ......

Page 3: ...1 1 MC40 HOPPER AND OUTPUT ASSEMBLY 4 4 1 2 Machine assembly of MC40 60 80 4 4 2 FUEL AND OIL 6 5 STARTING 6 6 STARTING AND OPERATION 6 7 MAINTENANCE 8 7 1 CLEANING 8 7 2 BELT ADJUSTMENT AND REPLACEME...

Page 4: ...w Chip system of this machine is very sharp To the first time user we strongly recommend that a practice with pieces of wood should be processed if possible with company of experienced user Before wor...

Page 5: ...gh If the wires are good If blade is sharp enough Always make sure all misalignment loose parts or breakage are fixed and repaired before machine started Make sure the machine is in good maintenance b...

Page 6: ...3 LABOR PROTECTION WARNING ON INPUT MATERIALS WARN ROTATING BRUM AND SHARP BLADE BE CAUTION OF FLYING DEBRIS READ MANUAL LUBRICANT NEEDED OIL CHANGING...

Page 7: ...Assemble top plate to hopper Notice that top plate should be placed inside with all holes in line and tighten all bolts OUTPUT CHUTE ASSEMBLY Assemble bottom plate 8 to output 9 Notice that bottom pla...

Page 8: ...5 Step1 Wheels and Wheel axel Step 2 Support and Debris collector Step3 Conveyor assembly Step4 Infeed hopper and handle...

Page 9: ...hands limb away from hopper rotor or any rotating parts Stay away from conveyor side before starting Stand on your feet in balance It is obligatory to wear safety gloves earmuff and safety goggles Ple...

Page 10: ...be pulled in automatically While chip thick ones pay attention the engine and keep it maintained Trim the side branch over 3cm in diameter before put it into hopper separately Long branches and thick...

Page 11: ...nd make the warranty voided It is always necessary to stop the machine before any clean or transport work Maintenance should be done in a flat clean area 7 1 CLEANING Using high pressure air flow to c...

Page 12: ...chipping work and protected from rusty corrosion 7 4 1 BLADE MOUNTING Slacken blades bolts with Torx tool supplied and remove Turn blades round and refit to use opposite edge Clean the blade holder s...

Page 13: ...not pull branches Chips are not in similar size Blade worn too much Oversize input Gap between blade and counter blade is not right Reverse sharpen or replace blade Take input out and make it right Ri...

Page 14: ...nearby flammable material such as gas fuel dry grass wood etc so that it cannot endanger any person Store this in a dry well ventilated place with temperature between 0 C to 45 C NOTE If you are plann...

Page 15: ...12...

Page 16: ...13 Spare parts are available from our dealers or our official website...

Reviews: