

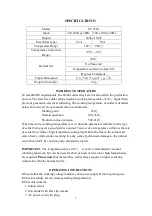


6
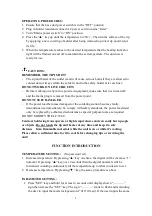
OPERATING PROCEDURES:
1.
Ensure that the base unit power switch is in the “OFF” position.
2.
Plug in Solder wand and connect AC power cord to mains “In-let”.
3.
Turn “Mains power switch” to “ON” position.
4.
Press the “▲” key up until the temperature to 250
℃
. Then tin the surface of the tip
by applying a new covering of solder after being warmed to protect tip and extend
its life.
5.
When the temperature reaches to the desired temperature that the heating indicator
light will be flashed on and off to maintain the set temperature. The unit now is
ready for use.
CAUTIONS:
REMEMBER, THE TIP IS HOT!
-
The tip and barrel of the solder wand will cause serious burns if they are allowed to
contact skin. Always return the solder wand to the safety holder after each use.
DO NOT WORK ON LIVE CIRCUITS
-
Before working on any mains powered equipment, make sure that it is turned off,
and the mains plug is removed from the power point.
DO NOT USE IF DAMAGED
-
If the power lead becomes damaged or the soldering station becomes faulty,
discontinue use immediately. To comply with safety standards, the power lead must
only be replaced by authorized technicians as special purpose tools are required.
DO NOT MODIFY THE LF-3500.
Caution: Soldering irons operate at high temperatures and can easily burn people
or objects. Do not touch the tip and heater at any time and keep it a safe
distance from flammable materials while the unit is on or while it’s cooling.
Please allow a sufficient time for it to cool before changing tips or servicing the
unit!
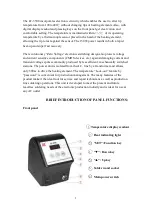
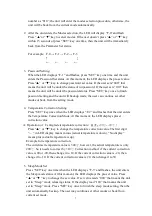
FUNCTION INTRODUCTION
TEMPERATURE SETTING:
(No password set)
1.
Increase temperature: By pressing “▲” key one time, the digital will be increase “1”
numeral. If pressing “▲” key over 2 seconds then the digital numerals will be
forwarded counting continuously till the temperature up to what you desire to set.
2.
Decrease temperature: By pressing“▼” key, the same procedure as above.
PARAMETER SETTING:
1.
Press “SET” key and hold for at least 4 seconds until display shown “— — —”
sign then release the “SET” key. The sign “— — —” starts to flash and reminding
the user to input the mode lock password “010” (fixed). If the user inputs the same


