background image


§


Step 3: 

Place the hard drive(with brackets) inside the DVR and secure with screws:


§


Step 3: 

Connect the power and SATA cables:


Please   Note:   The   DVR’s   hard   drive   needs   to   be   formatted   before   it   is   used   for   recording.   For   further   detailed   


information   please   consult   the   main   user   guide.   


Summary of Contents for X32D1H

Page 1: ...1 Box Contents P 2 2 Hard Disk Installation P 3 3 DVD RW Installation P 5 4 Front Panel Controls P 7 5 Rear Panel Guide P 8 X32D1H PROFESSIONAL 32 CHANNEL REAL TIME D1 DVR Quick Guide...

Page 2: ...R Remote Control 4 Batteries 5 CD 6 Hard Disk Mount 7 Screws 8 IDE to SATA Power Cable 9 Power Cable 10 SATA Cable Please Note The purchased DVR may or may not include a hard drive Please press DVR1 b...

Page 3: ...3 Hard Drive Installation Step 1 Fix the HDD to rack mount with the screws as shown below Step 2 Remove all screws holding the top of the DVR case and pull it away from the main unit base...

Page 4: ...kets inside the DVR and secure with screws Step 3 Connect the power and SATA cables Please Note The DVR s hard drive needs to be formatted before it is used for recording For further detailed informat...

Page 5: ...5 DVR RW Installation Step 1 Remove the riser front cover from the DVD RW Step 2 Secure the DVD RW to the rack mount from both sides Step 3 Secure the DVD RW rack as shown above into the DVR s base...

Page 6: ...6 Step 4 Connect the power and SATA cables to the DVD RW...

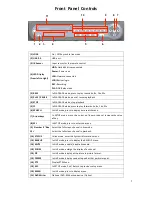
Page 7: ...SETUP mode move the cursor up down reduce increase the value of key 8 SEL In SETUP mode press to enter sub menu 9 Number 0 9 10 Select the full screen channel in live mode Select the full screen chan...

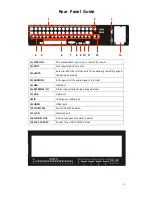
Page 8: ...depends on model 4 AUDIO IN RCA input port for audio signal 16 in total 5 USB USB port 6 EXTERNAL I O Alarm inputs Outputs see image below 7 VGA VGA port 8 IR IR extension cable jack 9 HDMI HDMI port...

Reviews: