


30
1)
HDD invalid
: “Enable/Disable”
2)
HDD full
: “Enable/Disable”
3)
Trigger
: Choose the channels that need to be triggered
4)
IP address conflict
: “Enable/Disable”
5)
Trigger
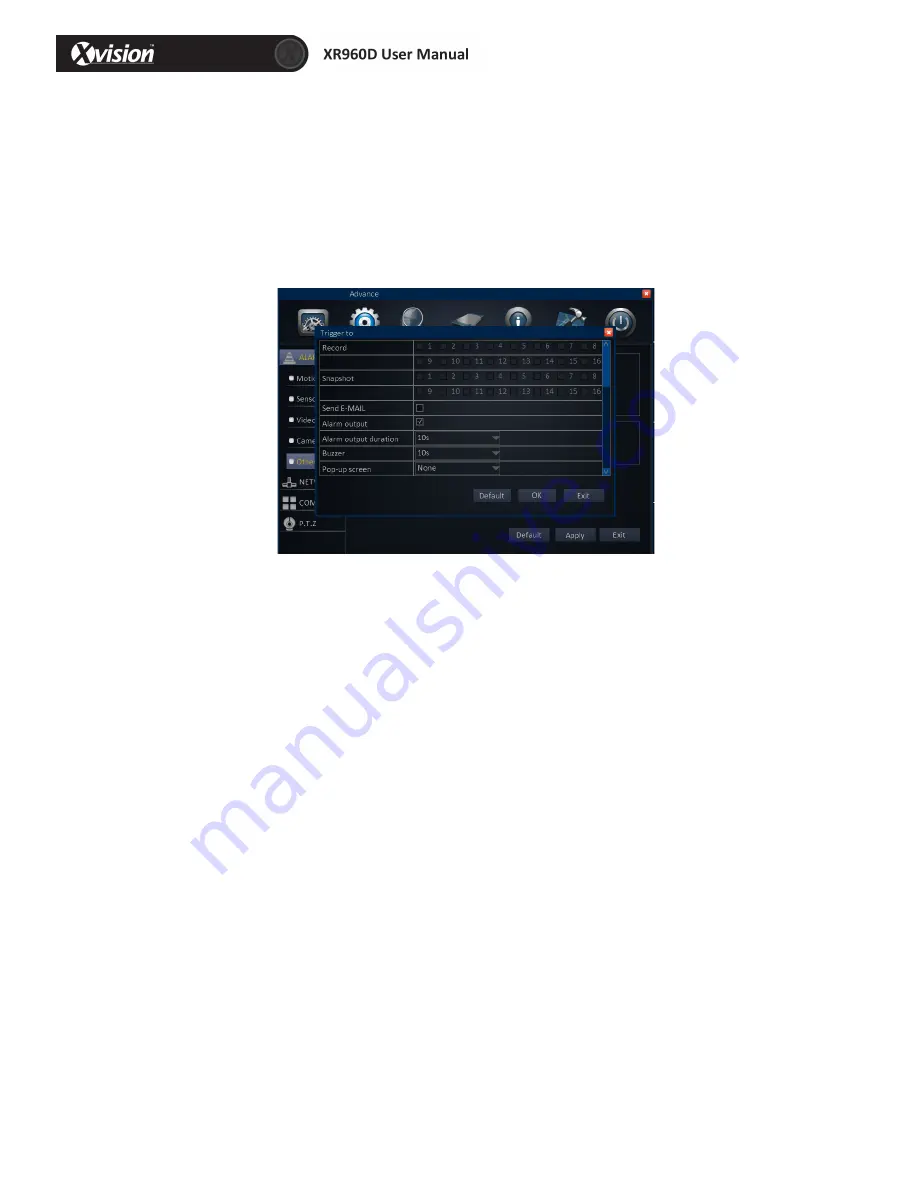
: The processing for alarming, click “settings” display as below:
Trigger recording
: Place a check mark '√' for the channel you need to trigger, when there
is an alarm on the setting channel, the DVR will send a trigger to other channels.
Snapshot
: Place a check mark '√' in front the channel, when the setting channel has an
alarm, the DVR will snap a picture.
Send E-‐mail
: Place a check mark '√', when there is an alarm, the DVR will send the
snapped picture to the mailbox you set.
Alarm output
: Place a check mark '√'. This will trigger the external alarm.
Alarm output duration
: Click the inverted triangle, options: 10s/ 30s/ 1min/ 3 min/
5min/ 10min/ 15min/ 30min.
Buzzer
: Click the inverted triangle, options: None/10s/ 30s/ 1min/ 3 min/ 5min/ 10min/
15min/ 30min.
Pop-‐out image
: Click the inverted triangle, options: None/ CH1/ CH2…
Post-‐record
: Click the inverted triangle, options: 10s/ 30s/ 1min/ 3 min/ 5min/ 10min/
15min/ 30min.
Pre-‐record
: Click the inverted triangle, options: None/ 5s/ 10s
Trigger PTZ
: None/ Cruise line/ Preset point
Attention
: Click “Apply” after setup.


