background image

[email protected]


Dyaco Canada Inc 2020 


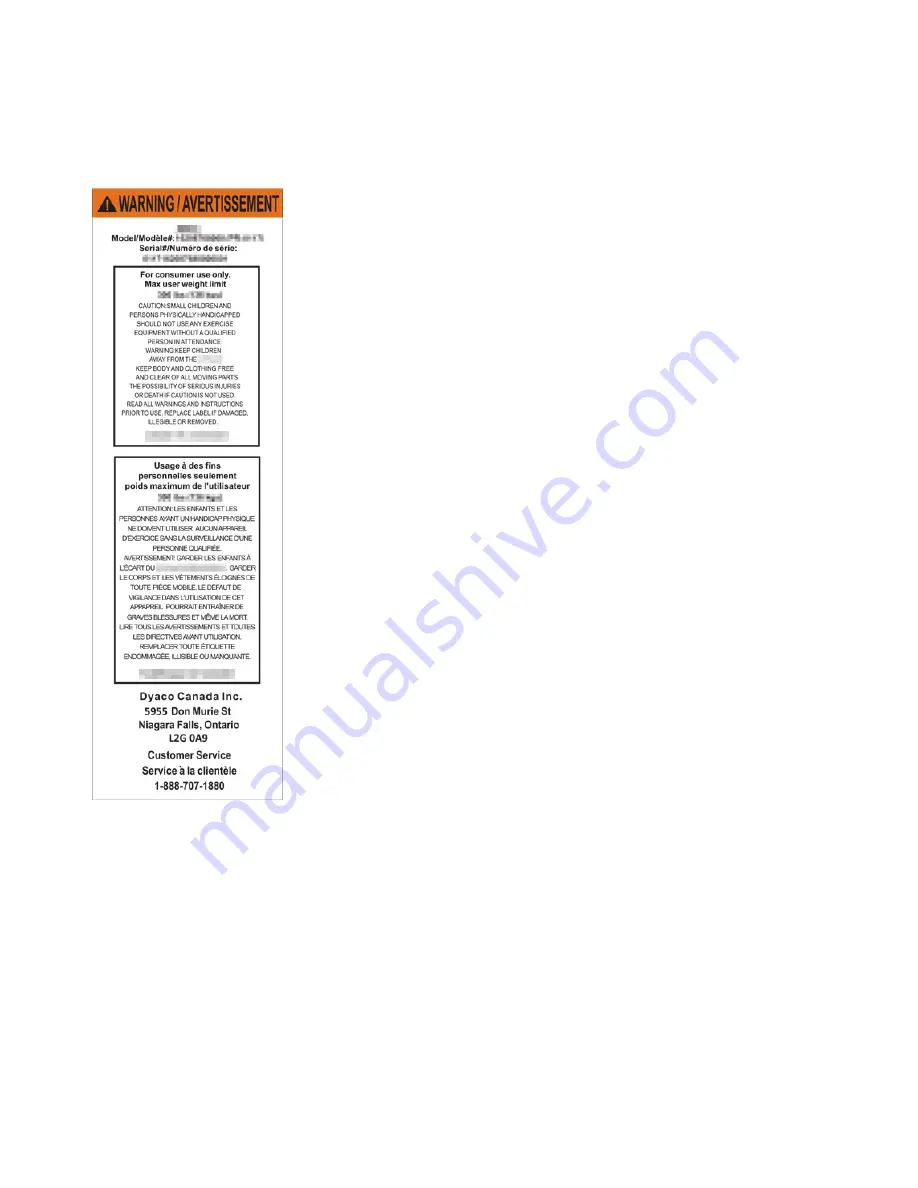
WARNING DECAL

 REPLACEMENT  

The decal shown below has been placed on the indoor cycle trainer. If the decal is missing or 
illegible, please call our Customer Service Department toll-free at 1-888-707-1880 to order a 
replacement decal. 


Summary of Contents for 16204071500

Page 1: ...CAREFULLY READ THIS ENTIRE MANUAL BEFORE OPERATING YOUR NEW INDOOR CYCLE OWNER S MANUAL Model No 16204071500 Assembly Operation Exercise Parts Warranty CAUTION You must read and understand this owner s manual before operating unit ...

Page 2: ...eration of Your New Indoor Cycle 13 General Maintenance 21 Exploded View Diagram 22 Parts List 23 Troubleshooting 25 Training Guidelines 26 Manufacturer s Limited Warranty 32 ATTENTION THIS INDOOR CYCLE IS INTENDED FOR RESIDENTIAL USE ONLY AND IS WARRANTED FOR THE APPLICATION ANY OTHER APPLICATION VOIDS THIS WARRANTY IN ITS ENTIRETY ...

Page 3: ...nd healthier lifestyle Please review the following pages and familiarize yourself with the parts that are labeled Read this manual carefully before using the Xterra MBX1500 Indoor Cycle Although Dyaco Canada Inc constructs its products with the finest materials and uses the highest standards of manufacturing and quality control there can sometimes be missing parts or incorrectly sized parts If you...

Page 4: ...l moving parts 10 Never drop or insert any object into any openings 11 Do not use outdoors 12 Warm up 5 to 10 minutes before each workout and cool down 5 to 10 minutes afterward This allows your heart rate to gradually increase and decrease and will help prevent you from straining muscles 13 Never hold your breath while exercising Breathing should remain at a normal rate in conjunction with the le...

Page 5: ...Inc 2020 5 WARNING DECAL REPLACEMENT The decal shown below has been placed on the indoor cycle trainer If the decal is missing or illegible please call our Customer Service Department toll free at 1 888 707 1880 to order a replacement decal ...

Page 6: ...LY CHECK LIST PART NO DESCRIPTION Q TY 1L Left Pedal 1 1R Right Pedal 1 4 Rear stabilizer 1 10 Seat post 1 12 Sliding tube 1 13 Seat 1 15 Front stabilizer 1 16 Main frame 1 17 Handlebar post 1 18 Handlebar 1 26 Tablet rack 1 80 Computer 1 Hardware pack 1 User manual 1 ...

Page 7: ...ner 6 Above described parts are all the parts you need to assemble this machine Before you start to assemble please check the hardware packing to make sure they are included Part No Description Qty 3 Carriage bolt 4 5 Flat washer φ8 4 6 Domed nut M8 4 7 Quick release knob 2 66 fixed baffle 1 67 fixed knob 1 Spanner 1 Inner hexagon spanner 1 ...

Page 8: ... on the floor and remove the packing material Refer to the parts list for help to identify the parts It will take two people to assemble your unit ENSURE THAT ALL NUTS AND BOLTS ARE FIRMLY TIGHTENED AFTER EACH STEP STEP 1 1 Attach the front stabilizer 15 to the main frame 16 Secure using two carriage bolts 3 two fiat washers 5 and two domed nuts 6 2 Attach the rear stabilizer 4 to the main frame 1...

Page 9: ...ly loosened from the seat 13 2 Insert the sliding tube 12 into the seat post 10 Secure using a club knob 19 and flat washer 20 which are pre assembled on the seat post 10 3 Insert the seat post 10 into the Main frame 16 Secure using a quick release knob 7 Note The seat can be horizontally and vertically adjusted after your cycle is fully assembled Hardware step 2 1 quick release knob 7 ...

Page 10: ...t and secure using four bolts 87 which are pre assembled on the backside of computer 80 4 Attach the tablet rack onto 26 onto the handlebar 18 and secure using a fixed baffle 66 and a fixed knob 67 which are pre assembled on the tablet rack 26 Note The handlebar post can be vertically adjusted and the handlebar can be horizontally adjusted after your cycle is fully assembled Hardware step 3 1 quic...

Page 11: ... Attach the left pedal 1L to the left crank 33 2 Attach the right pedal 1R to the right crank 36 Note The right pedal should be threaded on clockwise and the left pedal on counter clockwise ENSURE THAT ALL BOLTS AND NUTS ARE TIGHTENED BEFORE USING THE MACHINE ...

Page 12: ...co Canada Inc 2020 12 ADJUSTING THE TENSION 1 Turn the tension knob 30 clockwise to increase the tension 2 Turn the tension knob 30 counter clockwise to decrease the tension IMPORTANT Press the tension knob 30 to stop the flywheel ...

Page 13: ...n When setting the target value time will count down from your target time to 0 and alarm will sound or flash Without any signal being transmitted into the monitor for 4 seconds during workout time will STOP DISTANCE Range 0 00 99 99 Count up Without setting the target value distance will count up Count down When setting the target value distance will count down from your target distance to 0 with...

Page 14: ...STANCE CALORIES and PULSE is the same as TIME set up 4 Once the workout begins and the console picks up the exercise signal the value of SPEED RPM TIME DST and CAL will count up on the display ITEM DESCRIPTION SET Press SET Key to increase value Press and hold the key to increase value faster TIME setting range 00 00 99 00 Each increment is 1 00 CAL setting range 0 9990 Each increment is 10 DIST s...

Page 15: ...o F6 after the countdown to test heart rate recovery status User can find the heart rate recovery level based on the chart below 3 Press RECOVERY key again to return to the beginning F1 Outstanding F2 Excellent F3 Good F4 Fair F5 Below average F6 Poor Wireless sensor assembly 1 The transmitter battery holder is assembled on the main frame 2 Place the battery CR2032 inside and lock it firmly ...

Page 16: ...r needs to replace or repair the sensor please follow these three steps again Console Trouble shooting 1 When the display of LCD is dim it means the batteries need to be changed 2 If there is no signal when you pedal please check if the cable is well connected NOTE 1 When training has stopped for 4 minutes the main screen will shut off 2 If the computer displays abnormally please re install the ba...

Page 17: ...ooth the console will not display feedback the console will restart after Bluetooth is disconnected from an affiliated APP 1 iConsole APP Connection Steps 1 1 Open the iConsole App and navigate to the home page From the Get Started tab press Quick Start or any other Training Mode 1 2 Select i Console to connect console Press the top right arrow key to enter the workout screen 1 3 Begin workout To ...

Page 18: ...nagement then press the symbol in the upper right corner to start adding new equipment 2 3 Choose the Bike graphic then select SENSORS from the list of affiliated brands 2 4 Select 8 levels exercise bike under Classic Tab 2 5 Select iConsole under Found Equipment tab 2 6 After connection is complete browse content and select a cycling video of your choice 2 7 Note users can join Kinomap for free b...

Page 19: ...rics 3 4 Zwift will ask to select a trainer Scroll down to the bottom and select Other Not Listed 3 5 Make sure SPEED SENSOR and CADENCE are both connected with green check marks 3 6 Start Zwift 3 7 Note users can join Zwift for free but with limited accessibility Disclaimer iConsole Kinomap and Zwift and not owned or operated by Dyaco Canada Inc and as such Dyaco is not responsible for applicatio...

Page 20: ... straps first pull the ends of the straps off the tabs on the pedals Adjust the straps to the desired position and then press the ends of the straps onto the tabs HOW TO LEVEL THE EXERCISE BIKE If the exercise bike rocks slightly on your floor during use turn one or both of the leveling knobs on the front stabilizer and adjust the leveling feet until the rocking motion is eliminated HOW TO MOVE TH...

Page 21: ...e secure check before each workout Check that pedals are tight pedals can work loose over time Check that stabilizer bolts are tight check before each workout Check that handlebar is secure if not tighten check before each workout Should a part become defective replace it immediately Do not allow use of the equipment until it has been repaired Cleaning Almost all surfaces are washable A damp cloth...

Page 22: ...customerservice dyaco ca Dyaco Canada Inc 2020 22 EXPLODED VIEW DIAGRAM ...

Page 23: ...andlebar post 1 18 0715018 Handlebar 1 19 0715019 Club knob 1 20 0715020 Flat washer 1 21 0715021 Grommet 4 22 0715022 Flat washer φ12 2 23 0715023 Allen screw M8 20 3 24 0715024 Spring washer φ8 3 25 0715025 Domed nut M10 2 26 0715026 Tablet rack 1 27 0715027 Allen screw M8 16 4 28 0715028 Flange nut M10 2 29 0715029 Crank end cap 2 30 0715030 Tension Brake knob 1 31 0715031 Nut M8 6 32 0715032 C...

Page 24: ...be for brake connection 1 65 0715065 Self tapping screw ST4 8 13 1 66 0715066 Fixed baffle 1 67 0715067 Fixed knob 1 68 0715068 Sleeve for brake 1 69 0715069 Corrugated sleeve 1 70 0715070 Magnetic holder 1 71 0715071 magnet 4 72 0715072 Allen screw M6 35 1 73 0715073 Allen screw M6 12 2 74 0715074 Air Pipe 1 75 0715075 Bolt M6 8 2 76 0715076 Small cover for flywheel 1 77 0715077 Spring washer φ5 ...

Page 25: ...display Batteries weak or dead Replace batteries No speed or distance displays on the monitor Wireless sensor battery weak or dead Replace the sensor battery Wireless sensor not paired Need to pair sensor with console Monitor not working properly Replace monitor Squealing Brake pad worn Replace the brake pad ...

Page 26: ...ange of motion about a joint Improving flexibility involves the stretching of muscles and tendons to maintain or increase suppleness and provides increased resistance to muscle injury or soreness Cardio Respiratory Endurance is the most essential component of physical fitness It is the efficient functioning of the heart and lungs AEROBIC FITNESS The largest amount of oxygen that you can use per mi...

Page 27: ...ould be gentle and preferably use the muscles to be involved later Stretching should be included in both your warm up and cool down and should be performed after 3 5 minutes of low intensity aerobic activity or callisthenic type exercise Warm Down or Cool Down This involves a gradual decrease in the intensity of the exercise session Following exercise a large supply of blood remains in the working...

Page 28: ...ble if you overdo it Let it happen naturally as you work through your program Remember the target is a guide not a rule a little above or below is just fine Two final comments 1 don t be concerned with day to day variations in your pulse rate being under pressure or not enough sleep can affect it 2 your pulse rate is a guide don t become a slave to it ENDURANCE CIRCUIT TRAINING Cardiovascular endu...

Page 29: ...xercising Clothes should be light enough to allow the body to cool Excessive clothing that causes you to perspire more than you normally would while exercising gives you no advantage The extra weight you lose is body fluid and will be replaced with the next glass of water you drink It is advisable to wear a pair of gym or running shoes or sneakers Breathing During Exercise Do not hold your breath ...

Page 30: ...ext rotate your head back for one count stretching your chin to the ceiling and letting your mouth open Rotate your head to the left for one count and finally drop your head to your chest for one count SHOULDER LIFTS Lift your right shoulder up toward your ear for one count Then lift your left shoulder up for one count as you lower your right shoulder SIDE STRETCHES Open your arms to the side and ...

Page 31: ...oes Reach down as far as you can and hold for 15 counts HAMSTRING STRETCHES Sit with your right leg extended Rest the sole of your left foot against your right inner thigh Stretch as far as possible Hold for 15 counts Relax and then repeat with left leg extended CALF ACHILLES STRETCH Lean against a wall with your left leg in front of the right and your arms forward Keep toward your toe your right ...

Page 32: ...s abuse misuse accident improper maintenance or acts of God 4 Products with original serial numbers that have been removed or altered 5 Products that have been sold transferred bartered or given to a third party 6 Products that do not have a warranty registration card on file at Dyaco Canada Inc Dyaco Canada Inc reserves the right to request proof of purchase if no warranty record exists for the p...

Page 33: ......

Reviews: