Xplore 3D PROTO Quick Start Manual Download Page 14

INSTALLING XPLORER 3D PROTO 

1.  Before  you  begin,  make  sure  your  computer  has  a  working  internet 
connection and that it’s connected to the mains or has enough charge left 
in its battery. 
 
2. Next, log on to www.Xplorer3D.com and download the most recent version 
of  XPLORER  ENGINE  &  XPLORER  3D  DRIVERS  for  your  particular  operating 
system or find one in the SD-card given. 
 
3.  After  XPLORER  ENGINE  &  Driver  has  finished  downloading,  go  to  the 
download folder and run  both  the installation  file one by  one or install from 
SD-card. 
 
4. Follow the installation instructions to the end, selecting the desired options. 
 
5. Run XPLORER ENGINE as administrator by right clicking on the shortcut on 
your Desktop or Applications menu and selecting “Run as Administrator”. 
 
6. After installing XPLORER ENGINE, follow the steps in the bed leveling wizard 
to  calibrate  your  XPLORER  3D  PROTO  using  the  “SETUP  &  INSTALLATION 
GUIDE”.  


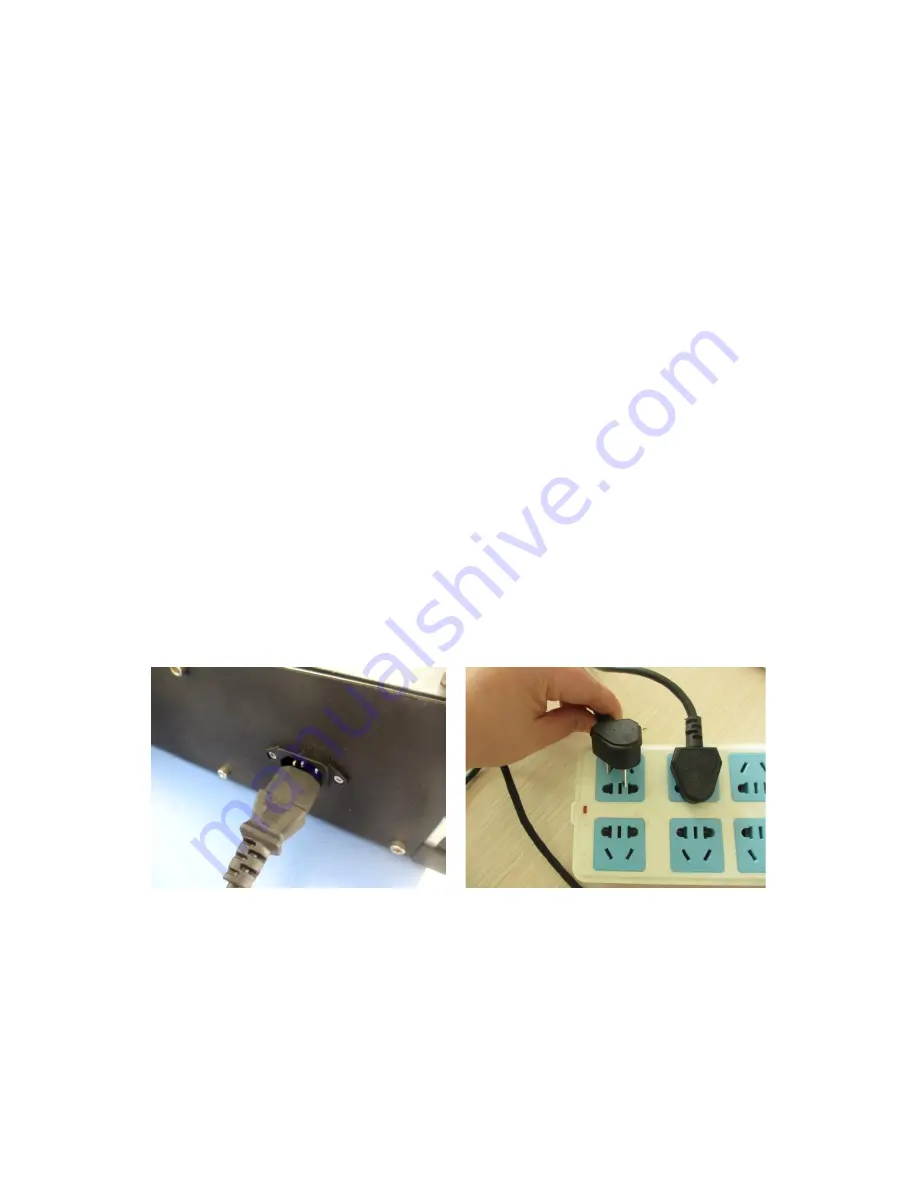
1. Make sure you’ve removed all the printer’s packaging material and check 
to see if the main switch is in the “OFF” position. 
 
2. Attach the power cable of adapter, connecting it first to the XPLORER 3D 
PROTO printer, and next, to the socket. 

Summary of Contents for 3D PROTO

Page 1: ...QUICK START GUIDE FOR USING XPLORER 3D PROTO...

Page 2: ......

Page 3: ...S This the Quick Start Guide for using your XPLORER 3D PROTO You can find updated versions of this guide on our website at WWW XPLORER3D COM where you can get in touch with Customer Service if you hav...

Page 4: ......

Page 5: ...INDEX 1 SAFETY INFORMATION 2 TECHNICAL SPECIFICATIONS 3 UNPACKING AND INSTALLING XPLORER 3D PROTO...

Page 6: ...lity is calibrating Xplorer 3D PROTO Proper calibration is essential to performance and to ensure the desired results Poor calibration may keep you from printing the object you wish to make High resol...

Page 7: ...1 SAFETY INFORMATON...

Page 8: ...XPLORER 3D PROTO has moving parts For that reason you should always keep a safe distance from the printer while it s operating 4 Filament XPLORER 3D PROTO has been developed and tested to function wi...

Page 9: ...2 TECHNICAL SPECIFICATIONS...

Page 10: ...bient temperature 15 30 C Storage temperature 0 30 C Humidity Low AC Input 200 240 VAC 2 0A 50 60 Hz Connectivity USB SD CARD Exterior Power Coated Aluminum Printing table Glass Acrylic Software name...

Page 11: ...3 UNPACKING AND INSTALLING XPLORER 3D PROTO...

Page 12: ...em as per instructions provided in the manual 4 Check to make sure the box contains the following items 1 Xplorer 3D PROTO Parts 4x 1 Printing Bed s Glass Acrylic 1 Tweezers 1 Allen key Set 1 Roll of...

Page 13: ...nt entry Extruder Motor Extruder nozzle Bed leveling screws Power ON OFF LED Display Control Menu Print Bed SD CARD mount USB Port Y Axis Motor X Axis Motor X Axis Limit Switch Y Axis Limit Switch Z A...

Page 14: ...nstallation file one by one or install from SD card 4 Follow the installation instructions to the end selecting the desired options 5 Run XPLORER ENGINE as administrator by right clicking on the short...

Page 15: ...ne in some cases 5 Place the spool inside the spool mount Take care to keep the filament wound tight because any looseness might cause kinks or knots to appear in the filament which makes printing imp...

Page 16: ...Import the 3D model you wish to print You can find a range of 3D models in the SD CARD online or you can create your own 3D model by using modeling software tutorials included 5 Make sure you ve foll...

Page 17: ...patula parallel to the table If none of these techniques work remove the tape Don t forget to replace the tape before printing again TROUBLESHOOTING We recommend you read our FAQ and Troubleshooting p...

Page 18: ...XPLORER 3D GLOBAL www Xplorer3D com All rights reserved...

Reviews: