PAGE3
PAGE4
{ II.Stylus }
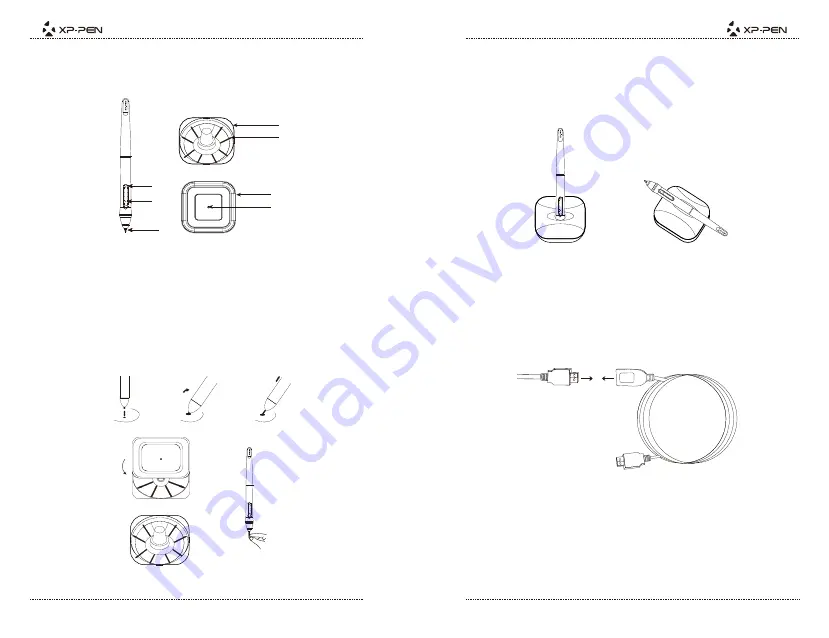
a.Stylus and accessories
Image 2-1: Stylus and Accessories
6. Pen stand bottom
1. Barrel button 2
4. Pen stand (Top)
5. Replacement pen tips
3. Pen tip
7. Pen clip hole
2. Barrel button 1
Notes:
(1). Barrel button functions can be customized in the tablet’s driver settings.
b.Pen tip replacement
Image 2-2: Pen Tip Replacement
3. Take a new pen tip from the inside of the pen stand.
4. Push the new pen tip straight into the stylus.
1. Turn the pen stand upside-down and insert the stylus tip into the hole in its center. Tilt the
stylus slightly so that the tip catches on the edge of the hole, then pull the stylus and pen
stand apart to remove the pen tip.
2. Twist the pen stand’s top half counter-clockwise to separate it from the bottom.
c.Pen Stand
Image 2-3: Pen Stand
{ III.Setting up the Artist 15.6 }
(1). Two USB cords are included with the Artist 15.6. The RED
USB code of the two comes in two
separate sections which must be connected before use.
(2). The RED USB cord can be plugged int to your computer or into a wall outlet. The other USB
Notes:
1.The RED USB cord plugs into extra USB cable.
Image 3-1: Connecting the extra USB cable
2. Plug the USB cord into the Artist 15.6.
3. Plug the Artist 15.6 HDMI and USB cords into your computer.
1
2
3
4
5
6
7
1
2
3
4


