XOVision X450NAV Operation Manual Download Page 17

03

17

32

Common Operations

05

DVD/VCD/MP4

Reset the Unit

Operating the unit for the first time or after 

replacing the car battery, you must reset 

the unit.

      Note: 

  *  

When  ome errors occur on the 

also press 

RES 


it will


s

display, you can 


button to resume to normal, 

and 

 erase the clock setting and some me-

      morized functions.

  *   This function can only be operated by the 

      main unit.

Release the front panel at first, and then

Press


RES


button in the panel w

object, (such as a ball

the unit to initial status.

ith 

a pointed 

point pen) 

to set 

9

   Press      

VOL+

 button to increase 

sou-

   nd level and press     

VOL- 

button to decr-

   ease 

sound level.

the 

the 

Volume Control

 *  Pressing      on the main unit also performs the 

     same function.

14

14

Note: 

7

Turning the Unit On/Off

Briefly press      

PWR


button to turn on the 

unit, press and hold to turn off.

1

  *   Pressing     /MOD button on the main unit also 

       performs the same function.

Note: 

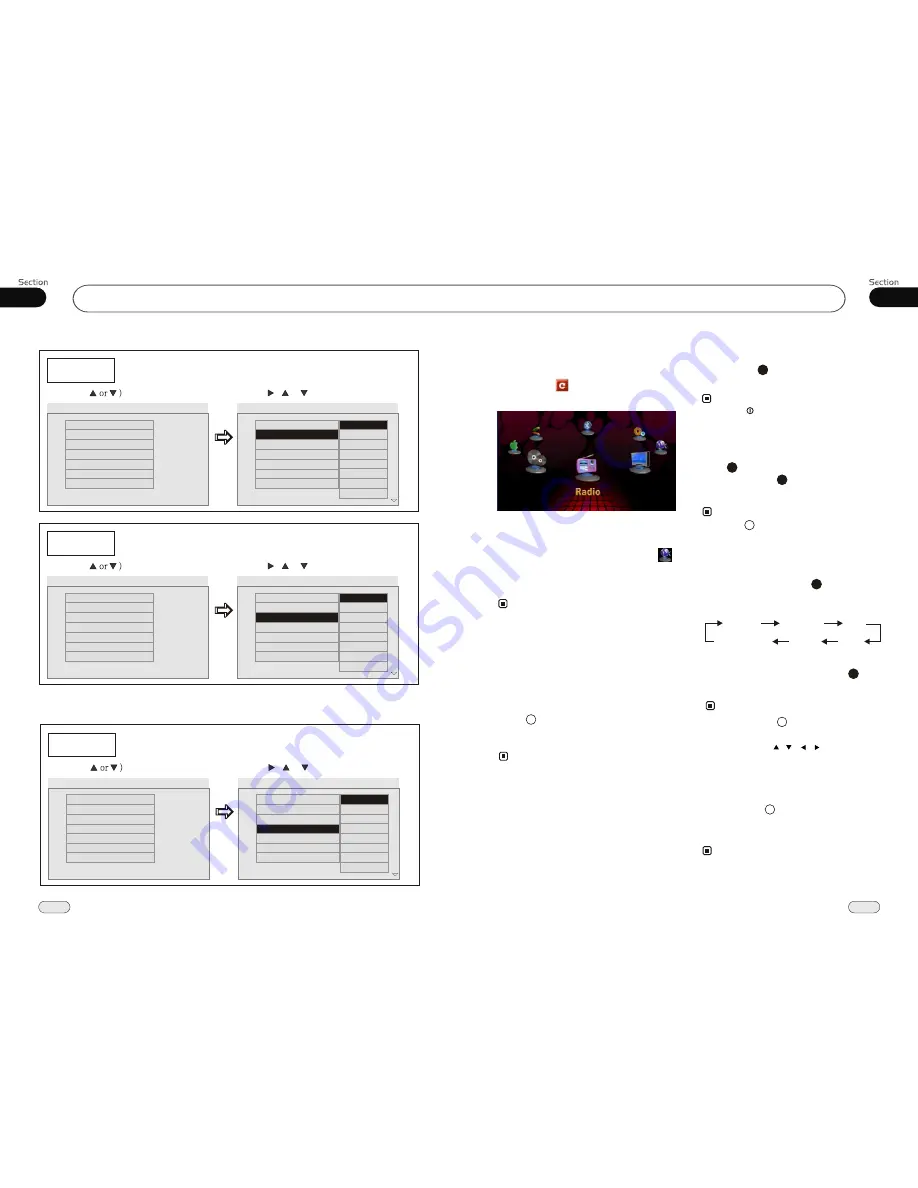
To Select Source by Menu 

In any mode(except for DVD, SD, USB 

mode), press         in the monitor, the 

following menu will appear:

You can skim through the items by gliding

horizontally 

If you want to 

, press NAVI        ; 

if it did not enter into, that means the unit 

does not include the function or the GPS

Card is not inside..

in the blank space of screen,

select your desired item to enter

navigate


*  If the font display is in gray, that means this 

      function is null.

Note:


Setting the Sound Characteristics


 press      

SEL

 button to 

select the 

mode in the following 

order:

Quickly and briefly 

desired 

*   Briefly pressing      


button on the 

unit

     also performs the same function.

main 

14


After selecting the desired mode, you

adjust the current level by pressing     

.

 can 

VOL


buttons

Note: 

7

14

*   Pr/- or     /    ,      /     on the screen 

     also adjust the current state.

TREBLE  

BALANCE

BASS  

VOLUME

FAD

SUBWOOFER

   Press and hold      ANG on the main unit to

   open the display before putting a disc inside. 

   Do it again to go back to the normal position.

Open the Display

*   This function is only performed by the main

     unit.

Note: 

16

Audio 

Example showing how to set Audio language:

(Press      ,      or     , then press ENTER)

(Press

--Preference Page--

Go  to  language  page

Set  the  audio  Language

TV Type

Audio 

Subtitles 

DVD Menu

Parental 

Change PSW 

Default 

Auto 

Eng 

Eng 

Eng 

--Preference Page--

TV Type

Audio 

Subtitles 

DVD Menu

Parental 

Change PSW 

Default 

Auto 

Eng 

Eng 

Eng 

Subtitles 

Example showing how to set subtitle language:

(Press      ,      or     , then press ENTER)

(Press

--Preference Page--

Go  to  language  page

Set  the  subtitles  Language

TV Type

Audio 

Subtitles 

DVD Menu

Parental 

Change PSW 

Default 

Auto 

Eng 

Eng 

Eng 

--Preference Page--

TV Type

Audio 

Subtitles 

DVD Menu

Parental 

Change PSW 

Default 

Auto 

Eng 

Eng 

Eng 

---Preferences page--

DVD Menu

Example showing how to set Disc Menu Language:

(Press      ,      or     , then press ENTER)

(Press

--Preference Page--

Go  to  language  page

Set  the DVD menu language

TV Type

Audio 

Subtitles 

DVD Menu

Parental 

Change PSW 

Default 

Auto 

Eng 

Eng 

Eng 

--Preference Page--

TV Type

Audio 

Subtitles 

DVD Menu

Parental 

Change PSW 

Default 

Auto 

Eng 

Eng 

Eng 

English 

French

Spanish

Chinese

Japanese

Korean

Russian

Others

English 

French

Spanish

Chinese

Japanese

Korean

Russian

Others

English 

French

Spanish

Chinese

Japanese

Korean

Russian

Others

.

Summary of Contents for X450NAV

Page 1: ...al inmost states There is a safety feature on this device which enables viewing videos only when Parked All other features may still be used while driving such as audio and Navigation but must be done...

Page 2: ...Picture Size 26 On Screen Display 26 Setting the Playback Time 26 Changing Audio Language 27 Changing the Subtitle Language 27 Changing the Viewing Angle 27 Selecting Channel 27 Program Playing 28 Pla...

Page 3: ...Phone 42 Simple Troubleshooting Guide 45 AUX Touch Screen Menu 39 00 3 Contents Slow Motion Play On Screen Display Program Playing Eject an SD Card Eject a USB 36 36 36 36 36 AUX 8 7 Tuner Listening t...

Page 4: ...o each other or to the vehicle body Make sure all the connections are comp letely correct before turning on your unit When replacing the fuse s the replace ment must be of the same amperage as shown o...

Page 5: ...ts edge to keep the disc clean and do not touch the surface Do not attempt to modify the unit modifying the unit may cause an accident Stop the vehicle before carrying out any operation that could int...

Page 6: ...s this button to go back to the select menu Current playing information Current file directory list box Selecting Tracks Fast Pressing in the monitor to perform the same function Note DuringIPODplayba...

Page 7: ...ay press to pause play Stop play press to stop play and press the PLAYto play the current track again 21 Note 17 18 30 Pressing on the unit or performs the same function 8 This function is only valid...

Page 8: ...nit or performs the same function To dial the number of the unit in the car only Pressing on the main unit or in the monitor also performs the same function PAIR 5 Pressing and on the unit or and perf...

Page 9: ...llow the pairing instructions for the first time use after that the unit will connect automatically Note To provide the best sound with minimal distorted sound the cellphone or network brings Full dup...

Page 10: ...r answer a phone During IPOD mode press it to go back to the previous mode During bluetooth mode press to hang up or refuse a phone During IPOD mode press it to back to the root catalog 08 BACK ROOT P...

Page 11: ...ore than 2 seconds while listening to a station on another number the station will be stored in that number button 1 2 3 Pressing in the monitor performs the same function Note 5 Scanning Memorizing S...

Page 12: ...n unit or in the monitor performs the same function During radio status repeatedly press BAND button to select bands in lowing order the fol Band Selector 3 For Two Bands 13 1 FM2 MW2 MW FM3 FM1 FM4 O...

Page 13: ...ode press PROG the TFT displays the program menu Press NUMBER BUTTONS to select the track Number and then press to move the cursor to START press ENTER to start program playing move the cursor to EXIT...

Page 14: ...Number Buttons 0 9 to select a track to play automatically 23 Pressing track region and the screen shows the number keys touch the number to select tracks Note Note Pressing button on the main unit or...

Page 15: ...tically Take away the rubber plug USB or SD card then insert USB or SD card which will be played automatically If there have be loaded a disc USB SD card press SOURCE to switch to play or back to play...

Page 16: ...e Audio Subtitles DVDMenu Parental ChangePSW Default Auto Eng Eng Eng PreferencePage TVType Audio Subtitles DVDMenu Parental ChangePSW Default Auto Eng Eng Eng Change PSW Example showing how to set pa...

Page 17: ...y and briefly desired Briefly pressing button on the unit also performs the same function main 14 After selecting the desired mode you adjust the current level by pressing can VOL buttons Note 7 14 Pr...

Page 18: ...ommon SD Card insert a common SD card into SD slot and the programs in the card will be played 6 Eject a Disc Press button to eject or insert a disc Note Pressing on the main unit also performs the sa...

Page 19: ...ET to go back to the default value on the screen Note Adjusting other options perform the same operation Pressing VOL VOL on the remote or press EN EN button on the main unit also performs the same fu...

Page 20: ...ress and or press the long strip to adjust the angle then press SAVE to save the setup press RESET to go back to the default value on the screen Note Do not use force to adjust the angle of display Ge...

Page 21: ...PBC Menu During VCD status first press TITLE PBC playback starts and the menu of the entire disc appears on the monitor and then you can select your favorite track by using Number Buttons When a trac...

Page 22: ...multi audio recordings The number in the mark on a DVD s package indicates the number of recorded languages audio systems 2 Note 6 Changing the subtitle language Multi subtitle With DVDs featuring mu...

Page 23: ...e playing time when the TFT dis play disc time track time repeat time disp Press to select the options press ENTER to set the status Then press NUMBER BUTTONS or to set the current status track 2 23 S...

Page 24: ...pause During stop mode press this button to resume playback mode Pause Playback 17 Note Pressing in the monitor or on the main unit performs the same function Stop the playback During DVD VCD playbac...

Reviews: